Order the 2018-2020 In Color Products Now!

handmade greeting cards created with the retiring 2018-2020 In Colors. Order them now!

Order the 2018-2020 In Color Products now! With all that’s been going on this Spring, I have almost completely forgotten that May is just around the corner. And for those of us who love crafting with Stampin’ Up! products, that means that it’s not long at all before we will have to say, “Goodbye,” to the bright and cheery 2018‑2020 Stampin’ Up! In Colors.

I remember in June of 2018 when I was so excited that we were finally going to have a group of bright colors. Those brights include three beautiful primary colors – Blueberry Bushel, Lovely Lipstick and Pineapple Punch. Those, along with two gorgeous secondary colors – Call Me Clover and Grapefruit Grove – helped me create vibrant projects throughout the next two years. Now, before I know it, the colors will be gone! I’ll miss them.

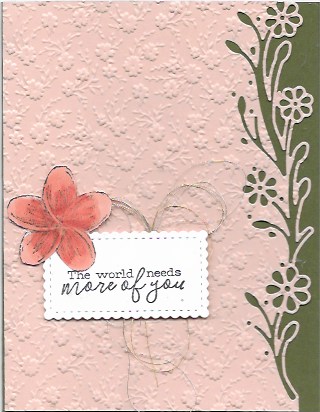
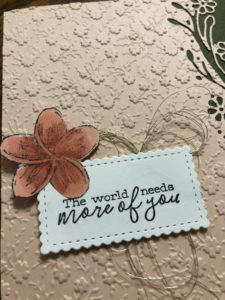
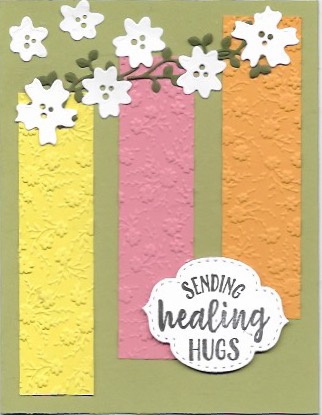
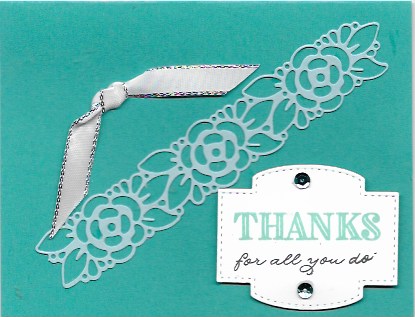
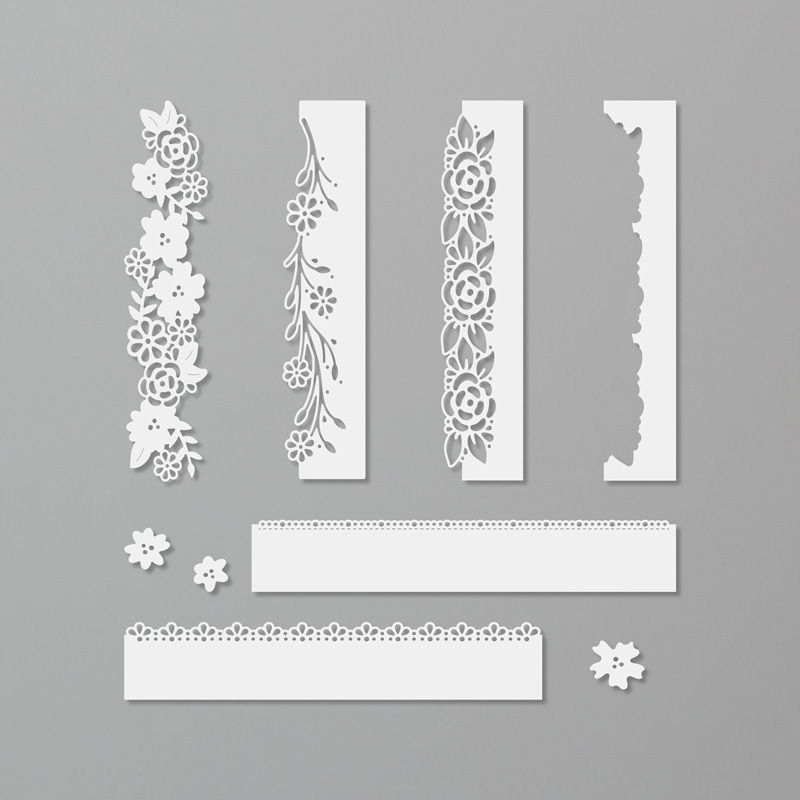
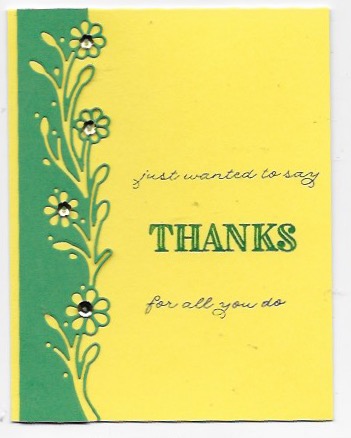
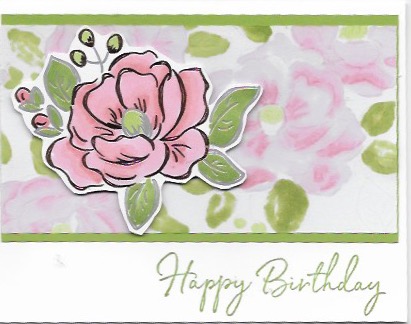
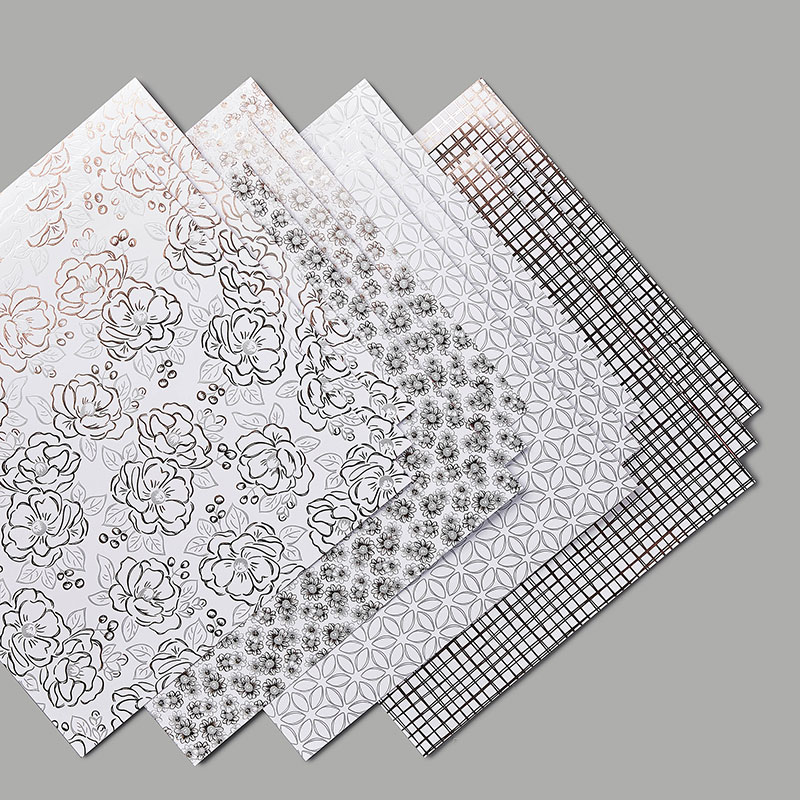
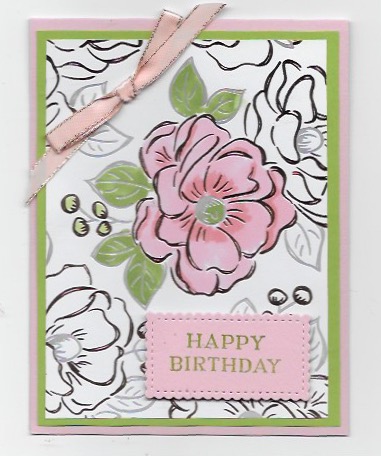
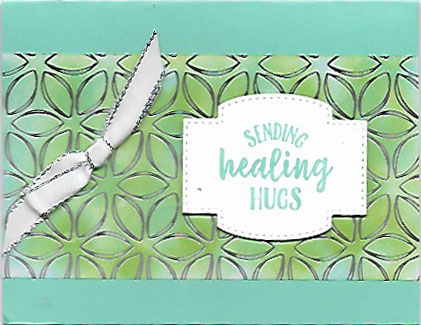
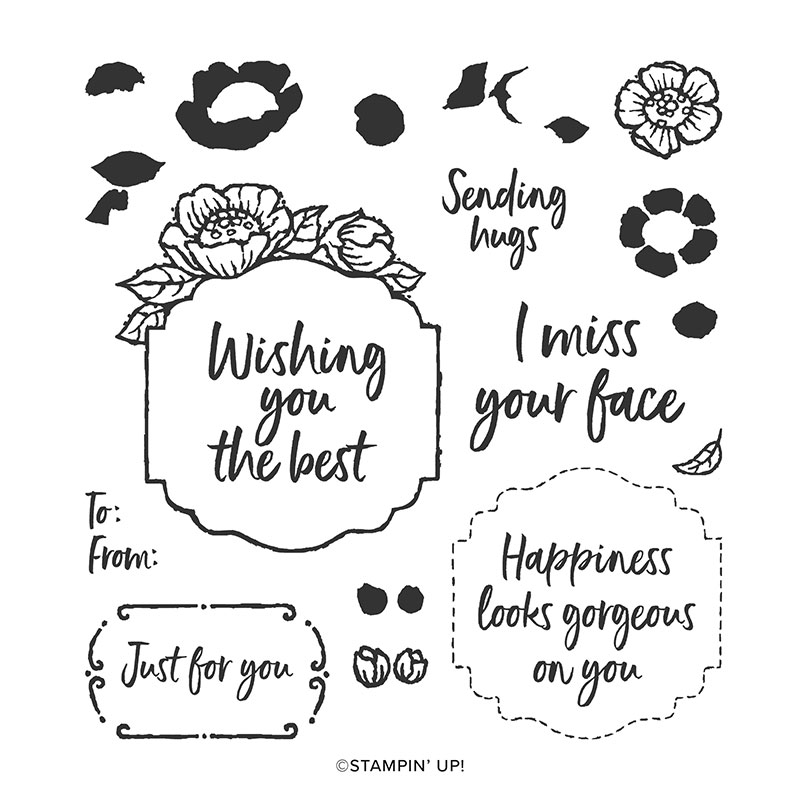
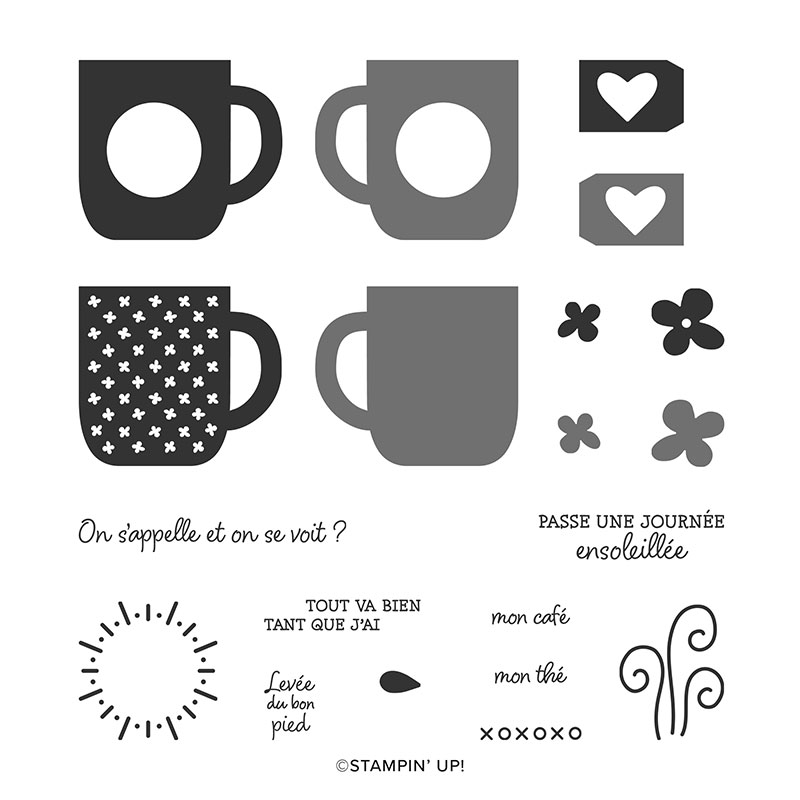
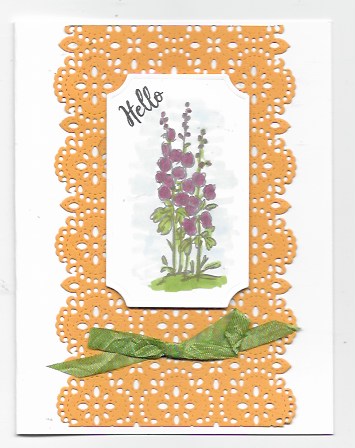
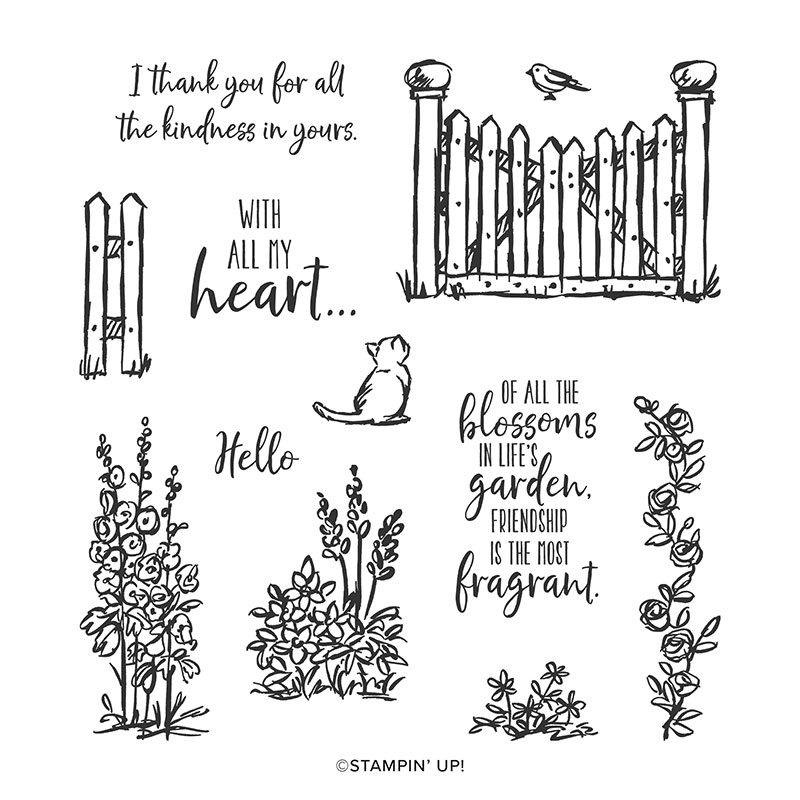
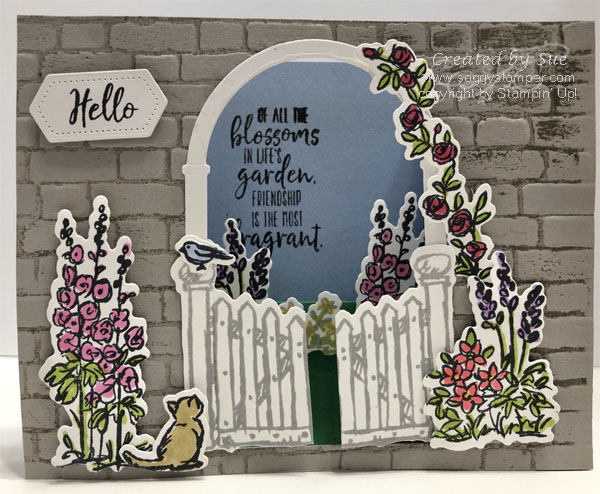
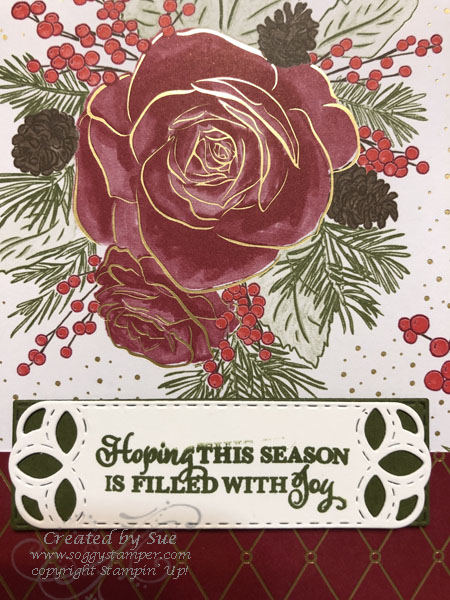
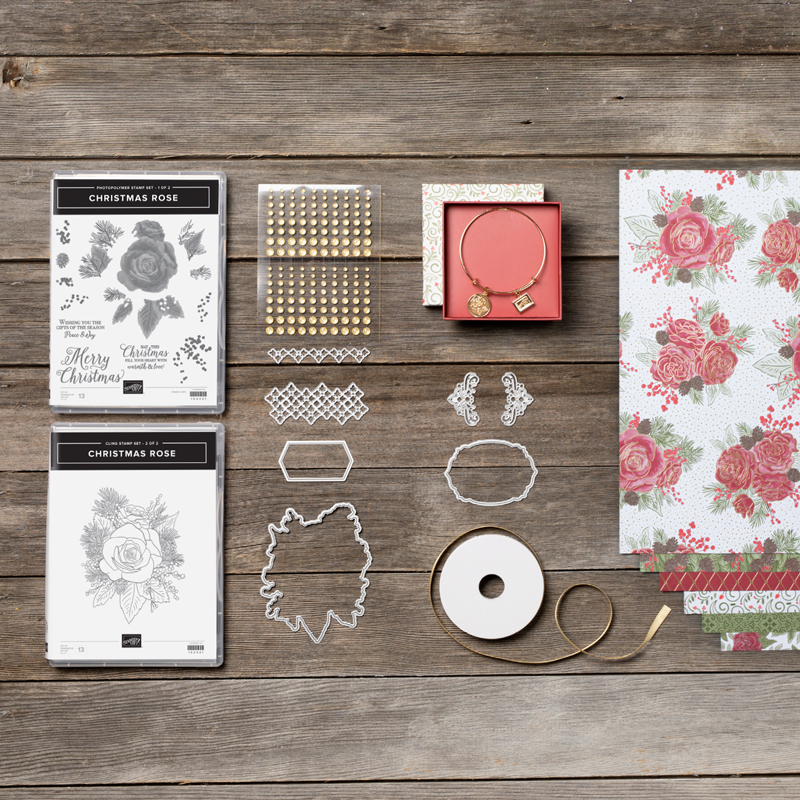
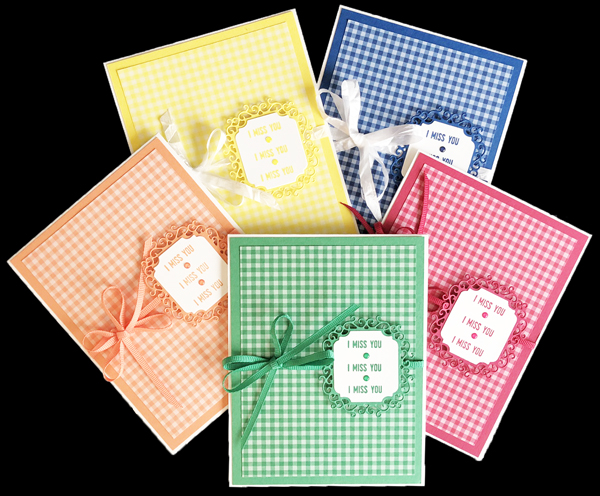
Sometimes I think of the In Colors – actually any Stampin’ Up! colors – in terms of paper and ink. But Stampin’ Up! does so much more with its colors. In this set of cards, I’ve used not only all five inks and cardstock in all five color. But I’ve also used the 6” square Designer Series Paper stack for the 2018‑2020 In Colors, and the matching 1/8” Grosgrain ribbons for Grapefruit Grove, Call Me Clover, and Lovely Lipstick. Oh, and then there’s a bit of embellishments on the stamped element – the beautiful Happiness Blooms Enamel Dots. While the colors aren’t all the same (the blue is Navy and the orange is Coral), they’re pretty close! I could have used the 2018‑2020 In Color Buttons, which are just as bright and cheerful as everything else related to this group of colors. But my cards started screaming, “Enough!”

Now here’s the thing: these are VERY popular colors, as you’d expect. But once Stampin’ Up! retires them as of June 3rd of this year, they’re most likely gone from the collection forever. That’s not 100% sure as Stampin’ Up! has brought some colors back after a couple of years in recent memory. But that’s rare. And what’s going to happen as the month of May progresses, is that a lot of products related to these In Colors are going to run out. So, if you’re interested in keeping these colors around for a while longer, now would be a good time to start stocking up.

Don’t wait. Order the 2018-2020 In Color Products now! Products that include the retiring In Colors and the Stampin’ Up! order numbers are listed below. You can also order the 2018-2020 In Colors in individual ink pads and cardstock packages. Just log in to my Stampin’ Up! online store (or call or e-mail me) to order any of them. The sooner the better – before they run out!

2018-2020 In Color Assortments:

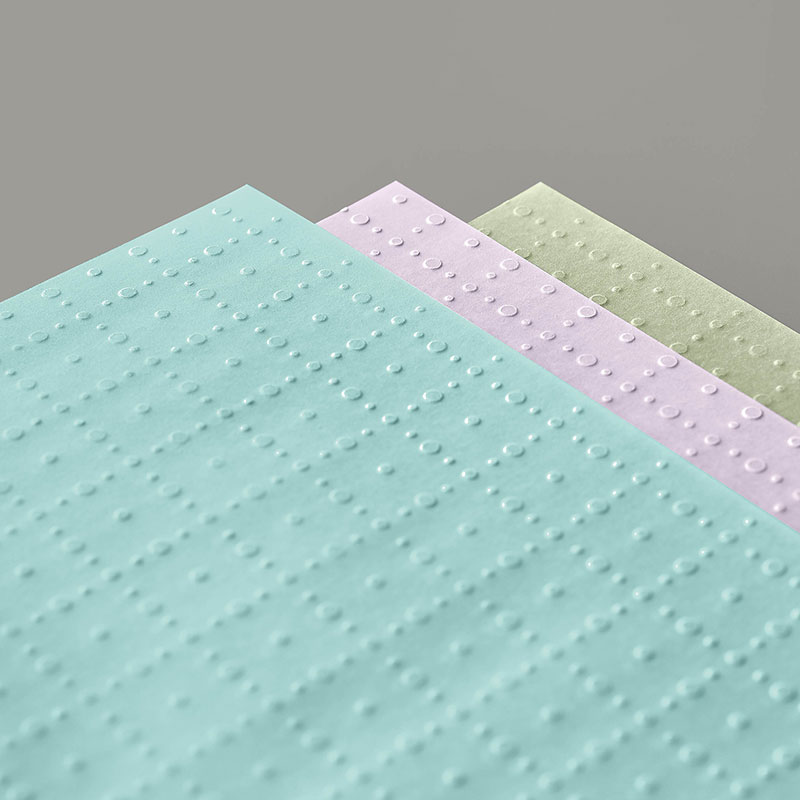
146973 8-1/2” x 11” Cardstock
146974            12” x 12” Cardstock
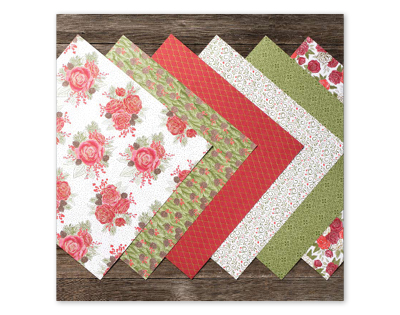
149618 6” x 6” Designer Series Paper
147153 Classic Stampin’ Pads
147159 Stampin’ Write Markers
149608 In Color Buttons
146932 (Retired but still in the Clearance Rack) In Color Binder Clips

Individual 2018-2020 In Color Items:

Ink Refills
147176            Blueberry Bushel
147178            Call Me Clover
147179            Lovely Lipstick
147180            Pineapple Punch
147181            Grapefruit Grove

1/8” Grosgrain Ribbon (3.2mm)
146950            Blueberry Bushel
146951            Call Me Clover
146952            Lovely Lipstick
146953            Pineapple Punch
146954            Grapefruit Grove

Another Ornate Floral Embossing Folder Idea

handmade card using Ornate Floral 3D Embossing Folder

Here is another Ornate Floral 3D Embossing Folder (152725) Idea. I shared my first card in this blog post. This time I also used one of the Ornate Border Dies (152724) along the right side of the card. This border die is so delicate that you really have to have it mounted on another piece of cardstock. In this case, I used Mossy Meadow cardstock for the card base. See the detail of the embossing folder in this close up photo.

To Make this Card:

  • Fold 8 1/2″ x 5 1/2″ piece of Mossy Meadow in half to form card base.
  • Die-cut right edge of 5 1/2″ x 4 1/4″ piece of Petal Pink cardstock with Ornate Border Die and die-cutting machine.
  • Use the Ornate Floral 3D Embossing Folder and the die-cutting/embossing machine to emboss the Petal Pink cardstock after the side is die-cut. To emboss first would cause the embossing to flatten when run through the machine to die-cut the edge.
  • Glue the Petal Pink layer to the card front with Multipurpose Liquid Glue or the Fine-Tip Glue Pen.
  • Stamp the greeting from Free as a Bird stamp set (149468) on Whisper White cardstock with memento ink and the plumeria flower from the Timeless Tropical stamp set (151497) on another scrap of Whisper White cardstock.
  • Die-cut the greeting with the next to the smallest Stitched So Sweetly Dies (151690) and the die-cutting machine.
  • Color the plumeria flower with the Calypso Coral Combo Stampin’ Blends (144045) and then either fussy-cut the flower out or use the corresponding die from the In the Tropics Dies (151495). Save 10% by purchasing the stamp set and dies together in the Timeless Tropical Bundle (153811). Then use a glue dot to attach it to the label.
  • Put some SNAIL adhesive on the back of the label and attach loops of gold and silver metallic thread to the SNAIL.
  • Use Stampin’ Dimensionals to adhere the label to the card front.

You can get the supplies needed to make this project by clicking on the items. They are linked to their location in my online store. When you place your order use the host code EQAYGMPG to receive a small thank you gift from me. Don’t use the host code if your order is $150 or more. With that amount you are your own host and will receive host benefits.

Ornate Floral 3D Embossing Folder

image shows handmade Get Well Card using the Ornate Floral 3D Embossing Folder

The Ornate Floral 3D Embossing Folder (152725) is one of the items in this month’s featured Ornate Style Suite that will be in the new 2020-2021 Annual catalog. This embossing folder embosses tiny flowers and leaves sprinkled across your cardstock. It makes a subtle texture as a background for a focal image or, as in this card, the Ornate Floral embossing of this folder can be the focus of the card. It is so pretty that I didn’t want to cover it up!

The tops of the Ornate Floral 3D embossed strips looked like they were missing something, so I embellished them with white flowers die-cut with dies from the Ornate Borders Dies (152724) that are also a part of the Ornate Style Suite. I shared a card I created with these border dies here. I added leafy vines die-cut from Mossy Meadow cardstock with dies from the Garden Gateway Dies (151512).

The greeting is from the So Sentimental stamp set (151691) and was die-cut with a Stitched So Sweetly Dies (151690). You can order the stamp set and the corresponding dies as the So Sentimental Bundle (153828) and save 10%.

Directions for Card

  • Fold 8 1/2″ x 5 1/2″ piece of Pear Pizzazz in half to form card base
  • Cut 4″ x 1 1/4″ strip of Pineapple Punch, Mango Melody, and Flirty Flamingo cardstock
  • Place these strips in Ornate Floral 3D Embossing Folder and run through die-cutting machine
  • Adhere to card front as shown with favorite adhesive
  • Die-cut one each of the leafy vine dies from the Garden Gate Dies from Mossy Meadow cardstock. Glue them to the top of the embossed strips.
  • Die-cut from Whisper White cardstock two large flowers, three medium flowers, and two small flowers from the Ornate Border dies. glue them over the vines.
  • Stamp the sentiment on Whisper White cardstock with Memento ink and die-cut with one of the Stitched So Sweetly dies. Adhere it to the card front with Stampin’ Dimensionals.

Come back on Wednesday to see more ideas for using the Ornate Floral 3D Embossing Folder. For more inspiration like my Soggy Stamper Facebook page and subscribe to my mailing list. The subscription form is in the upper right corner of my blog.

Beautiful Ornate Thanks Bundle

photo shows all the pieces of the Ornate Thanks Bundle

Today I am sharing two Thank You cards created with the Ornate Thanks Bundle (154115). This bundle is part of the Ornate Garden Suite (154153) which is in the upcoming 2020=2021 Annual Catalog. If you are an avid stamper like me, you will love this chance to buy the suite now instead of having to wait until June. Click here to see the whole Ornate Garden Suite.

photo is of a handmade Thank You card created with the Ornate Thanks Bundle

This is the first card I created when I started playing with the Ornate Thanks Bundle. I was immediately drawn to the Ornate Border Dies shown here.

photo shows the Ornate Border Dies

I love this new Ornate Thanks stamp set(149471) because it’s a photopolymer set, I love the script font of the various sayings you can add to the big, bold thanks stamps. For this card I chose to add ‘for all you do’ to the ‘Thanks’. These cards are going to a couple friends who are highly stressed nurses right now.

To Make This Card:

  • Fold Bermuda Bay cardstock 8 1/2″ x 5 1/2″ in half for card base
  • Die-cut Pool Party cardstock 5 1/2″ x 1 1/2″ with the two dies in the upper right corner and adhere diagonally across the card front with Multipurpose Liquid Glue
  • Stamp greeting from Ornate Thanks stamp set on Whisper White with Bermuda Bay ink and die-cut with die from Stitched So Sweetly Dies (151690) and applied to card front with stampin’ dimensionals
  • Tie an overhand knot in Silver metallic edged ribbon and affixed to card front with mini glue dot.
handmade Thank You card created with product from the Ornate Garden Suite

This is the second Thank You card I created with the new Ornate Thanks Bundle.

To Make This Card:

  • Fold Pineapple Punch cardstock 8 1/2″ x 5 1/2″ in half for card base
  • Die-cut Call Me Clover cardstock 5 1/2″ x 1 1/4″ with Ornate Border die and adhered to card front
  • Stamp greetings from Ornate Thanks stamp set on card base with Call Me Clover ink
  • Add four sequins to flower centers with Multipurpose Liquid Glue

Now go order this new Ornate Thanks Bundle and begin creating gorgeous but easy cards with it. Share a photo of your card with me and I’ll share it here on my blog.

Flowering Foils Specialty DSP Card

Handmade Birthday card using Flowering Foils SpecialtyDesigner Series Paper

Here is a Flowering Foils Specialty DSP card. This specialty designer series paper has both rose gold foil and silver foil embossing. It is my favorite of all the Sale-A-Bration free products. I love coloring the paper with Stampin’ Blends with stunning resluts. The paper is only one-sided and a little lighter in weight than Stampin’ Up!’s regular designer series paper but that is fine with me as the Stampin’ Blends soak through more leaving a soft water-colored effect on the reverse side. That is what I used as the background for the beautiful flower I colored and fussy-cut for the card It comes in a package of four different designs, three 12 x 12″ sheets each. Check out the patterns below.

index of Flowering Foils Specialty Designer Series Paper

To make this card use the following supplies:

  • Whisper White Cardstock, 8 1/2″ x 5 1/2″, scored and folded at 4 1/4″ for card base
  • Granny Apple Green Cardstock, 5 1/4″ x 3″
  • Flowering Foils Specialty Designer Series Paper – large floral design 5 1/4″ x 2 3/4″, scrap with one complete large flower
  • Combo Flirty Flamingo Stampin’ Blend Markers
  • Combo Granny Apple Green Stampin’ Blend Markers
  • Granny Apple Green Classic Stampin’ Pad
  • Happy Birthday To You Stamp Set – a free Sale-A-Bration item with a $50 purchase
  • SNAIL Adhesive
  • Stampin’ Dimensionals

I colored the larger piece of Flowering Foils Specialty Designer Series Paper and the scrap with the stampin’ blends and fussy cut the single flower. The Granny Apple Green cardstock was adhered to the card front. Then the larger piece of the dsp was turned over and adhered to the card front. The single flower was popped up with Stampin’ Dimensionals. Finally the Happy Birthday was stamped in the bottom right corner with Granny Apple Green ink.

Here is another Flowering Foils Specialty DSP card I created and you can see two others I shared here.

Birthday card featuring Flowering Foils Specialty Designer Series Paper.

If you don’t already have this gorgeous Flowering Foils Specialty Designer Series Paper go order it here and then share with me what you create by email. I’ll feature it on a blog post.

Subscribe to Paper Pumpkin by March 10th!

image has picture of the March 2020 Paper Pumpkin kit, Subscribe to Paper Pumpkin by March 10 to receive this kit.

Subscribe to Paper Pumpkin by March 10th to receive this special Paper Pumpkin kit. This month Paper Pumpkin turns 7 and Stampin’ Up! is celebrating by including an extra stamp set in the kit. Yes, there have been seven years of crafters have been receiving a monthly paper-crafting kit in the mail. Each month includes everything except scissors needed to create cute projects.

January’s Paper Pumpkin kit included everything to make 10 3″ x 3″ Valentine cards with envelopes and 20 paper treat bags for Valentine candy. The kit enabled me to quickly make enough Valentine things to send something to each of our 10 grandchildren and 10 of our great-grandchildren.

There are a couple of ways to subscribe.
1. You can go to www.paperp

umpkin.com and subscribe on a month-to-month basis. If you do please designate me as your demonstrator. Each month is $22.
2. You can purchase a 3 month prepaid subscription (137859) for $63. This is a small savings for you but most importantly this month you get to choose a free $50 item from the Sale-A-Bration brochure with your 3 month prepaid subscription.
3. You can purchase a 6 month prepaid subscription (137860) for $114 and during Sale-A-Bration you can choose a $100 Sale-A-Bration item or 2 $50 items.
4. Purchase a 12 month subscription (137861) for $220 and choose 2 $100 items, one $100 item and 2 $50 items, or 4 $50 items.

Subscribe to Paper Pumpkin by March 10th to get the wonderful March kit. Check it out!

Don’t forget…subscribe by March 10th!

Five New Sale-A-Bration Gifts Added!

Today Stampin’ Up! added five new Sale-A-Bration gifts to your choices when you order from me during Sale-A-Bration. This is the last month of Sale-A-Bration, the time you can choose free items when you purchase $50 or more excluding shipping and tax. Check out the great new items below!

With each $50 purchase:

New Sale-A-Bration Gift Flowering Foils Specialty Designer Series Paper

This Flowering Foils Specialty Designer Series Paper (152312) has rose gold and silver foil embossing. It comes in 12″ x 12″ size with 3 sheets each of four designs. It is beautiful by itself but really stunning when color is added like I did in these two cards.

A second New Sale-a-Bration Gift is this great masculine stamp set (152300). It will be great for making all sorts of masculine cards.

image is of the Well Dressed stamp set

The third New Sale-A-Bration Gift that you can choose with a $50 purchase is the So Very Vellum Specialty Designer Series Paper. This vellum is embossed with a dotted pattern. These 12″ x 12″ sheets come with 3 each of 3 colors.

With a $100 purchase:

The fourth New-Sale-A-Bration Gift is the Tags In Bloom stamp set (152292). This stamp set coordinates with the Label Me Fancy Punch (151297) and the Label Me Lovely Punch (151296) found on page 41 in the spring mini catalog.

photo shows index for Tags in Bloom stamp set, the fourth New Sale-A-Bration Gift

The fifth New Sale-A-Bration Gift is the Rise & Shine stamp set (152303). This set coordinates with the Cup of Cheer Dies (151150).

Rise & Shine stamp set, the fifth New Sale-A-Bration Gift

Now that you have seen the fFive New Sale-A-Bration Gifts, go shopping! Click on the inks to find these items in my online store or contact me to place your order. These items are on an ‘as quantities last’ basis. Some of the earlier SAB items have sold out so go shopping now. There is only this month left of Sale-A-Bration!

Grace’s Garden Handmade Card

Photo shares Grace's Garden Handmade card created with Grace's Garden stamp set and Stitched Lace die

I love this Grace’s Garden Handmade card! Grace’s Garden stamp set (151513) is the first set to catch my eye in the new spring mini catalog. I love flowers in my garden and this set has flowers galore and a lovely garden gate. Check out the stamp set.

photo shows index of Grace's Garden stamp set

What is even better is that it comes bundled with Garden Gateway Dies (151512), Grace’s Garden Bundle (153789) for a 10% discount! Having the coordinating dies eliminates fussy cutting the flowers and gate. Note: the arched gate die is larger than the stamped gate. I have made it work by die-cutting the gate and the arch separately, cutting the gate in half and cutting the gate off the arch as shown in my second card.

photo shows picture of the Garden Gateway dies

To make Grace’s Garden Card I first folded a 8 1/2″ x 5 1/2″ piece of Whisper White cardstock to make the card base. Then I cut a 5 1/2″ x 4 1/4″ piece of Crushed Curry cardstock with the Stitched Lace dies (149625) and a die-cutting machine. I used the single edge die to make the scallops along the sides. I stamped the image with Gray Granite ink on Whisper White cardstock and colored the flowers with Light Lovely Lipstick and Light Granny Apple blends. I shaded the background with the Light Sea Side Spray blend. Then I cut the image out with one of the Painted Labels dies and mounted all this on the card front.

Now the ribbon I used on this Grace’s Garden Handmade card is tricky. I wanted a Granny Apple Green ribbon but the one in the catalog was wider than I wanted. So I took the Dark Granny Apple Green Stampin’ Blend and colored the Whisper White 1/4″ Crinkled Seam Binding Ribbon (151326). I love the softness and width of this ribbon and the fact that you can color it any color you wish with our Stampin’ Blends. You’d better stock up on this ribbon that will only be available in the spring mini catalog!

Diorama card created with Grace's Garden Bundle

I also created this beautiful diorama card using the Grace’s Garden Bundle. If you would like a picture tutorial of this card, contact me and I’ll be happy to send you one. The cost of the tutorial is $5.

Happy New Year – 2020! May It Be The Best Yet!

Photo says Happy 2020!

Happy New Year – 2020! It is hard to believe that it is actually 2020. When a kindergarten class was labelled as the class of 2020, it seemed like a very long time in the distance. Now 2020 is here! There is something about starting a new decade that is intimidating and yet exhilarating. A fresh page has begun. It is up to us to make it the best decade possible. My prayers for this new decade are that our society can become united in our common desires and respectful and generous with each other in our differences. So Happy New Year, Happy 2020!

Have you made New Year’s resolutions yet? Have you broken any of your resolutions yet? I have unfortunately. I have resolved to kick the sugar and carb addiction and eat a Keto lifestyle. Unfortunately, the leftover Christmas candy called my name insistently and by noon I had succumbed to that siren call. But…tomorrow is a new day and I can start again.

With my stamping business I resolve to keep in better touch with you all through my blog and social media. I really want to get to know you better, to know your likes, desires, and hopes. I’ll continue to share my creativity with you but hope to be able to include you in that creativity through online classes, classes by mail, and Facebook live presentations.

With the new year, we also have the beginning of Sale-A-Bration and a new Handmade for You mini catalog. These start on Jan 3. This means that today is the last day to purchase many of the supplies in the Holiday catalog. In particular, the bundles will no longer be available. Stampin’ Up! is trying a new strategy. Some of the items from the Holiday Catalog will be in the 2020-2021 Annual Catalog and can still be purchased before that catalog is live. Some other items from this year’s Holiday Catalog will be in the 2020 Holiday catalog but won’t be available until that catalog is live. The safest thing to do is not wait! If there are some items that you want from the 2019 Holiday catalog, especially the bundles, order them today! Visit my online store. The host code for January is P6KRKYMC. Please use it when you place your order to receive a small gift from me. You can also email me your order and pay through PayPal if that is more convenient for you.

Free Shipping One Day Only!

Photo shows Free Shipping One Day Only

Wow! Free Shipping One Day Only tomorrow, December 11! It’s time to finish up your wish list from the Holiday catalog and prepare for the new Spring mini catalog. This sale begins tonight at 12:01 mountain time and runs through 11:59 pm MT. You can either email me your order or order online through my online store.

Another reason to take advantage of the Free Shipping One Day Only is that the bundles in the Holiday catalog and much of the other products will retire on January 2. Check out the retiring products and order them tomorrow. You need to especially check out the bundles. Even if the stamp set and dies or punches carry forward into the next catalog, they won’t be bundled together at a 10% discount. Check out the clickable images of the bundles below and then order the ones you don’t yet have.

/

Year-End Papercrafting Closeout!

Image is  about Stampin' Up!'s year-end papercrafting closeout

The Year-end Papercrafting Closeout has begun. The retirement list is up and some items are even on discount.

Here are some things you need to know: about the Year-end Papercrafting closeout.

* Many items from the Holiday Catalog are being carried forward to the 2020-2021 Annual Catalog. They just won’t be bundled together. If you want the discount, buy the bundle now!
* Other product from the Holiday Catalog will not be available to order after January 2, 2020 until they appear in the 2020 Holiday catalog. Yes, some of the supplies will appear again next fall.
* As always, retiring items are on an “as long as inventory lasts” so order NOW! Things will sell out fast. Click on the image above to go to my online store. Use the host code AZFJF474 and receive a gift from me.

Easy-Peasy Christmastime Is Here Card

Christmas Card created with Christmastime Is Here Specialty Designer Series Paper

This easy-peasy Christmastime Is Here card was created in no time. When you use the beautiful Christmastime Is Here Specialty Designer Series paper (152154), the paper is the star of the card! Notice the gold embossed splatters and edges of the rose on this designer series paper. I love, love, love it!

Close up of the Christmastime Is Here Specialty Designer Series Paper showing the gold embossing

The card base is an 11″ x 4 1/4″ piece of Mossy Meadow cardstock which I scored and folded at 5 1/2″. I trimmed down a piece of the large rose print to 4″ x 4″ and added a 4″ x 1″ piece of the gold-embossed Cherry Cobbler design at the bottom. Since the dsp is so beautiful, all this card needed was a greeting.

Close up of the greeting part of Easy-peasy Christmastime Is Here Card

The greeting comes from the Bells Are Ringing stamp set (150476) I stamped it onto Whisper White cardstock with Mossy Meadow ink. Then I cut it out with one of the Stitched Labels Framelits dies (146828). I backed the label with a piece of Mossy Meadow cardstock to show off the pretty ends of the label.

Check out all the products that are part of the beautiful Christmastime Is Here Suite in my online store. These products are only available during November and are on an ‘as long as quantity lasts’ basis. You must order early, like today to be sure you will get the supplies needed to make this Easy-Peasy Christmastime Is Here card for yourself. I will be sharing more projects using this suite so come visit my blog often.

Introducing The Beautiful Christmastime Suite!

photo shows all the product in the Christmastime Is Here Suite

This Thursday the beautiful Christmastime Is Here Suite (153947) of products will be available to order. This suite has a beautiful Christmas rose stamp set (152431) and coordinating Roses Dies (152144). Buy them in a bundle (153944) for 10% off.

images in the Christmastime Is Here stamp set

The suite includes the gorgeous Christmastime Is Here Specialty Designer Series Paper (152154). One side of the paper is gold embossed.

Christmastime Is Here Specialty Designer Series Paper

Finish off your projects with the beautiful gold shimmer ribbon and gold glitter enamel dots. The best part of this suite for me is this beautiful gold rose bracelet (152159) I am enjoying wearing on my wrist.

the beautiful gold rose bracelet that is part of the Christmastime Is Here Suite

The thing is that this beautiful Christmastime Is Here Suite is only available Nov 1 – 30 and as long as supplies last. So hop on over to my online store this coming Thursday to order before quantities run out. You really will love everything in this suite.

12 Weeks of Christmas Gift – Subscribe Now!

photo shows a banner saying 12 Weeks of Christmas

Yes, you have missed four weeks of my 12 Weeks of Christmas gift to my mailing list subscribers. In the last four weeks I have shared exclusive Christmas card tutorials with those on my mailing list.

But it isn’t too late! You can still receive the next 8 weeks of my 12 Weeks of Christmas Gift by subscribing before 1 pm Pacific time tomorrow. Just fill out the box to the right of this post and click subscribe. You will be glad you did!

Not only will you receive the next 8 exclusive tutorials as a subscriber to my mailing list, you will receive a monthly newsletter with a couple of tutorials and information to assist your creativity, and shorter weekly emails with helpful hints and a project tutorial. Remember to subscribe by 1 pm tomorrow!

Frosted Frames Birthday – Feel Free to CASE

Birthday card created with Frosted Frames dies and Beautiful Friendship Stamp Set

This Frosted Frames Birthday card was a cinch to make and you can make it too. I started with a Smoky Slate card base, 8 1/2″ x 5 1/2″ folded in half. Add a 5 1/4″ x 4″ layer of Feels Like Frost 6×6″ Specialty Designer Series paper using SNAIL adhesive.

The next step for making this card is to cut a piece of Purple Posy cardstock with the beautiful large Frosted Frames die and a die-cutting machine. Adhere this to the card front using Multipurpose Liquid Glue.

Finally, stamp the greeting from the Beautiful Friendship stamp set on Whisper White cardstock with Rich Razzleberry ink. Cut it out with the smaller frame die and mount it on the card front with Stampin’ Dimensionals.

Tadaa! Your beautiful Frosted Frames Birthday card is finished. Write a birthday wish on the inside. Be sure to put your signature on the back like artists do because you really are an artist. Now put someone’s name and address on an envelope and mail it off.