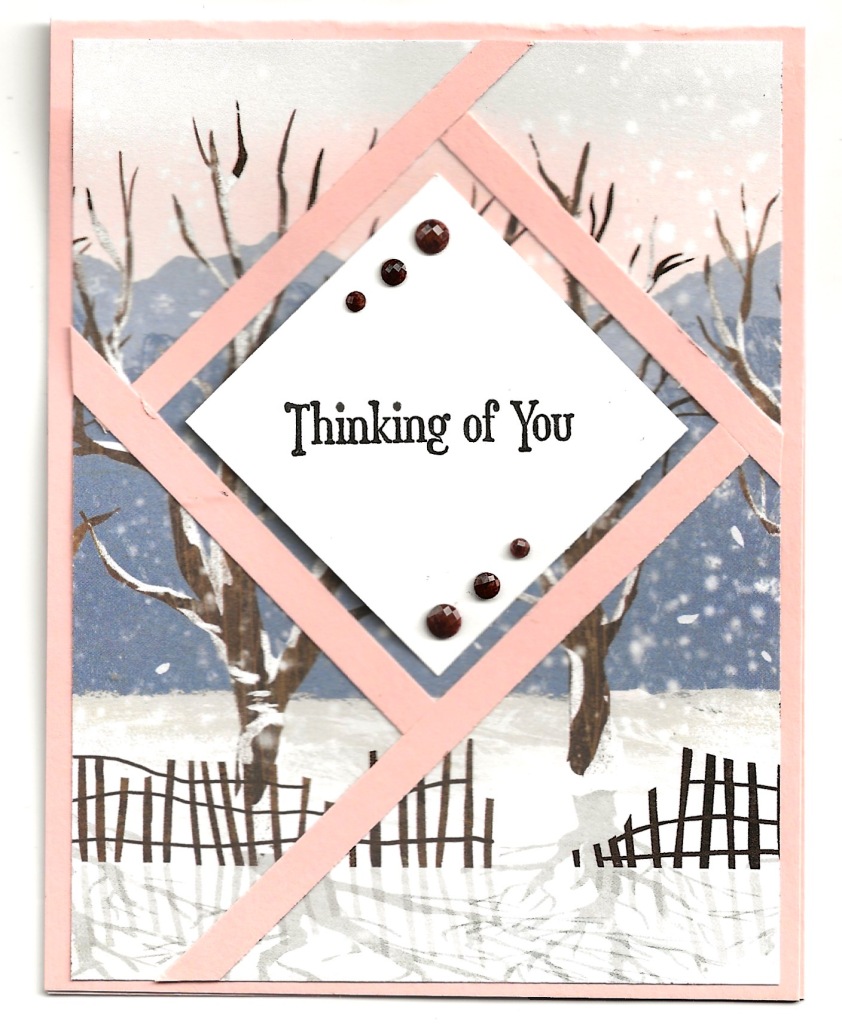
Beautiful Easy Fractured Card Technique

beautiful handmade greeting card using the easy Fractured Card technique and One Horse Open Sleigh Designer Series Paper

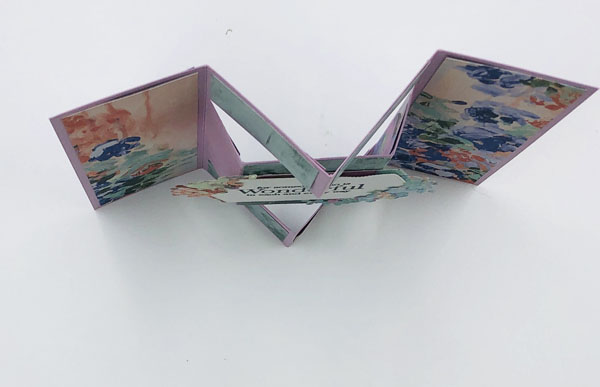
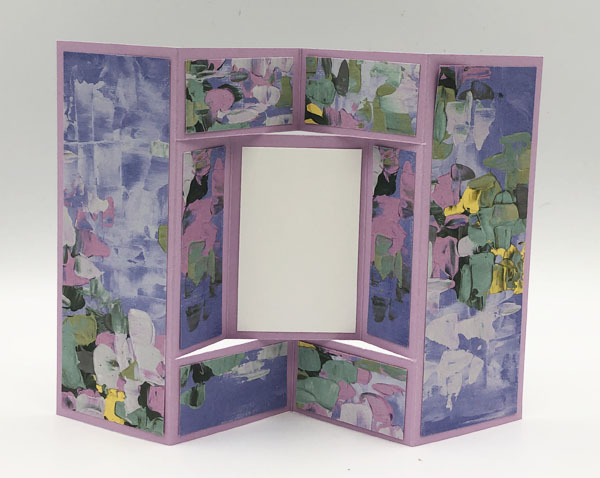
I created this card using the beautiful easy Fractured Card Technique. It is also called the Faux Shutter Technique and in a camera shutter. While it looks very complicated because it looks like the designer series paper has been cut into pieces and then adhered, it is really quite easy. Other Fractured Card techniques call for die-cutting the diamond out of the top and second layer, putting a piece of cardstock behind the opening, and then applying the strips of cardstock on top along the opening of the top layer.

In my technique, I put down a temporary 2 1/4″ mask in the center of the card and apply the strips around the mask. Then I remove it and add the top 2″ square that has been stamped with an image or greeting.

Supplies Used for this beautiful easy Fractured Card Technique

  • Quiet Meadow Stamp Set for greeting
  • Petal Pink Cardstock – 11″ x 4 1/4″ scored and folded at 5 1/2″ for card base. Four 1/4″ strips about 5″ long. For ease of adhering, apply Adhesive sheet material to back of cardstock before cutting the strips.
  • Basic White Cardstock – one piece 2 1/4″ square for a mask and one piece 2″ square
  • One Horse Open Sleigh Designer Series Paper – 5 1/4″ x 4″
  • Early Espresso Classic Stampin’ Pad
  • Natural Tones Stampin’ Blends Deep -dark to color gem
  • Adhesive-backed Solid Gems
  • Adhesive Sheet
  • Other adhesives of choice
  • Paper Trimmer
  • Paper Snips Scissors
  • Click here to find these items in a shopping cart in my online store for your convenience. You can delete any items you already have.

Once you have your needed supplies gathered, stamp along with me while watching my Facebook Live replay.

Thanks for joining me today. grab a cup of coffee or tea and take some time to look around my blog. I have lots of interesting projects. Please also leave a comment so I know you have been here.

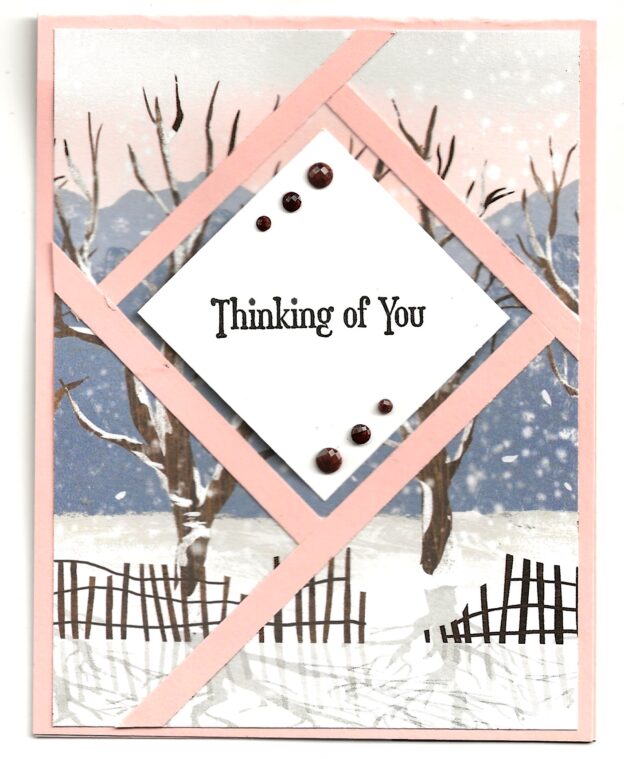
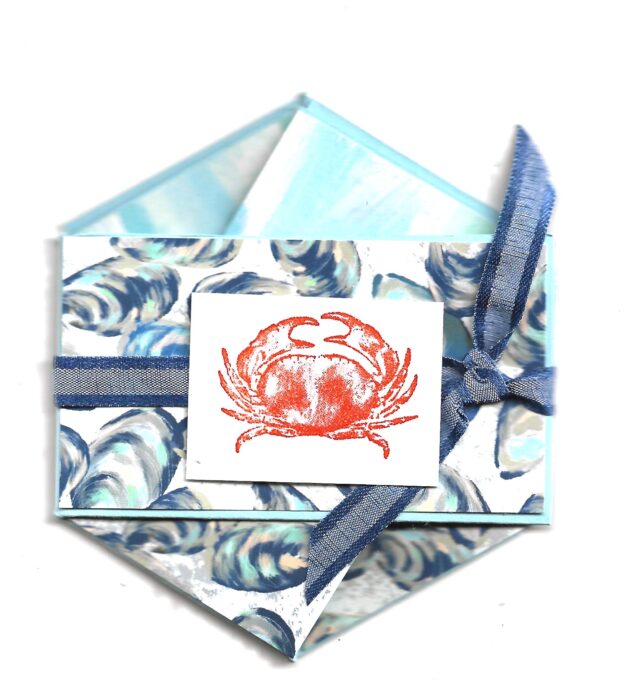
Beautiful Hexagon Fancy Fold Card

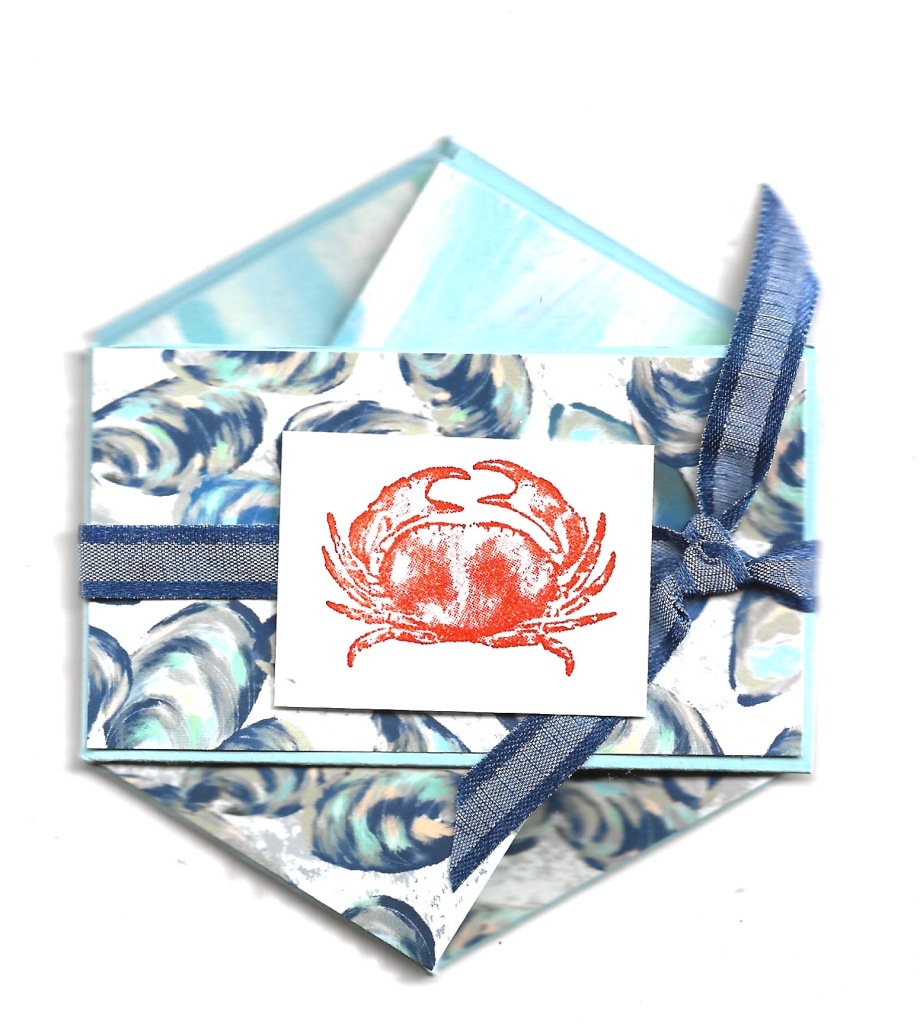
a BeautifulHexa gon Fancy Fold card created with the By the Bay Specialty Paper

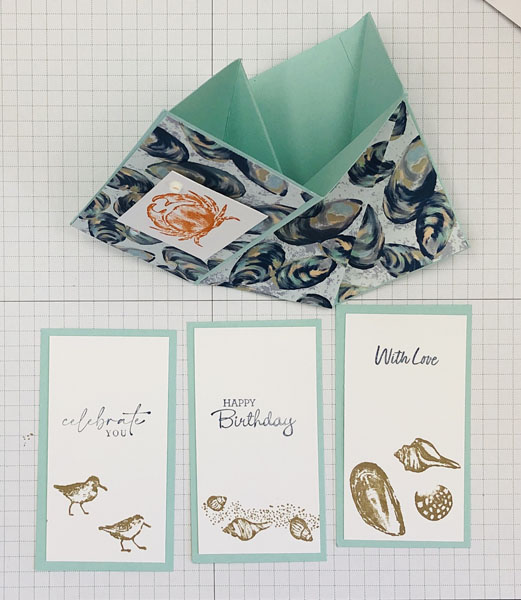
I love fancy fold cards and this beautiful hexagon fancy fold card is such fun to receive. When you remove the ribbon, it opens to reveal three pockets with little message cards in the pockets.

beautiful hexagon fancy fold card opened and showing the little cards that go in the pockets

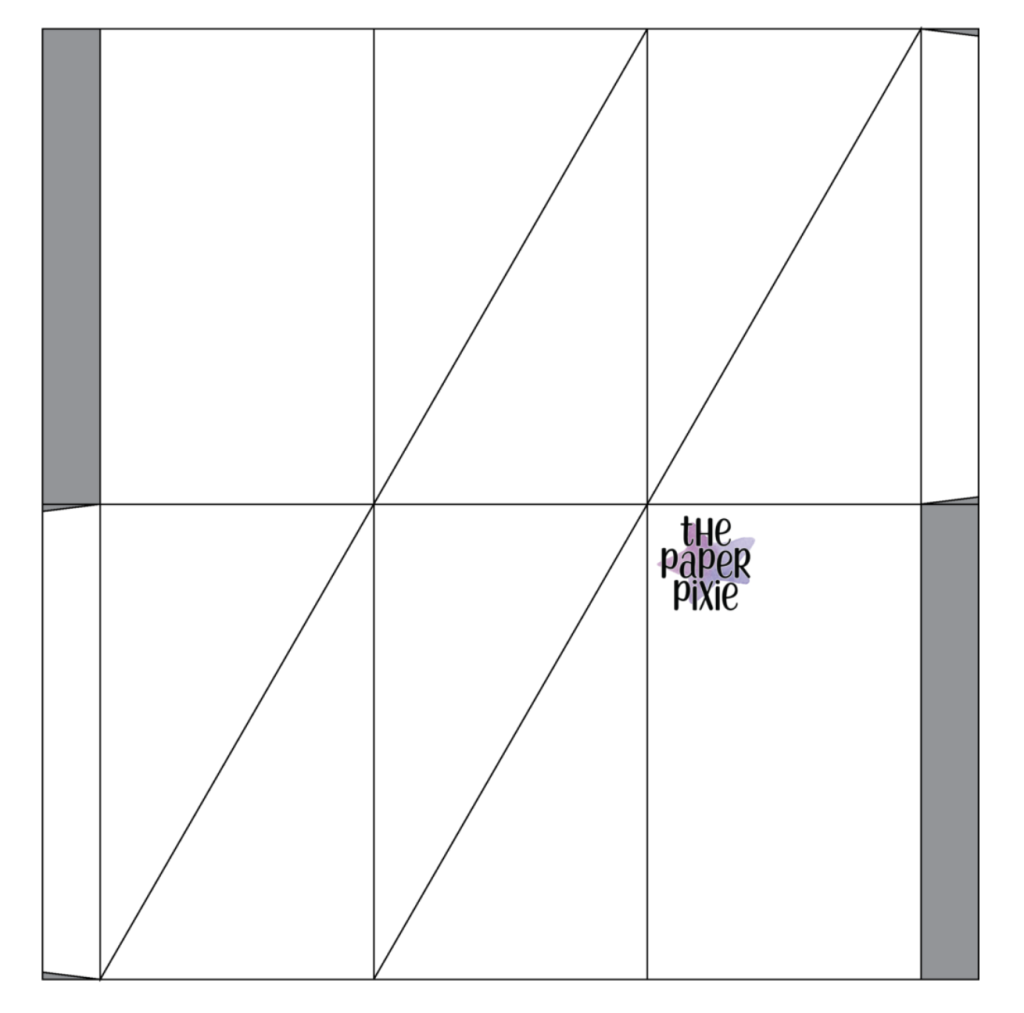
I watched a great video by Julie DiMatteo on how to make this card and am sharing the template she has on her blog, the Paper Pixie. Fold the straight score lines in mountain folds and the diagonal ones in valley folds. Cut off the shaded areas.

Supplies to make this beautiful hexagon fancy fold card

  • Seaside Bay stamp set (160436)
  • Night of Navy, Pumpkin Pie, and Crumb Cake inks
  • By the Bay 6″ x 6″ Specialty Paper (160434) soon to be retired, one piece 4″ x 2 1/4″, 2 pieces 3 7/8″ x 2 1/4″ cut diagonally f
  • From upper right corner to lower left corner
  • Pool Party cardstock (122924) 8 1/4″ x 8 1/8″ scored with the 8 1/8″ length at top of trimmer at 1/2″, 2 7/8″, 5 1/4″, and 7 5/8″ then turned to have the 8 1/4″ side at top and scored at 4 1/8″, 3 pieces 2 1/4″ x 4″
  • Basic White Cardstock (159276) 3 pieces 2″ x 3 3/4″, scrap for stamping the crab
  • Night of Navy 3/8″ Bordered Ribbon (160581)
  • Flat Adhesive-backed Pearls (160449)
  • Multipurpose Liquid Glue (110755)
  • Paper Trimmer (152392)
  • For your convenience, click here to be taken to a shopping cart in my online store with these items in it. You can delete any products you already have.

Once you collect the supplies needed, you can stamp along with me in this video.

Thanks for stopping by. Grab a cup of coffee or tea and spend some time checking out my various blog posts. There are other fancy fold posts here, here, and here. Leave a comment about which one you like best.
Playing in the Rain Box Frame Card

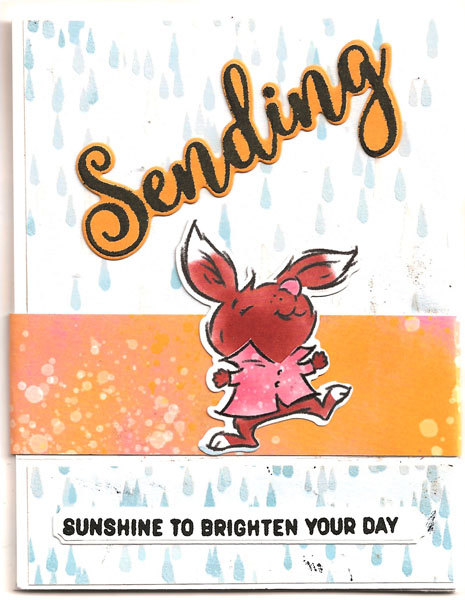
This Playing in the Rain Box Frame card is sure to cheer up anyone who sees it. I love it! As you might know, I love fancy folds and this card is an easy one to make. I got the dimensions for this box frame card from another demonstrator’s video. Thanks to whomever that was. I forget.

The outside of this card is cute enough but just look at the magic inside!

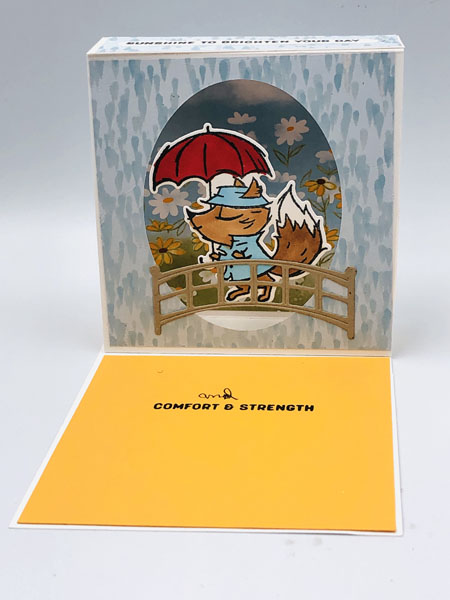
Open view of Playing in the Rain Box Frame Card

I created this Playing in the Rain box frame card for a friend’s brother who is battling stage 4 melanoma cancer. I hope it cheers him up and encourages him. The images for this card come from the Playing in the Rain Suite of products. They are so cute and uplifting!

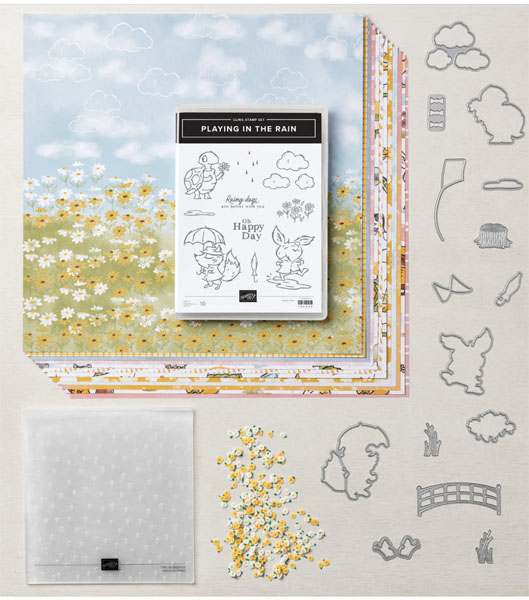
photo shows the elements in the Playing in the Rain Suite used for the Playing in the Rain box frame card

Supplies Used for Playing in the Rain Box Frame Card

  • Playing in the Rain Bundle (160551)
  • Sending Smiles Bundle (158707)
  • Memento Ink Pad
  • Basic White Cardstock (159275) 11″ x 4 1/4″ scored at 1 1/4″ and 5 1/2″, 6 1/8″ x 4 1/4″ scored at 1 1/8″ on each end, scraps for stamping fox with umbrella and greeting
  • Mango Melody Cardstock (146989) 4 1/8″ x 4 1/8″, scrap for sunshine word
  • Soft Suede Cardstock (115318) scrap for bridge
  • Rain or Shine Specialty Paper (160540) Card front – Light raindrop pattern 4 1/8″ x 4 1/8″, inside back behind frame – grass with daisies pattern x4 1/8″ x 4 1/8″, inside front of frame – light raindrops pattern 4 1/8″ x 4 1/8″, splashed pink/yellow design 12″ x 1 1/2″ for belly band
  • Stampin’ Seal (152813) or Multipurpose Liquid Glue (110755)
  • Paper Trimmer (152392)
  • Stampin’ Cut & Emboss Machine (149653) or Mini Stampin’ Cut & Emboss Machine )(150673
  • Click here to be taken to a shopping cart in my online store where these supplies are all ready for you to purchase. You can delete any you already have.

Once you have collected your supplies, watch this video and stamp along with me. If you like this project, please leave a message in the comments. The Mango Melody and Soft Suede cardstock is retiring as well as the Rain or Shine Specialty Paper. They are on the Last Chance List so order them now before they sell out. The Playing in the Rain stamp set and dies are in the new 2023-2024 Annual Catalog but not as a bundle. Purchase them now as a bundle and save 10%

Fresh New Colors

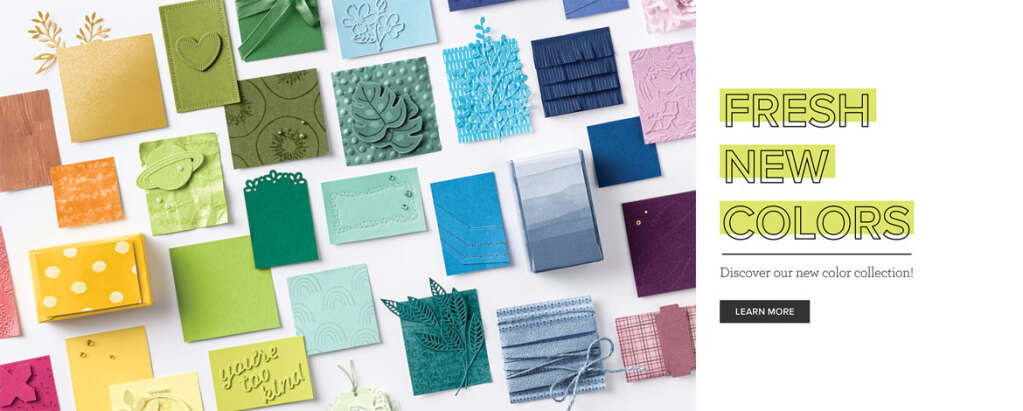
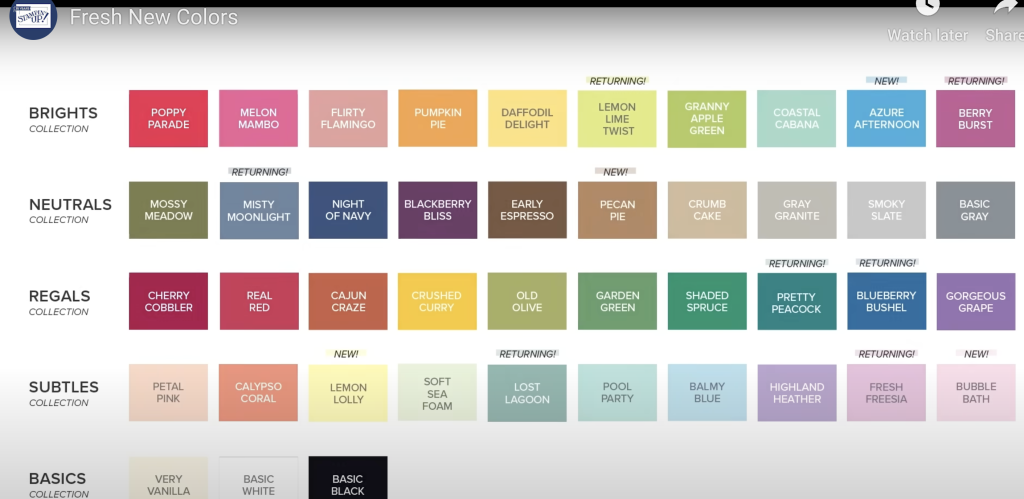
photo shows  Stampin' Up! Fresh New Colors

There are fresh new colors at Stampin’ Up! Every few years, Stampin’ Up! refreshes the basic color families, Subtles, Brights, Regals, and Neutrals and this is the year. In addition to new 2023-2025 In Colors, there are 15 new or returning colors. Check out this video that introduces them.

So you have now seen the fresh new colors. Which are your favorites? Are any of the returning ones a color you were sad to see go? Leave your response in as a comment below. Here is a screen shot of the new basic colors.

This photo is a screen shot of the Stampin' Up! fresh new colors

You will be able to order these fresh new colors in combo packs of the cardstock (both 8 1/2″ x 11″ and 12″ x 12″), ink pads and Stampin’ Write Markers. The new 2023-2024 Annual Catalog sales period begins May 2.

In addition to these fresh new colors, we have a new set of 2023-2025 In Colors. You will also be able to buy combo packages of the cardstock, ink pads and markers. Check them out.

photo is screen shot of the new 2023-2025 In Colors that are added to the fresh new colors

You won’t be able to see these in my online store until May 2 but I encourage you to check out the Last Chance items. The consumables will sell out fast. Some of the items will be discounted starting April 4. You can buy them now at the regular price. There are bundles that are retiring. This does not necessarily mean that the die and the stamp set is retiring, just the bundled price. You can tell which are those bundles because the stamp set is not on the Last Chance list.

Also, the Stamparatus is being retired. If you have been considering getting this, DO! I don’t use mine all the time but is is most helpful when you have solid stamps that don’t hold the ink as well. Put your paper in the Stamparatus, lay the stamp on the paper, pick it up with the acrylic plate, ink, stamp and repeat as necessary. You can stamp over and over again as long as the magnet holds the cardstock still.

I’m excited about the fresh new colors. I hope you are too!

Flash Report! Prices Going Up!

image is of a dollar sign and jagged arrow showing in this Flash Report that prices are going up!

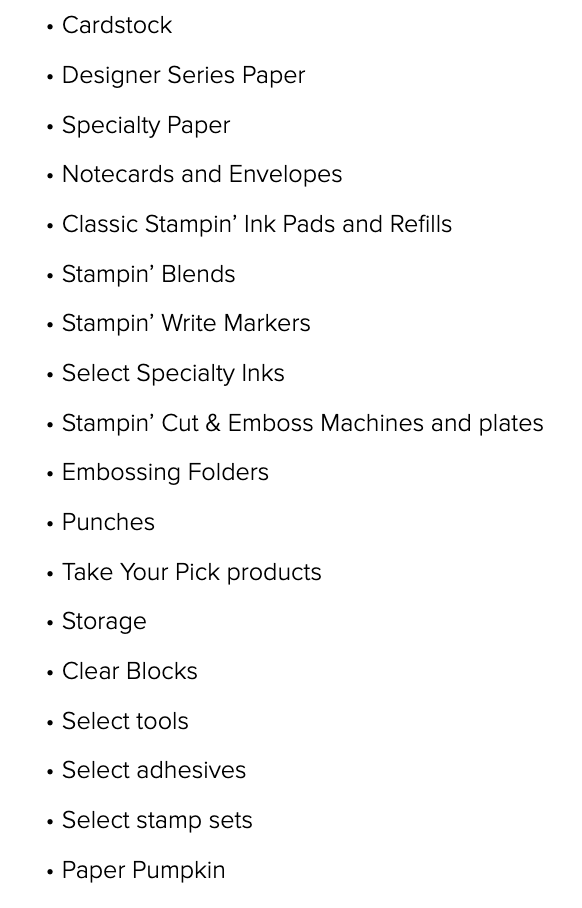
I need you to read this Flash Report because prices are going up. With the new 2023-2024 Annual Catalog beginning May 2, you will see that inflation hits rubber stamping! There will be increased prices on these items:

photo is a list of Stampin' Up! items with increased prices

Stampin’ Up! has been very diligent in keeping price increases at a minimum over the years but the economy and shipping challenges now necesitate them. Yes, I know, living expenses have gotten exorbitant and where will we find the money for our stamping habits. I’m sure we can find a way. Remember that Stampin’ Up! products are of fine quality and you get what you pay for. Yes, we can find cheaper supplies elsewhere, but they won’t coordinate with each other like SU products do and…..you don’t get the expertise and personal service I give.

So my advice to you is to stock up on essentials before inflation hits rubber stamping May 2.

Another thing you need to know is that the 2022-2024 In Color items, inks, papers, embellishments will be retiring. Now is the time to stock up on those colors that are your favorites. You should especially get the ink refills if you don’t already have them. That way, when your ink pads dry out, you will be able to reink them. The retirement list will be coming out in April but refills will sell out quickly so don’t wait until April to order them. There are hints that there may also be a color refresh of the basic color families as well. I’ll keep you posted.

Now that you have read this Flash Report, take time to go through your supplies and make note on what you are getting low on. Also check your wish list for items that quite likely will retire the end of April. Then go to my online store and place your order. Orders placed this month of $50 or more will receive the brass butterflies as a free gift.

photo is of brushed Brass Butterflies, a free gift for $50 or more orders before inflation hits rubber stamping

A New Twist on the Shutter Card

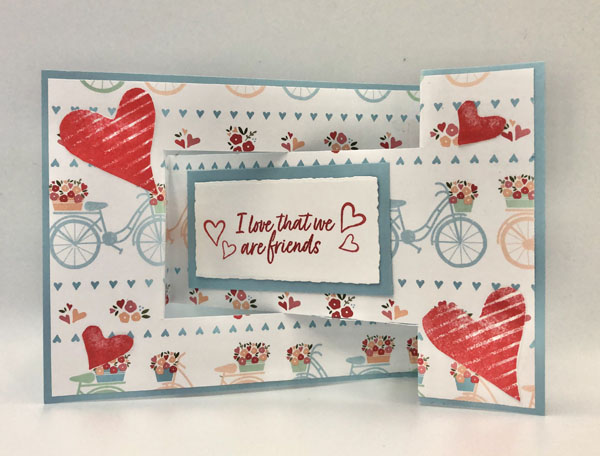
This photo is of a new twist on a shutter card created with Country Floral Designer Series paper.

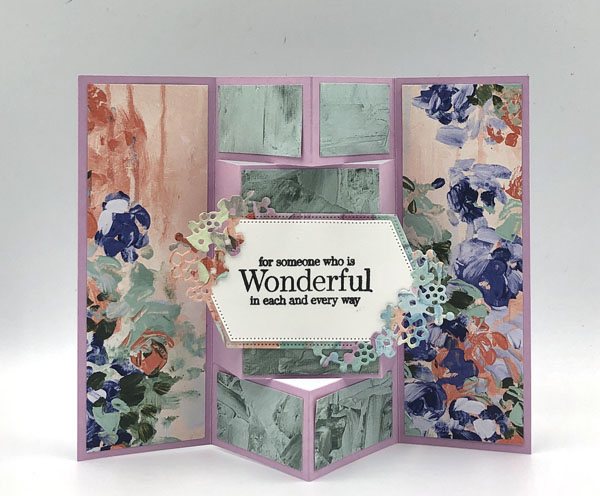
Here is a new twist on the shutter card. It is called a seesaw shutter card and is very much like a trifold shutter card, the score and fold lines are just changed around. It looks complicated but it really is quick and easy to make. I first saw this fancy fold in a post on Facebook by Lavonne Schwendeman. She even shared a diagram on how to cut and score it. Thanks, Lavonne!

This paper is from the Country Floral Lane Designer Series Paper (160375). I hadn’t used this design yet and thought it would be perfect with the bicycles lined up along the middle but had to cut it carefully so the bicycles were in the center. The card base is Balmy Blue. I like the blue edges but Basic White cardstock for the base would make folding the score lines easier. It is a bit lighter in weight.

Start out by adhering a solid piece of the dsp to the card base before doing any cutting or scoring. You could layer the dsp after cutting and folding but calculating the measurements and shapes would be a big challenge. This way is much easier. Then I cut and scored and folded according to the diagram below. (Diagram is not to scale, sorry!) All that is left to do is add any additional elements desired.

Template for the new twist on a shutter card. It's a seesaw shutter card.

The solid lines are cut lines and dotted are score lines. V=valley fold, M=mountain fold. The size of the piece is 8″ x 4 14″. This new twist on the shutter card will fold up to fit a medium envelope.

Supplies Used for a New Twist on the Shutter Card

  • Balmy Blue Cardstock 8″ x 4 1/4″, 3″ x 1 3/4″
  • Basic White Cardstock 3″ x 2″. scraps for the hearts
  • Country Floral Lane Designer Series Paper 7 3/4″ x 4″
  • Sweet Sorbet Classic Ink Pad
  • Multipurpose Liquid Glue
  • Deckled Rectangles Dies
  • Paper Snips
  • Paper Trimmer
  • Mini Stampin’ Cut & Emboss Machine
  • Click here to be taken to a shopping cart with these supplies ready for you to check out. You can delete any that you already have.

I demonstrated this card during my Fabulous Friday Facebook Live yesterday. Here is the replay.

If you choose to make this card, I’d love to see what you do. Email me a picture to sue@soggystamper.com. Thanks for visiting today and don’t forget to visit my store for your papercrafing needs. I really appreciate your business.

Beautiful Fancy Flora Fancy Fold Card

photo is of the beautiful Fancy Flora Fancy Fold card

This beautiful Fancy Flora fancy fold card was a cinch to make and turned out so wonderfully! Three scored lines and two cutting lines are all it takes for create the card base. Then adding pieces of the Fancy Flora designer series paper (160413) to decorate it creates the beauty. The focal point is a beautiful die-cut label using the Sentimental Park dies (160566). Unfortunately, the greeting is unavailable as it is from the retired 2022 SAB set Special Moments. You can easily substitute a greeting from the Sentimental; Park stamp set (160561) or any other greeting set that fits on the label. Here is a vertical view of the card and the back side. The white area is for handwriting a message and signing the card.

This is the top view of the Beautiful Fancy Flora Fancy Fold card
Back view of the beautiful Fancy Flora Fancy Fold card

Supplies Used for Beautiful Fancy Flora Fancy Fold Card

  • Sentimental Park Dies (160566) or Sentimental Park Bundle (160567)
  • Fancy Flora 6″ x 6″ designer series paper (160413) 4 at 5 3/8″ x 1 7/8″, 8 at 1 1 7/8″ x 1 1/8″, 2 at 2 7/8″ x 7/8″, 1 at 2 7/8″ x 1 7/8″, 4 1/4″ x 2 3/4″ for die-cutting fancy label
  • Basic White Cardstock (159276) 2 7/8″ x 1 7/8″, 3 1/4″ x 2″ for label
  • Fresh Freesia Cardstock (155613) 8″ x 5 1/2″
  • Tuxedo Black Memento Ink
  • Paper Trimmer
  • mini Stampin’ Cut & Emboss Machine
  • A shopping cart in my online store with these products is here for your convenience. You can remove anything you already have from the cart before placing your order.

Template

Template for the beautiful Fancy Flora Fancy Fold card

Once you have the needed supplies, you can follow along with me in this video of my Friday Facebook Live as I show how to put this beautiful Fancy Flora Fancy Fold card together.

Beautiful Sentimental Park Pop-Up Card

Beautiful Sentimental Park Pop-Up Card

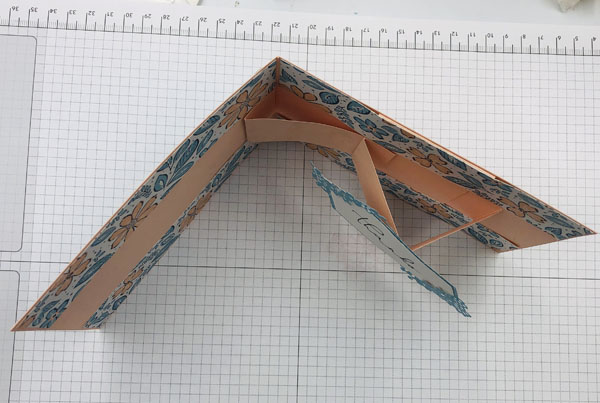
I love this Beautiful Sentimental Park Pop-up Card! I love pop-up cards in general but this one is so pretty and so easy to make. Check out the opened view.

opened view of the Beautiful Sentimental Park Pop-Up Card

And here is a top view of the card.

Top view of the Beautiful Sentimental Park Pop-Up Card

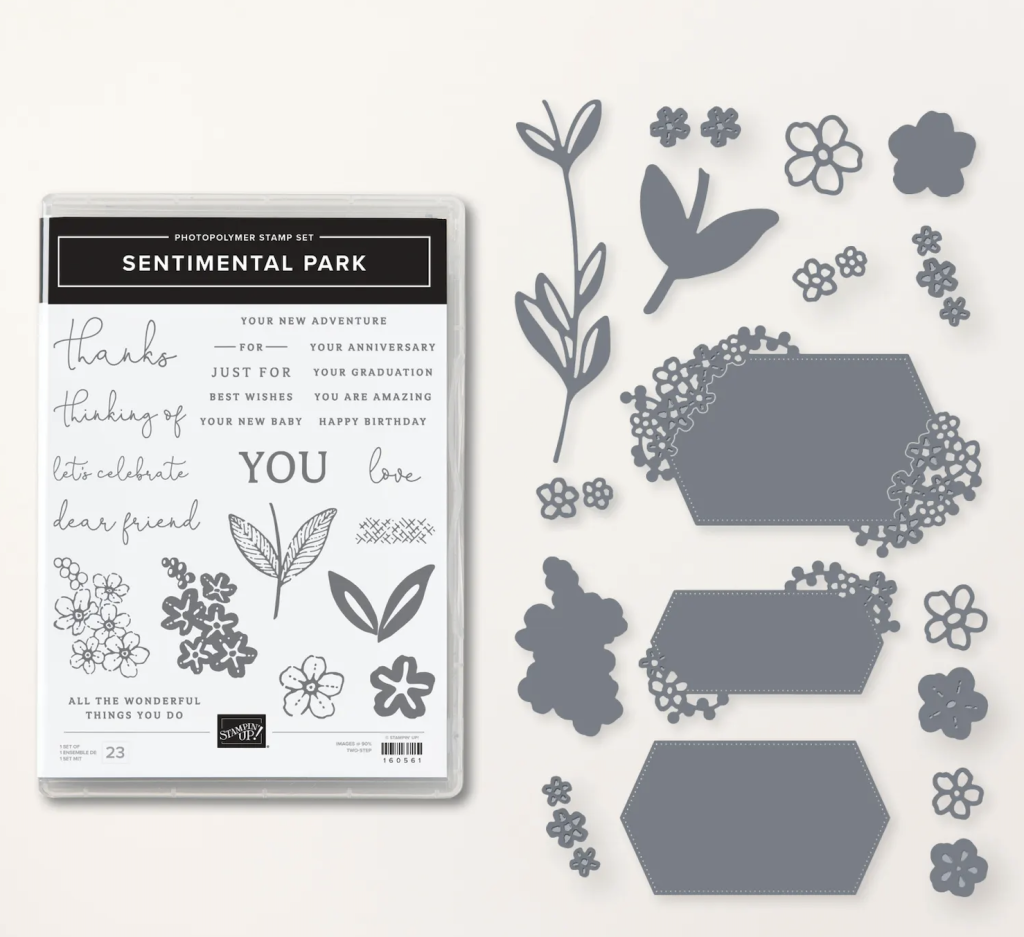
This Sentimental Park Bundle caught my attention as soon as I opened the January – April Mini catalog because of the beautiful label dies. The floral corners of the dies are beautiful. A very cool thing I discovered when I first used the dies is that the the inside edge of the floral bundles is cut so that the smaller straight-edged label nestles inside the larger floral one. Sooo cool!

Photo shows the Sentimental Park bundle

I used one of the patterns from the Regency Park 6″ x 6″ Designer Series Paper (160559) to decorate the card base which is of Petal Pink cardstock.

Supplies Used in the Beautiful Sentimental Park Pop-Up Card

  • Sentimental Park Bundle (160567)
  • Scalloped Contours Dies (155560)
  • Pear Pizzazz, Sweet Sorbet (stamped off once), and Tuxedo Black Memento Inks
  • Petal Pink Cardstock 11″ x 4 1/4″ scored at 5 1/2″; 10″ x 1 1/2″ scored at 3/4, 5 1/2, 7 1/4, 7 1/2 and 9 3/8 “;5 1/4″ x 2″ scored at 1/2″ and 4 3/4”
  • Basic White cardstock scrap for label, scrap to stamp flower and leaves
  • Regency Park Designer Series Paper, Balmy Blue Polka dot design 5 1/4″ x 4″ and 4 1/4″ x 2 3/4″; Petal Pink flowers with Balmy Blue flowers design 4 pieces 5 3/8″ x 1 1/4″
  • Stampin’ Seal and Multipurpose Liquid Glue
  • Elegant Faceted Gems (159189)
  • Click here to access a these items in a shopping cart for your convenience. You can remove anything you already have.

Once you have the supplies to make this beautiful card, watch this video to see how to put the card together.

Time for More Sales at Stampin’ Up!

photo is of banner for Last Chance Products Promotion

It’s the first of December and it’s time for more sales at Stampin’ Up! A new mini catalog comes out January 4 and Stampin’ Up! needs to make room for all the wonderful new product that is coming. Therefore, they have posted the list of items from the July – December mini catalog that will be retiring. Some items are up to 60% off! These retiring items are available only as long as inventory lasts so check them out here in my online store. I could give you a link to the list but it would need to be updated often as items are no longer available. The best way to be sure you get what you want it to go directly to my store and do it now!

banner for Stampin' Up!'s Clearance Rack

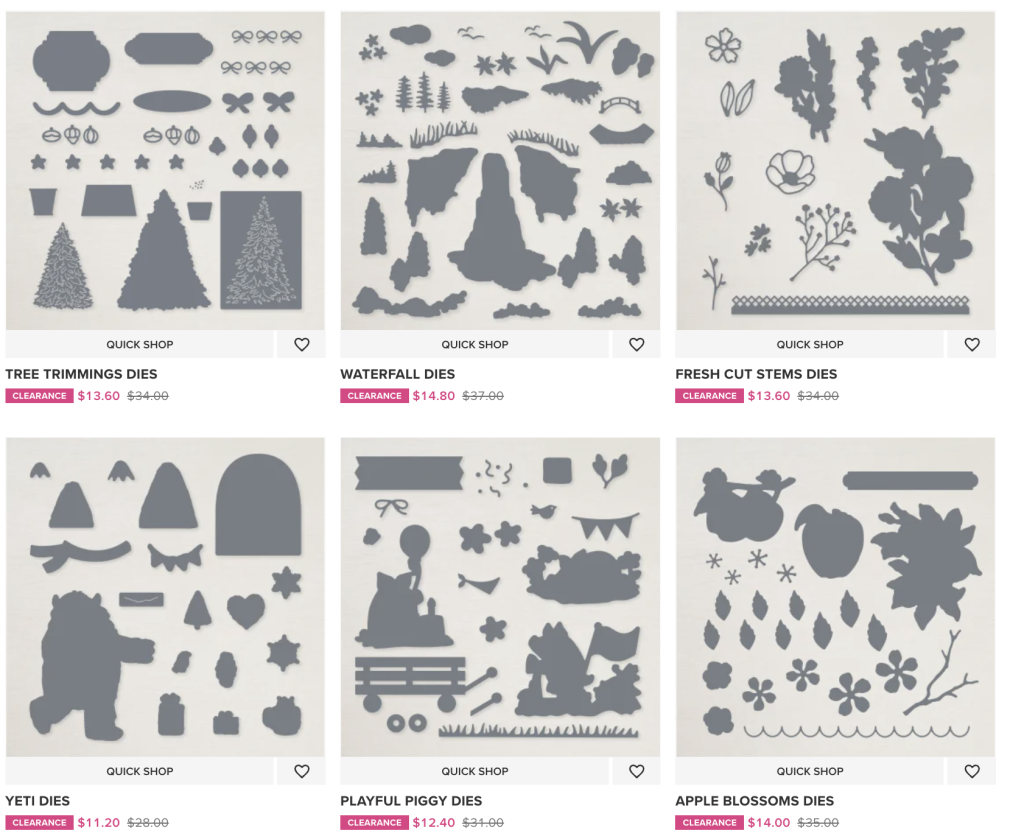
Another sale which is ongoing is the Clearance Rack and it was just updated last night. Did you miss out on the September promotion where you could buy dies for some of the stamp sets that aren’t bundled with dies? Then you are in luck because they are now on the clearance rack! I guarantee these will sell out in the next couple of days. Check them out!

photo of dies that go with stamp sets from the Annual catalog that were a special promotion in September.

As you can see, it’s time for more sales at Stampin’ Up! Now is the time to stock up and/or complete your wish list from the July – December mini catalog. Since this is the season for purchasing gifts, consider buying a stamp set or bundle or designer series paper for a crafty friend. And…of course…don’t forget yourself!

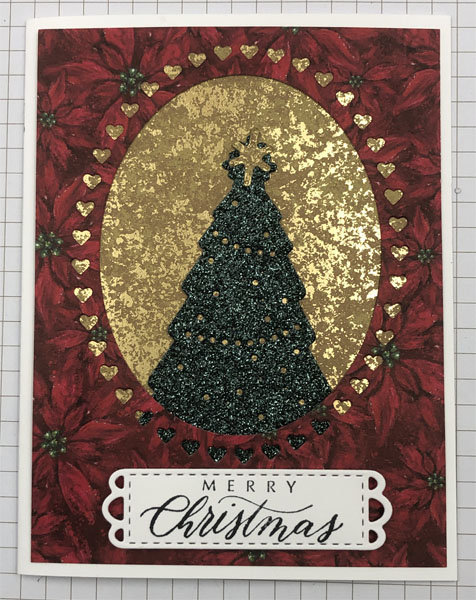
Beautiful Oh Christmas Tree Christmas Card

image is of the Beautiful Oh Christmas Tree Christmas Card created with a Twinkling Lights die and a Framed Florets die

This beautiful Oh Christmas Tree Christmas card is so easy to make! I used one of the Twinkling Lights dies and two of the Framed Florets dies to make it.

I love, love, love the Framed Florets die (160623) that cuts out the oval of hearts. This makes such a wonderful frame for the gorgeous tree that I cut out from Evening Evergreen Glimmer paper. I backed this with the Distressed Gold Specialty Paper which is sadly temporarily unavailable. I went to reorder it and the Evening Evergreen Glimmer paper this morning to find out that the gold is out of stock (due to be available week of Jan 9) and the evergreen glimmer paper is sold out! What?!? I’m sorry if you missed out!

The top layer of the card is the beautiful Boughs of Holly designer series paper. I used a greeting from the Hope & Peace stamp set (159773) and cut it out with a die from the Meadow Dies (155852).

Supplies to make Beautiful Oh Christmas Tree Christmas Card

Click on the links to be taken to the item’s location in my online store. Thank you for shopping with me. Once you have the supplies to make this beautiful Oh Christmas Tree card, watch my facebook live and stamp along with me. You can stop the video anytime you need to catch up.

Beautiful Iridescent Snowflake Z-fold Card

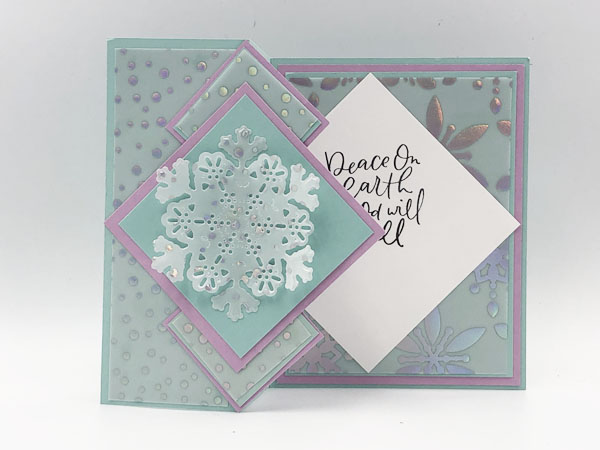
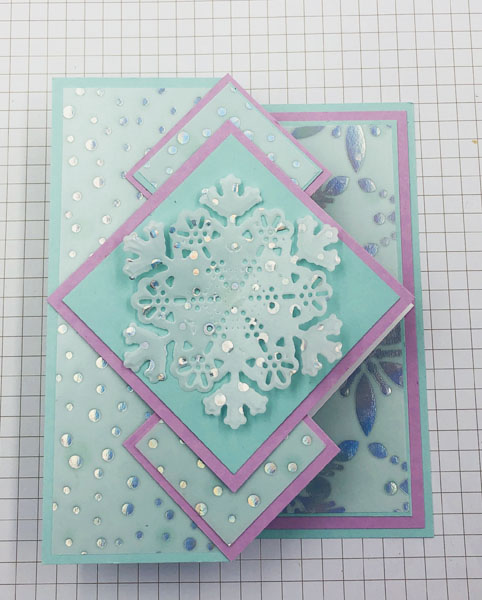
Beautiful Iridescent Snowflake Z-fold card created with the Snowflake Specialty Vellum and Twinkling Lights Dies
open view of Beautiful Iridescent Snowflake Z-fold Card

This iridescent snowflake z-fold card was somewhat time-consuming while cutting all the layers but it is easy to put together. The star of the show is the stunning iridescent sheets of the Snowflake Specialty Vellum (159832) found on page 40 in the July – December mini catalog. There are three patterns, one a dotted pattern and two with snowflakes. One sheet of each pattern is a white flocked image and one sheet is an image with an iridescent foil. For this card I used the dotted iridescent pattern and one of the snowflake patterns. I cut the large snowflake out of the dotted pattern with the two large snowflake dies in the Twinkling Lights Dies (159541). Order the supplies listed below from me and then join in making the with the video.

Supplies Needed to Make the Iridescent Snowflake Z-fold Card

  • Stamp Set – Hope & Peace Stamp Set (159773)
  • Ink – Tuxedo Black Memento Ink (132708)
  • Pool Party Cardstock (122924) – 8 1/2″ x 5 1/2″ scored at 2 1//8″ and 4 1/4″ for card base; 2 pieces 1 5/8″ x 1 5/8″ for small diamonds; 2 3/4″ x 2 3/4″ for large diamond; 5″ x 3 3/4″ for inside
  • Fresh Freesia Cardstock (155613) – 5 1/4″ x 4″ for inside; 3″ x 3″ for large diamond on front; 2 pieces 1 3/4″ x 1 3/4″ for small diamonds
  • Basic White Cardstock (159275) – 3 1/2″ x 3 1/2″ for greeting inside
  • Snowflake Specialty Vellum (159832) – dotted iridescent pattern 2 pieces 5 1/4″ x 1 7/8″, 3 1/2″ x 3 1/2″ for snowflake; iridescent snowflake pattern 4 7/8″ x 3 5/8″ for inside
  • Twinkling Lights Dies (159541) snowflake dies
  • Paper Trimmer (154980)
  • Stampin’ Cut & Emboss Machine – either size
  • Multipurpose Liquid Glue (110755)
  • Stampin’ Seal ()152813)
  • Mini Glue Dots (103683)
  • For your convenience click here for a shopping cart in my online store with these items. You can remove any supplies you already have.

Are your supplies gathered? Thank you if you ordered them from me. Here is the video!

November Bundle of the Month

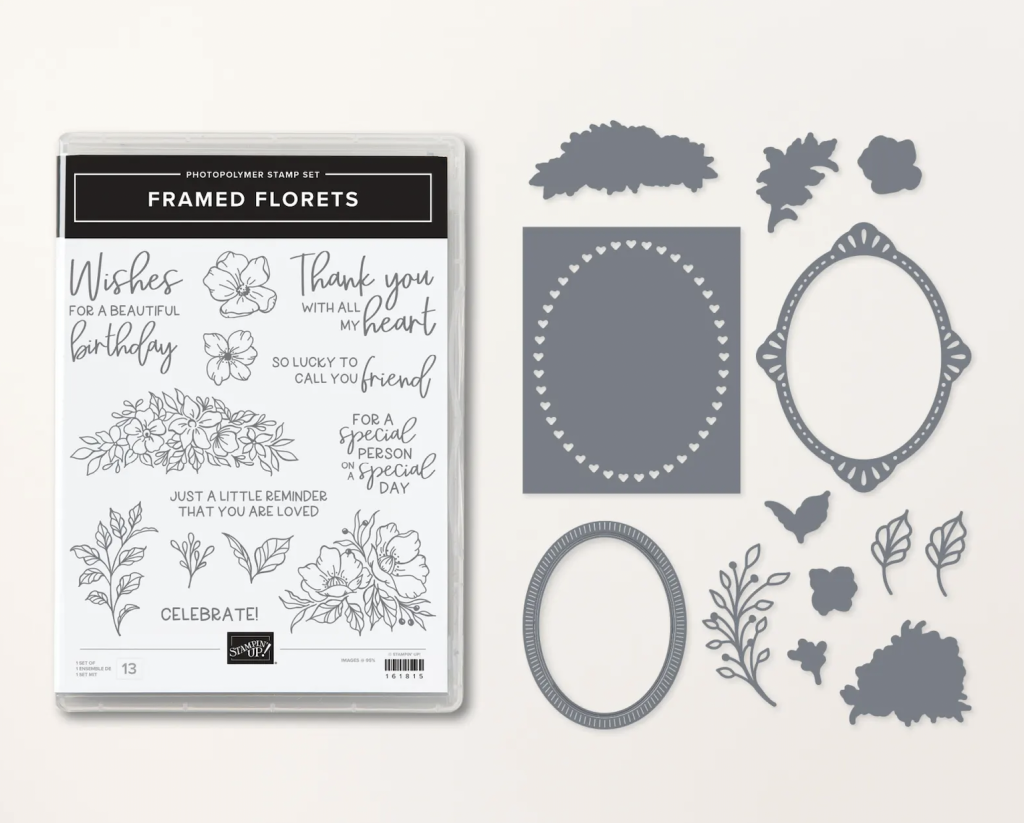
The November Bundle of the Month is the Framed Florets Bundle (162407). I love this beautiful floral bundle for it’s versatility and the beautiful oval frames. Check it out.

This image is of the November Bundle of the Month, the Framed Florets Bundle

If you order this November Bundle of the Month from me, during November, I will email you five free tutorials using this bundle.

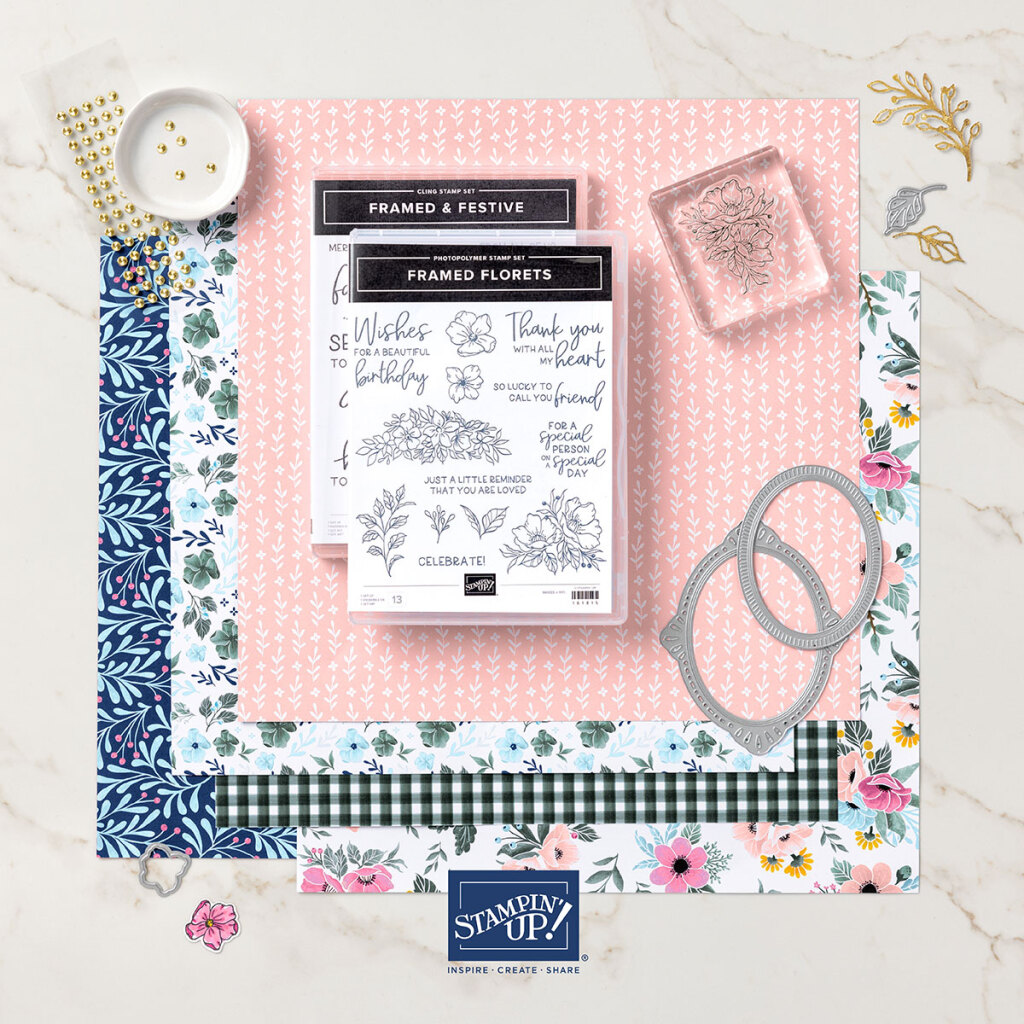
Now, this bundle is part of a November – January 4 promotion by Stampin’ Up!, the Fitting Florets Collection. In addition to this bundle; the collection includes a Christmas greeting stamp set, Framed & Festive (160888); The gorgeous all-year themed Fitting Florets 12 x 12 Designer Series Paper (161814) and the Gold Adhesive-Backed Swirls (161822).

Fitting Florets Collection of which the November Bundle of the Month is a part

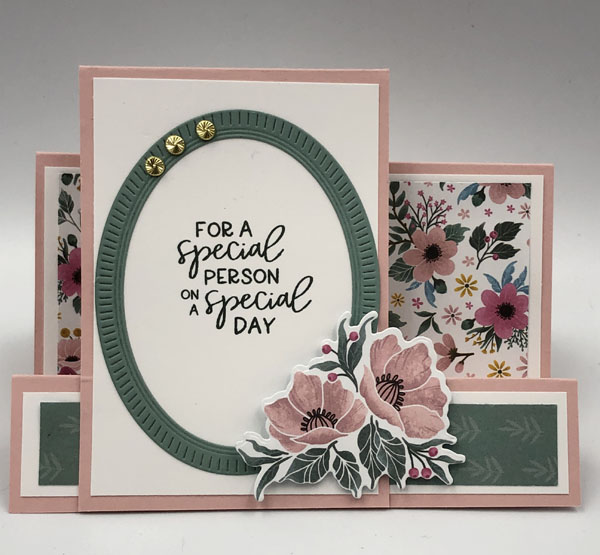
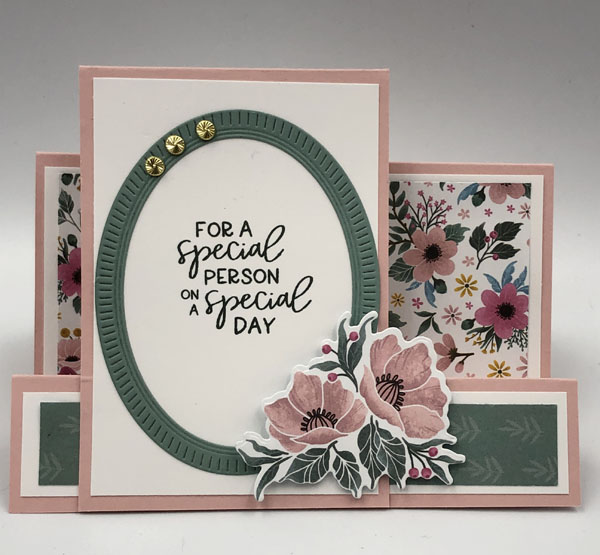
When you purchase the complete Fitting Florets Collection from me in November, I will send you not 5 but 10 tutorials using all the products. What a deal! I love creating tutorials and sharing them with you! I created this Faux Side-step card using all the products in the Collection.

November Bundle of the Month used to create a spring-themed birthday card using all of the Fitting Florets Collection

SUPPLIES USED

  • Blushing Bride Cardstock – 8 1/2″ x 5 1/2″ scored at 3″, 6″, and 7 1/4″; 8 1/2″ x 3″ scored at 4 1/4″
  • Basic White Cardstock – 2 pieces 4″ x 2 3/4″, 5 1/4″ x 1″, 5 1/4″ x 2 3/4″
  • Soft Succulent Cardstock – scrap big enough for oval die
  • Fitting Florets 12 x 12 Designer Series Paper 5″ x 3/4″, 5″ x 2 1/2″ plus scrap with flower design
  • Framed Floral Bundle
  • Evening Evergreen Ink
  • For your convenience, here is a shopping cart in my online store with all the needed product for this project. You can delete any supplies you already have.

The Fitting Florets Designer Series Paper, Frames & Festive stamp set, and the Gold Adhesive-backed Swirls are available only as long as supplies last. I believe they will sell out quickly so I advise you to place your order now! You will be able to create a large variety of cards with just this one collection.

You Are Missing Out!

image is of a Christmas tree and the notice of a 12 Weeks of Christmas Gift that you are missing out on

You are missing out on my 12 Weeks of Christmas Gift to my mailing list subscribers if you aren’t on it. I have already emailed them 4 exclusive tutorials for great Christmas cards. Tomorrow I will be sending the 5th tutorial for a Christmas card. Then the following Wednesdays, I’m sending handmade gift ideas and tag/wrap ideas.

The benefits of being on my mailing list are:

  • Monthly newsletter on the first Tuesday of the month
  • This annual gift of the 12 Weeks of Christmas
  • shorter emails the other Tuesdays of the month with current news from Stampin’ Up!, great tutorials for a variety of paper-crafting projects, stamping tips, and current events I am holding
  • occasional discounts or free shipping offers from me

What are you waiting for? Sign up today and stop missing out. Fill out the form in the upper right corner right now! Thanks you.

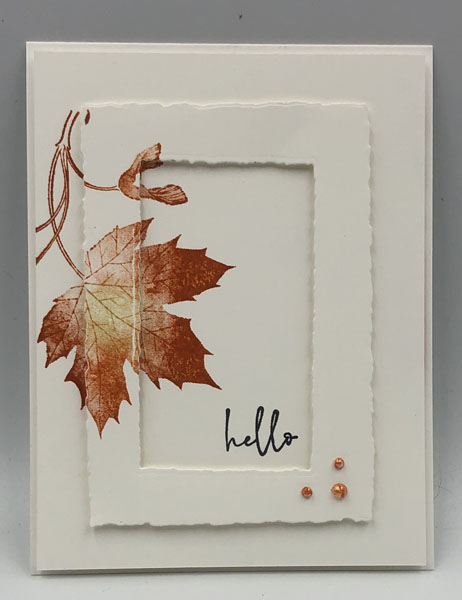
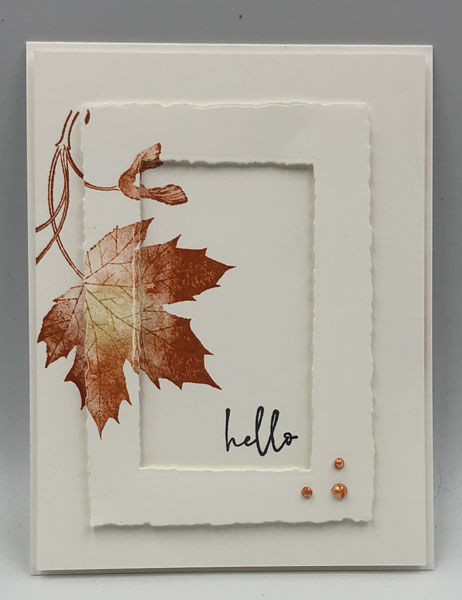
Elegant Soft Seedlings Framed Card

an Elegant Soft Seedlings Framed Card using the Soft Seedlings Stamp Set

Although this elegant Soft Seedlings framed card looks complicated, it is really easy to make.

Supplies Used

  • Soft Seedlings Stamp Set
  • Deckled Rectangles Dies
  • Thick Basic White Cardstock 11″ x 4 1/4″ scored and folded at 5 1/2″ or 8 1/2″ x 5 1/2″ scored and folded at 4 1/4″, 5 1/4″ x 4″, 4 3/4″ x 3 1/2″
  • Pumpkin Pie Classic Stampin’ Pad
  • Parakeet Party Classic Stampin’ Pad
  • Cajun Craze Classic Stampin’ Pad
  • Tuxedo Black Memento Ink Pad
  • Stampin’ Dimensionals
  • Iridescent Pearls
  • Stamparatus
  • Stampin’ Cut & Emboss Machine
  • Click here to go to the shopping cart with these supplies on my online store. You can remove items you already have.

Instructions

  1. Use the third down from largest deckled rectangles die and the third up from smallest to cut the frame from the smallest piece of thick Basic White cardstock.
  2. Place the 5 1/4″ x 4″ piece of thick Basic White cardstock in corner of Stamparatus and put a magnet on the corner of it.
  3. Put the stamp, stamp-side down on the cardstock and pick it up with the acrylic plate.
  4. Use the Pumpkin Pie ink pad to ink the stamp. Then use sponge daubers to add Cajun Craze along the edges of the leaves and Parakeet Party ink to the center of the leaf.
  5. Stamp image.
  6. Place the frame on top of card front and move magnet to also hold the frame in place. Reink the stamp and stamp a second time adding the image to the frame. Clean off the stamp.
  7. While the frame is still being held down by the magnet, place the ‘hello’ stamp on card front inside the lower right corner of the frame. Pick it up with the acrylic plate, check to see that it is lined up correctly and stamp using Memento ink.
  8. Remove the card from the Stamparatus and adhere the frame with Stampin’ Dimensionals lining up the two images.
  9. Color one large and two small Iridescent Pearl Adhesive Gems with the Dark Cajun Craze Stampin’ Blends. Apply to lower right corner of the frame.
  10. Stamp the seed cluster on a corner of the inside if desired.

Watch the Video

Now that you have the supplies gathered to make this elegant Soft Seedlings framed card, follow along with me in this video.

Scary Cute Pop-upCard

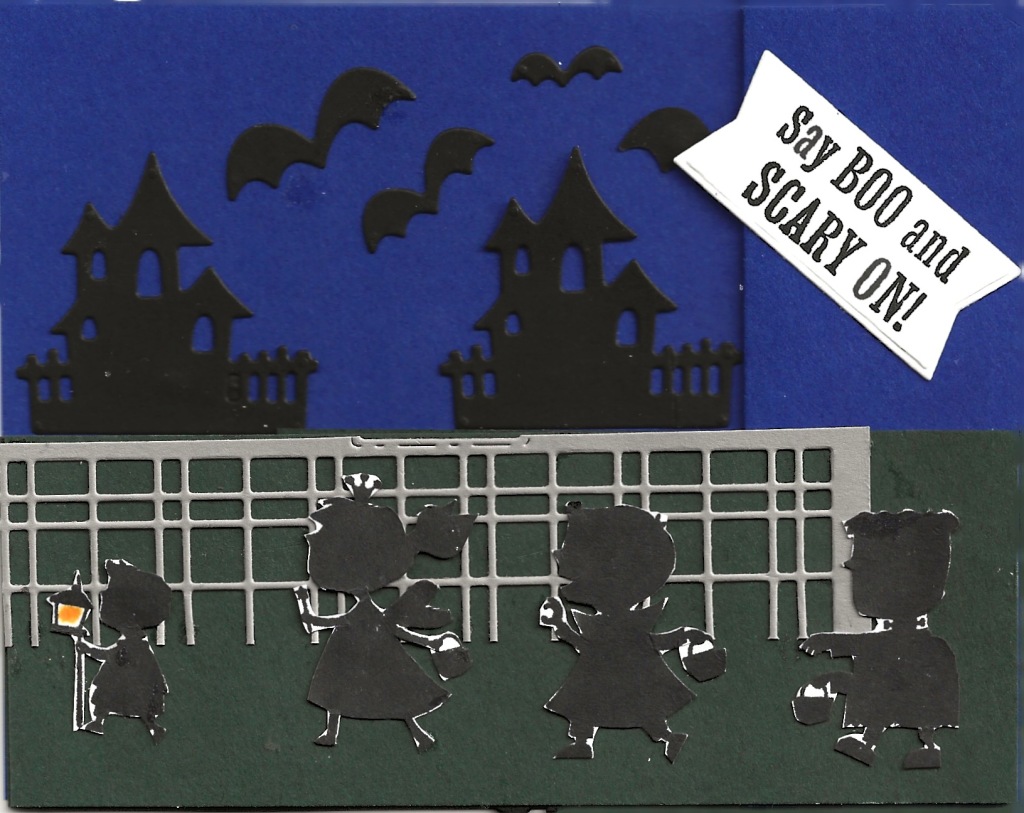
photo is of a Halloween Scary Cute Pop-up Card

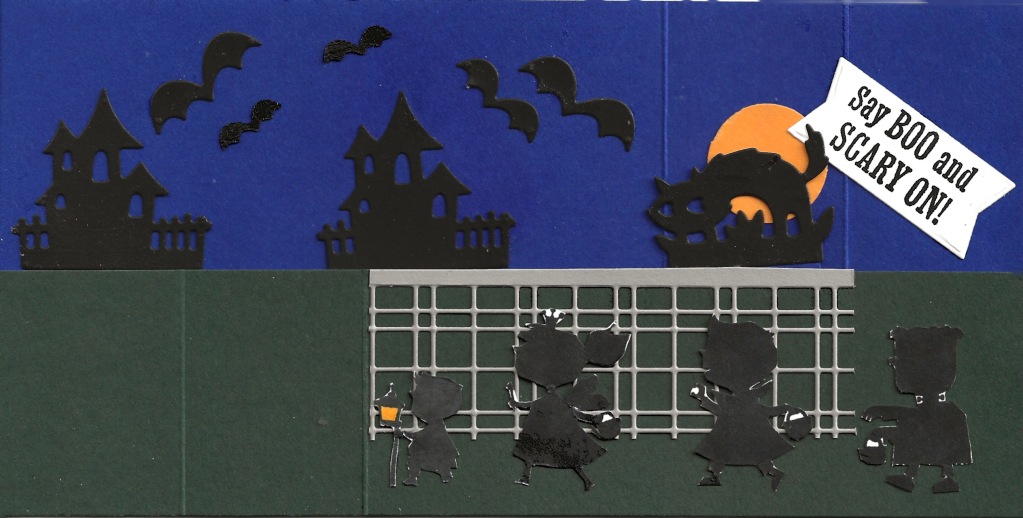
This scary cute pop-up card is such fun to play with. What you are seeing is the card in the closed. The magic happens when you open the card. The photo shows the card flattened open but it is 3 dimensional otherwise. I love how the black cat pops up! I can play with it for minutes at a time. 🙂

Halloween Scary Cute Pop-up card opened

The images of the children do not have a corresponding die so I fussy cut them out. The tricky part of the card is getting the pop-up feature to work properly without any of the cat showing out the bottom of the card when it is closed. The fence is cut out with part of a Split Card Textures die

Supplies Used for Scary Cute Pop-up Card

  • Scary Cute Bundle (159852)
  • Starry Sky Cardstock (159263) 8 1/2″ x 4 1/4″ scored at 5 1/2″ and 7″, 1 1/2″ x 1 1/4″ for pop-up
  • Evening Evergreen Cardstock (155574) 8 1/2″ x 2″ scored at 5 1/2″ and 7″, 3 7/8″ x 2″
  • Basic Black Cardstock (121045) scraps for cat, haunted houses and bats
  • Gray Granite Cardstock (146983) 4 3/4″ x 1″ for fence
  • Basic White Cardstock (159276) scrap for tag, scrap to stamp children on
  • Mango Melody Cardstock (146989) scrap for moon
  • Tuxedo Black Memento Ink (132708) and Dark Mango Melody Stampin’ Blend (retired) use marker instead
  • Split Card Textures Dies (159162)
  • 1″ Circle Punch – retired
  • Paper Snips (103579)
  • Paper Trimmer (152392)
  • Stampin’ Cut & Emboss Machine (149653)
  • adhesives of choice
  • you can find these supplies in a shopping cart in my online store for your convenience. Click here.
Once you have gathered your supplies, watch this FaceBook Live I did to see how to put the card together.
For other samples of cards using this Scary Cute bundle, click here and here.