I love Christmas and I love giving gifts to my family and friends. It is only 1 week until I will begin my 12 Weeks of Christmas gift-giving to my subscribers on my mailing list. Each Wednesday from October through the week before Christmas I will be posting a really cool project — either a card, a gift to make, or a wrap/tag project. The thing is…you have to be on my mailing list to receive these weekly gifts. Before you forget, sign up by filling out the form in the upper right corner on this page. You will LOVE the projects I have chosen for you! I look forward to having you join me! Feel free to share this with your friends and get them to join as well.
Awesome Limited-Time Host Promotion
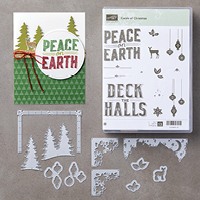
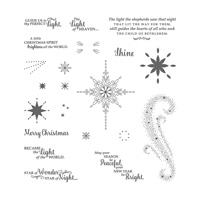
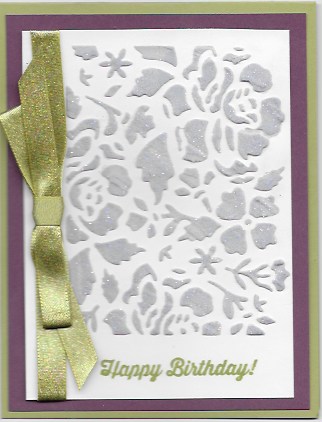
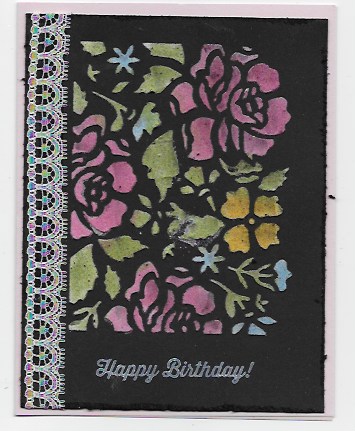
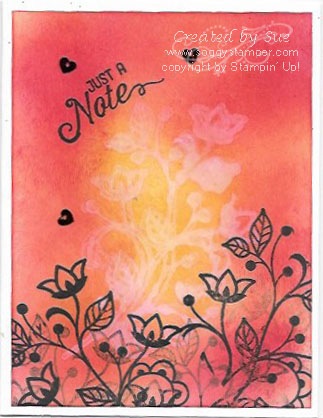
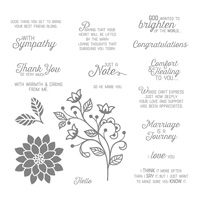
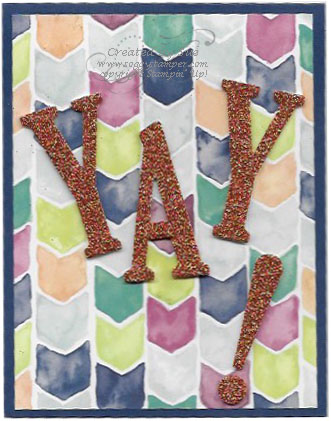
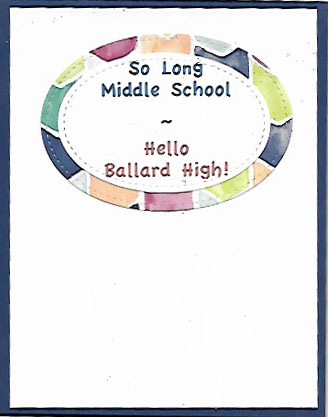
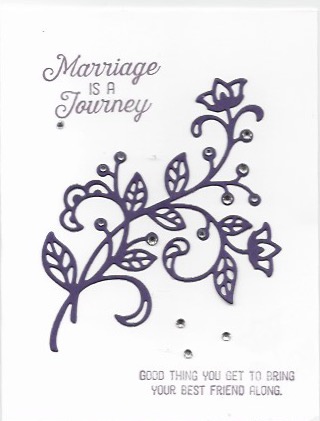
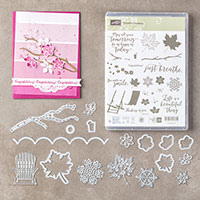
‘These are just some of the wonderful cards you can make with the Merry Patterns stamp set that is a free exclusive Host set. How do you get this set? By hosting a workshop of $300 or more in product sold. That’s all! Check out this video by Stampin’ Up! and then contact me to see how you can host a workshop. (It doesn’t have to be a real-time workshop in the Skagit Valley!)September Host Code
Z2CTPN2C Don’t use if your total is $150 or more
Spooky Night Suite Card
I am not particularly fond of Halloween nor am I a cat lady but this cat punch which is part of the Spooky Cat Bundle has so many possibilities outside of Halloween, that I had to get the bundle. Besides, the punch exactly fits the cats in the Spooky Night Designer Series Paper, a win/win situation!
This card came together in about 10 minutes and would be a great one to make multiples of to send to your family and friends. I stamped the cat-shaped words onto Smoky Slate cardstock and punched it out with the Cat Punch. I fussy cut one of the hats from one of the Spooky Night Designer Series Paper patterns, die cut a circle from one of the other patterns, and used a Stitched Shape circle die to cut a circle from Very Vanilla cardstock. The greeting is from the stamp set.
To order the supplies you need to create this card, just click on the images below to be taken to their place in my onliine store. If you enter this host code Z2CTPN2C in the lower left corner of your order screen, I will send you a gift. If your order is $150 or more, don’t use the code as you will be your own host.
The 2017 Holiday Catalog Is Live!
September 1st was the beginning of the 2017 Holiday Catalog sales period and I am so excited to share with you some of the many very cool stamps, papers, and accessories to be found between the covers of this catalog. You can download it here or better yet contact me so I can send you a free catalog for you to hold in your hands and pour over until it gets dog-eared. This video by Stampin’ Up! will give you a peek at some of the products. Check it out!
Let the Holiday Stamping Begin!
As a demonstrator, I was able to preorder stamp sets and supplies from the 2017 Holiday catalog. I finally finished a scrapbook of our granddaughter’s four years of college and am now able to begin making cards for the upcoming holidays.
The card pictured above is one of the cards we made in my August Christmas Card Class. If you missed the class, you will be able to join us on September 17th at 2 pm for the September class. We will also have one in October and November. Be sure to watch for the dates of those classes.
Do you notice the subtle sparkle in the swirl of stars? I mixed gold embossing powder and gold glitter in about a 50/50 amount. When embossing this mixture, it takes a little longer because the glitter deflects some of the heat away from the embossing powder. I positively am in love with the tree dies from the Card Front Builder Thinlits. The thinlits are bundled with the Carols of Christmas stamp set for a 10% savings. I hand cut the slope of the snow from Shimmer paper.
To order the supplies I used for this card, click on the images below to be taken to their location in my online store.
Reminder to Use Your July Bonuses by Aug 31st
Time to Redeem!
If you spent $50 or more on Stampin’ Up! supplies in July, you have until August 31st to redeem those coupons. Stampin’ Up! would have sent you an email in July with a $5 coupon code number for each $50 you spent in product to use on any purchase in August. Unfortunately, if you lost that email, I can’t help you get the code back.
Getting Ready!
Yep, I have a copy of the upcoming 2017 Holiday catalog. Actually I have lots of copies of it and am ready to give them away. How else would you know about all the exciting new stamps,thinlits, designer series papers, and embellishments Stampin’ Up! has selected for us to enhance our fall and winter creativity. You know you need your own copy to pour over, mark-up, and purchase from! So if you don’t already have a demonstrator that feeds your rubber addiction, email me your address and phone number and I’ll get one into the mail for you. I’d love to be your source of your stamping supplies and inspiration.
But hurry, you will be able to order from the catalog September 1st and Halloween, Thanksgiving, and Christmas are coming faster than we think. It’s time to get stamping for those holidays!
The Embossing Paste Discovery Continues
I have become addicted to the Embossing Paste. Stampin’ Up! sells a set of four Pattern Party Decorative Masks (144103) to use with the embossing paste and which I have purchased but not used yet. I have been creating masks using various thinlits and cutting the masks from cardstock. By using cardstock, I feel I can just throw the mask away after using it and not have to worry about washing it immediately before the paste dries on it. I also can create all kinds of masks this way.
For this card, I cut the mask from the larger Detailed Floral Thinlits. I tinted the embossing paste with a drop of Wisteria Wonder reinker to give it a light lavender tint. While the embossing paste was still wet, I sprinkled Dazzling Diamonds Glitter on it. Unfortunately, the scan doesn’t show the subtle shimmer. I love the results but then went on to another idea.
I cut another mask with the Detailed Floral Thinlits, spread the white embossing paste, and allowed it to dry. Then I cut a second, clean mask and laid it over the embossing and sponged Rose Red, Marina Mist, Crushed Curry, and Pear Pizzazz ink on the dry paste. I love this result even more!
I have another idea using embossing paste that I will share with you in another blog post so come back again soon! When you order embossing paste from my online shop, I suggest you order at least two jars of it so you don’t run out. Click on the images below to order the supplies I used for these cards.
Embossing Paste
The 2017-2018 Stampin’ Up! Annual Catalog, introduces Embossing Paste to our arsenal of creative tools. We now have three ways to add embossing to our creations. There is the traditional heat embossing using a heat tool and embossing powder, dry embossing made easy with embossing folders and the Big Shot Die-Cutting machine, and now embossing paste.
With this paste, you temporarily stick a stencil onto your cardstock and smear the embossing paste onto the stencil. When you lift the stencil, sections of the paste are left on the cardstock. Over the next few posts, I will share different ways you can use this embossing paste. On pg. 201 of the catalog, Stampin’ Up! offers precut stencils, Pattern Party Decorative Masks (144103) and Palette Knives (142808) to use with the Embossing Paste (141979). The masks are very lovely but you don’t have to limit your creativity to what Stampin’ Up! offers. With the wide variety of dies offered, you can create your own masks.
In the card above, I used one of the dies from the O So Eclectic Bundle (wood – 145355, clear – 145356) to make a mask. I tinted the embossing paste with a drop or two of Lemon-Lime Twist reinker. I love how it came out! You can purchase the items I used for this card by clicking on the images below to find them in my online store or contact me by email.
Come back soon to see more ideas for using the new Embossing Paste.
Never Too Old to Learn New Tricks
I have been a stamper for almost 20 years and a demo for 16 but can still get excited by new techniques. I created this card using a technique like bleach stamping but used just water on the stamp. I first sponged cardstock with Real Red, Tangerine Tango, and Crushed Curry inks. Then I misted the detailed image from Flourishing Phrases with water and stamped. That’s it! This is such an easy technique! I’m not sure it has a name but I call it ghosting. Like bleach stamping, it takes a couple minutes to see the end results. I didn’t think I had misted enough water on the stamp so I misted it some more and stamped over the first image. Hence the double image. As the cardstock dried, the white showed through more. Give this technique a try. I think you will love it! To order the supplies I used for this card, just click on the images below.
Grandson’s Graduation Card
What to do for a graduation card for an eighth-grader? You make a quick card using the Large Letters Framelits, retired Pumpkin Pie Glimmer Paper, and Naturally Eclectic Designer Series Paper...easy, peasy and so quick! The letters take center front and I’m really happy the framelit set includes punctuation.
Now this particular boy did not like middle-school and was not very excited about going to graduation. So I computer-generated the sentiment on the inside. I printed it out and used the Stitched Shapes Frameiits to cut it out. The white label on a white background would not have been very impressive so I backed it with an oval of the same pattern as on the front of the card. I really love this Naturally Eclectic designer series paper. Check out all the wonderful designs in it and place your order for it by clicking on the image below. Thanks for stopping by to visit today. I invite you to grab a cup of coffee and take some time to browse through my blog. Leave me a comment so I know you have been here.
Beautiful You Grad Card
Doesn’t this woman from the Beautiful You stamp set (wood-143004, clear-143637) exude happiness and joy? I thought it would be a perfect image to use on this graduation card for our granddaughter who graduated from high school yesterday. Almost all the product used in this card is new to the 2017-2018 Annual Catalog. The background is one of the patterns in the Naturally Eclectic Designer Series Paper. I stamped the woman with Basic Grey ink onto Whisper White cardstock; colored her with Bermuda Bay, Calypso Coral (for her skin) and Daffodil Delight watercolor pencils; then fussy cut her out. The sentiment came from the Sunshine Sayings stamp set. I have fallen in love with the 1/4″ Ombre Ribbon in Island Indigo and am going to order both the Calypso Coral and Lemon Lime Twist colors on my next order.
Thanks for stopping by to visit today. If you need to order any of the supplies I used for this card, just click on the images below to find them in my online store.
Flourishing Phrases Anniversary Card
I love it when you can make a quick card from just one stamp set like Flourishing Phrases (wood – 141531, clear – 141534). Our daughter and son-in-law are renewing their marriage vows on their 33rd anniversary on Saturday. The 33rd anniversary stone is the amethyst so I used Elegant Eggplant and Perfect Plum for this card. I have not used those colors in a long time! The rhinestones were added to the card for a little bling and because there was a tiny extraneous spot of Perfect Plum ink by the top sentiment. This is a great way to cover up booboos! You can order the supplies I used for this card by clicking on the images below which are linked to my online store. Thanks for stopping by.
What Is Your Favorite Bundle in the New Catalog?
What is your favorite bundle from the new 2017-2018 Stampin’ Up! Annual Catalog? Mine is the Colorful Seasons Bundle (145348).
- It is so very versatile with all four seasons represented,
- The stamp set Colorful Seasons is a photopolymer set, my favorite type.
- I love the greetings.
- The Adirondack chair, leaf skeleton, and snowflake dies are wonderful!
You will be seeing many cards created with this bundle. The one at the top of this post is the first. You can order the supplies for this card by clicking on the images below.
The New Stampin’ Up! 2017-2018 Catalog Is Live!
I am so excited that we can now order from the new 2017-2018 Annual Catalog! While we demos can place a preorder for certain items, there were several other things I have been patiently waiting to order. Yep…I placed my first order today. Check out these videos from Stampin’ Up! that shows a few products in the new catalog. Then contact me so I can send you your own copy of the catalog for free!
Thanks for coming by to visit. Leave a comment below with your favorite item from the new 2017-2018 Stampin’ Up! Annual catalog.