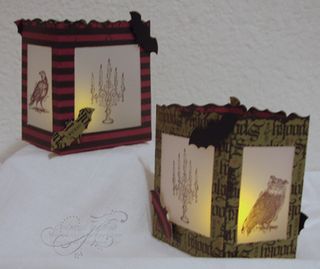
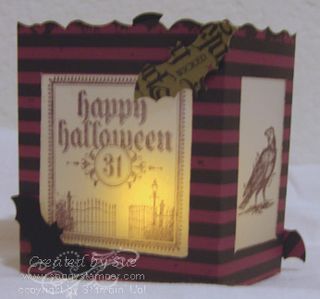
Here is a special decoration you can make to add the Halloween spirit to your bathroom or window sill. It is easily made in an evening by using Stampin' Up!'s Fancy Favorite die and designer paper. You can make more for each season of the year by changing out the designer paper, inks, and stamps. Use a battery operated tea light for that special glow.
Stamp set: Dark and Dreary (120837 wood, 121151 clear mount)
Paper: Wicked Fun Specialty (117400), Paper Velum (101839), scrap of Basic Black card stock
Ink: Craft Basic Black (102192)
Other: Big Shot Die-Cutting Machine (113439), Fancy Favor die (115965), Bitty Bat Large punch (119279), Stampin' Dimensionals (104430), 2-Way Glue Pen(100425), Paper Cutter (104152)
Directions:
- Cut out the Fancy Favor box from a piece of the Wicked Fun Specialty paper. Trim the tab along the side of the box to 1/4" wide.
- Cut a piece of scrap card stock 2 1/4" by 2 1/4" and a piece 1 1/2" x 2 1/4" to use as templates for the cutouts.
- Lay the Fancy Favor die cut down on your work space with the scored side up. Center the 2 1/4" square piece of card stock between the score lines on one of the wide sides of the box and trace around it. Repeat on the other wide side. Center the 1 1/2" x 2 1/4" template on one of the narrow sides of the box and trace around it. Repeat on the other narrow side.
- Use the paper cutter to cut out the traced shapes.
- Cut two pieces of vellum 3" square and two pieces 2" x 3". Stamp desired images in center of each piece of vellum with Craft Basic Black ink. Allow ink to dry thoroughly.
- Adhere vellum on inside of box centering the images and using 2-Way Glue Pen.
- Fold the box on all score lines and crease with a bone folder. Use 2-Way Glue Pen on tab and glue the open side together. Fold in the two shorter tabs of the bottom. Put glue on both of the larger tabs and fold them in pressing the bottom together by putting your fingers inside the box.
- Punch out two Bitty Bats from Basic Black card stock and two from the designer paper. Adhere them to your luminary with Stampin' Dimensionals.
- Add a flameless tea light inside the box and enjoy!


