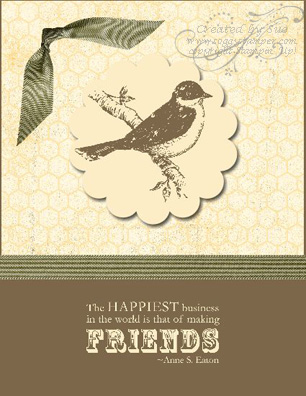
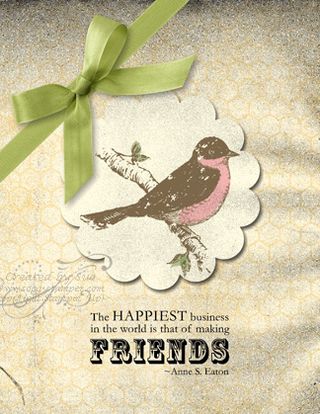
I am on the design team for Utah Divas International My Digital Studio Monday and we are supposed to be designing digital cards with My Digital Studio with the beginner in mind. Ooops! I got so involved with creating my card, adding a layer here and a spot of color there, that I forgot it was supposed to be for a beginner. So I created the same card using just very basic techniques.
For the basic card I started with a base color of Soft Suede. I stretched the square punch to cover about 2/3 of the card and filled it with one of the patterns from Botanical Gazette Designer Series Paper. I added a strip of Always Artichoke Seam Binding over the bottom of the designer paper. I filled the scallop circle punch using the color picker and picking one of the colors in the designer paper. I added a drop shadow to the punch so it stood out. I stamped the bird from the Friends 24/7 Stamp Brush Set onto the scallop circle and colored it with Soft Suede. Next, I stamped the verse from Friends 24/7 on the soft Suede bottom of the card and used the color picker to match the print with the scallop circle. Finally I added an Always Artichoke seam binding knot.
In the stepped up card, I skipped the Soft Suede base and applied the Botanical Gazette Designer Series Paper directly on the base. I filled the scallop circle with Very Vanilla and again stamped the bird with Soft Suede. I used the oval punch to add Blushing Bride to the bird's breast and neck. After I got the ovals in place I moved them backward so the soft suede stamp was in front. Again I added a drop shadow to the scallop circle. I used a leaf punch from Blossom Petals Punch filled with Wild Wasabi to color in the leaves. The next layer I added was Vintage Overlays Texture 8 Stamp Brush to add some antiquing. When I stamped the verse from Friends 24/7, it was difficult to read on top of the designer paper so I placed an oval punch filled with color picked from the background paper behind the verse. I reduced the opacity until the edges of the oval pretty much blended into the background. Finally I placed Pear Pizzazz Seam Binding diagonally across the corner and added a bow.
The simple card was very quick to design…maybe because I did the stepped up one first and didn't need to experiment with design. I like both cards but the stepped up one is my favorite. Which card do you like best? Leave me a comment. The design process was so much fun and so satisfying. To purchase the files I used, just click on the item numbers and the link will take you to my online store. If you don't own My Digital Studio yet and are dying to try your hand at digital creating, just click on the link.
Stamp Brush Set: Friends 24/7 (118829)
Vintage Overlays (121061)
Papers: Botanical Gazette Pattern 6 (122169)
Other: Square, scallop oval, and plain oval punches (part of Punch Shapes 118853)
Blossom Petals Punch – leaf 2 (124018)
Pear Pizzazz Seam Binding from Seam Binding II Ribbon Pack (124020)
Thanks for coming to visit today. Here is your virtual cup of coffee or tea  to enjoy while you browse. Do come back again soon.
Happy Stamping,
Sue Erickson
sue@soggystamper.com


