Sweet Days of Autumn Bundle

The Sweet Days of Autumn Designer Series Paper can not only be purchased by itself but also as a Sweet Days of Autumn Bundle which includes a coordinating sticker sheet.
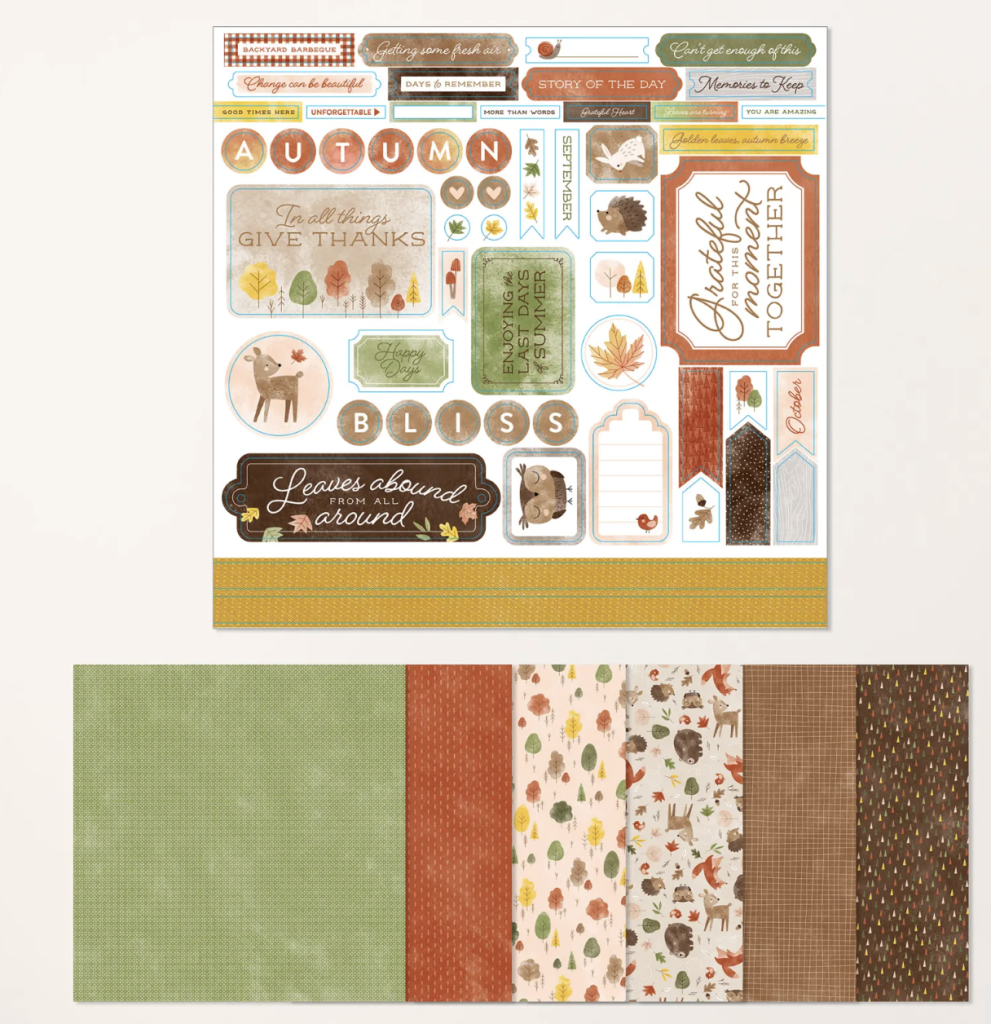
photo is of the Sweet Days of Autumn Bundle with a sticker sheet

This Sweet Days of Autumn bundle is perfect for scrapbooking as it includes four double-sided sheets each of three combinations. There is one combination of the trees on one side and darling forest animals on the other. (Too bad the reverse of each pattern wasn’t a neutral pattern.) The stickers quickly add details to a scrapbook page.

One year we flew to Boston from Seattle to view the famous fall colors in New England. Unfortunately the day we flew in, there was a huge storm with lots of wind and all the red leaves blew off the trees. What a disappointment! However the low bush cranberry fields were still in glorious reds. I used the stickers on this simple page of some of the photos taken on this trip. I computer generated the ‘New England’ and my journaling.
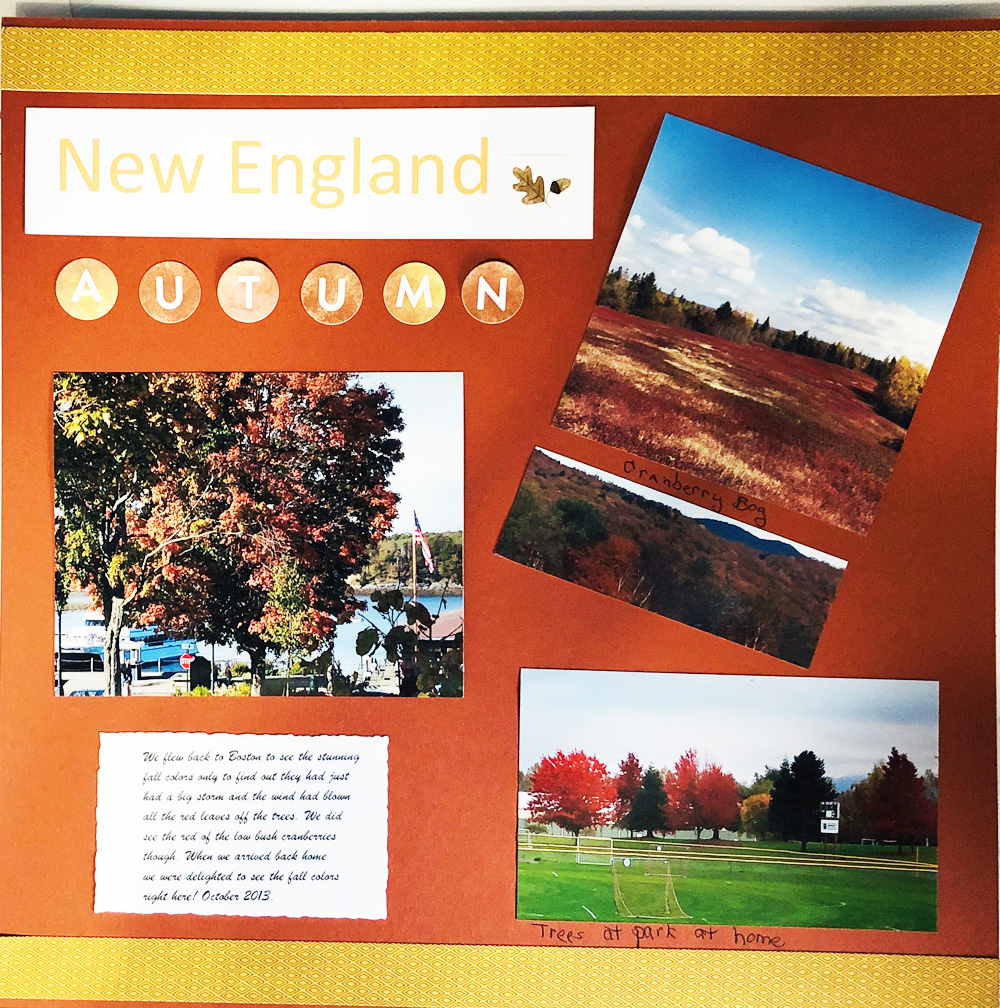
scrapbook page using the coordinating sticker sheet to the Sweet Days of autumn dsp

However, the Sweet Days of Autumn bundle is useful for quick greeting cards. I made this card in about 5 minutes and I think you will be able to as well.
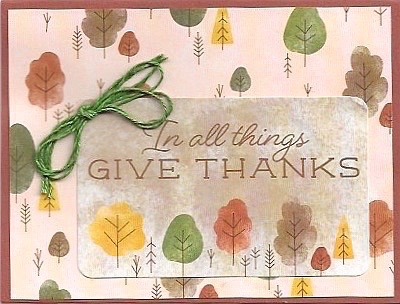
SUPPLIES USED

  • Copper Clay Cardstock [CS] (161721) 8 1/2″ x 5 1/2″ scored and folded at 4 1/4″
  • Basic Beige Cardstock [CS] (164511) 5 1/4″ x 4″ for inside of card
  • Sweet Days of Autumn Designer Series Paper [DSP] (166498) 5 1/4″ x 4″
  • Natural Tones Linen Thread (164071) about 36″
  • Sticker from Sweet Days of Autumn coordinating sticker sheet
  • Stampin’ Seal (152813)
  • Mini Glue Dots (103683)

INSTRUCTIONS

  • Fold Copper Clay CS in half for card base.
  • Adhere the DSP to card front with Stampin’ Seal
  • Apply the label from the sticker sheet
  • Fold the linen thread into thirds and tie a bow.
  • Use a mini glue dot to adhere to bow to the card front.
  • Stamp a greeting on the Basic White cardstock if desired and adhere to inside of card.
  • For your convenience, I have a shopping cart ready with these supplies in my online store. Click here to access the shopping cart. Thank you for your business.

Nests of Winter Diamond Box

Nests of Winter Diamond Box

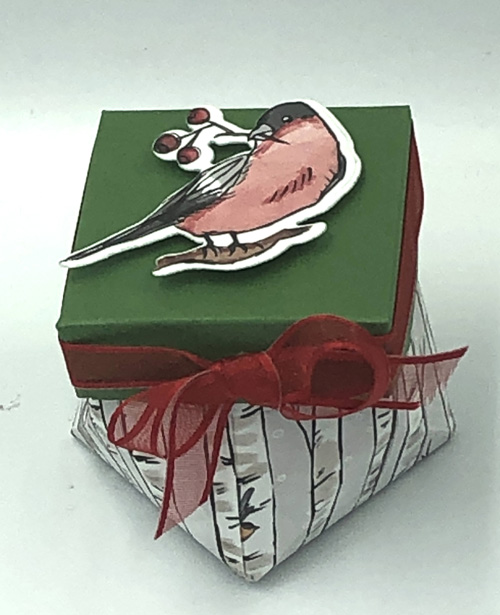
I love making little boxes and this Nests of Winter Diamond Box is one of the cutest boxes I have made. It measures about 2 3/4″ square by 2″ high and is the perfect size to hold a lovely big piece of chocolate. I made it using the beautiful Nests of Winter Designer Series Paper which is in the September – December mini catalog available September 3. i made the lid from Garden Green Cardstock. Unfortunatel, I can’t show you a picture of this dsp yet because I have cut up several of the pieces already.

Also included in the Nests of Winter Suite is the Winterly Tree Tops bundle. I love how the dies have a die for cutting out two different birds that are part of the stamp set but also cut out the birds of one of the designs in the dsp. Stampin’ Up! is offering more and more of this coordination so that if you are in a hurry or don’t like coloring, you can still use the images inyour creations. That is how I got the bird on the lid of the box.

Supplies

  • Nests of Winter Designer Series Paper – 8 1/2″ x 3 3/4″ plus scrap that has the large bird – available Sept 3. To make this box now use any other designer series paper or cardstock.
  • Garden Green Cardstock – 3 1/2″ x 3 1/2″
  • Basic White Cardstock – scrap to reinforce the die-cut bird
  • Multipurpose Liquid Glue
  • Tear & Tape
  • Mini Glue Dots
  • Stampin’ Dimensionals
  • Paper Snips
  • Paper Trimmer
  • Winterly Tree Tops Dies
  • Stampin’ Cut & Emboss Machine or the mini one

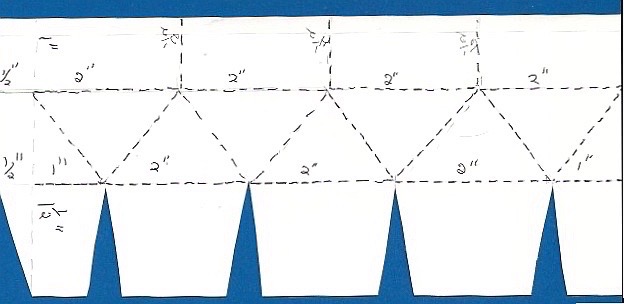
Template for Nests of Winter Diamond Box

Template for Diamond Box

Once you have all the materials ready, craft along with me. You can pause the video when you need to catch up.

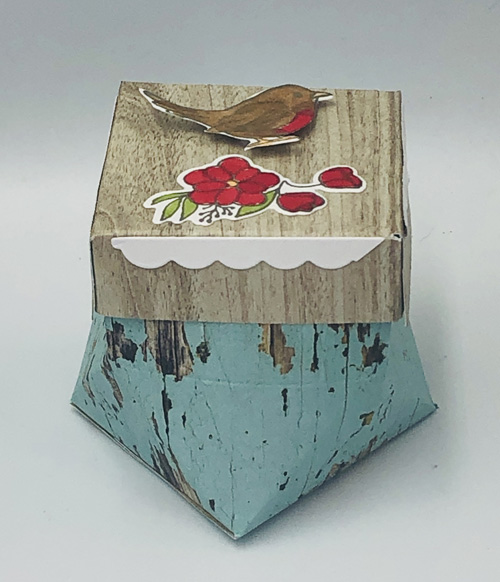
Here is another example of the diamond box created with Country Woods Designer Series Paper and Country Birdhouse Bundle. Enjoy!

Diamond box created with Country Woods Designer Series Paper.

Since you have only today and tomorrow to earn $5 coupons to be used in August, why don’t you order this Country Woods Designer Series Paper (163393) and the Country Birdhouse Bundle (163401) right now to make this cute diamond box.

Awesome Offer at Stampin’ Up!

There is not just one awesome offer this week at Stampin’ Up! but three. Check them out!

photo is of Free Shipping today only. An awesome offer at Stampin' Up!

Today, July 23, Stampin’ Up!, get free shipping on orders of $75 or more before shipping and taxes. Take advantage of this awesome offer at Stampin’ Up! right now. Orders need to be entered by 11:59 pm Mountain time.

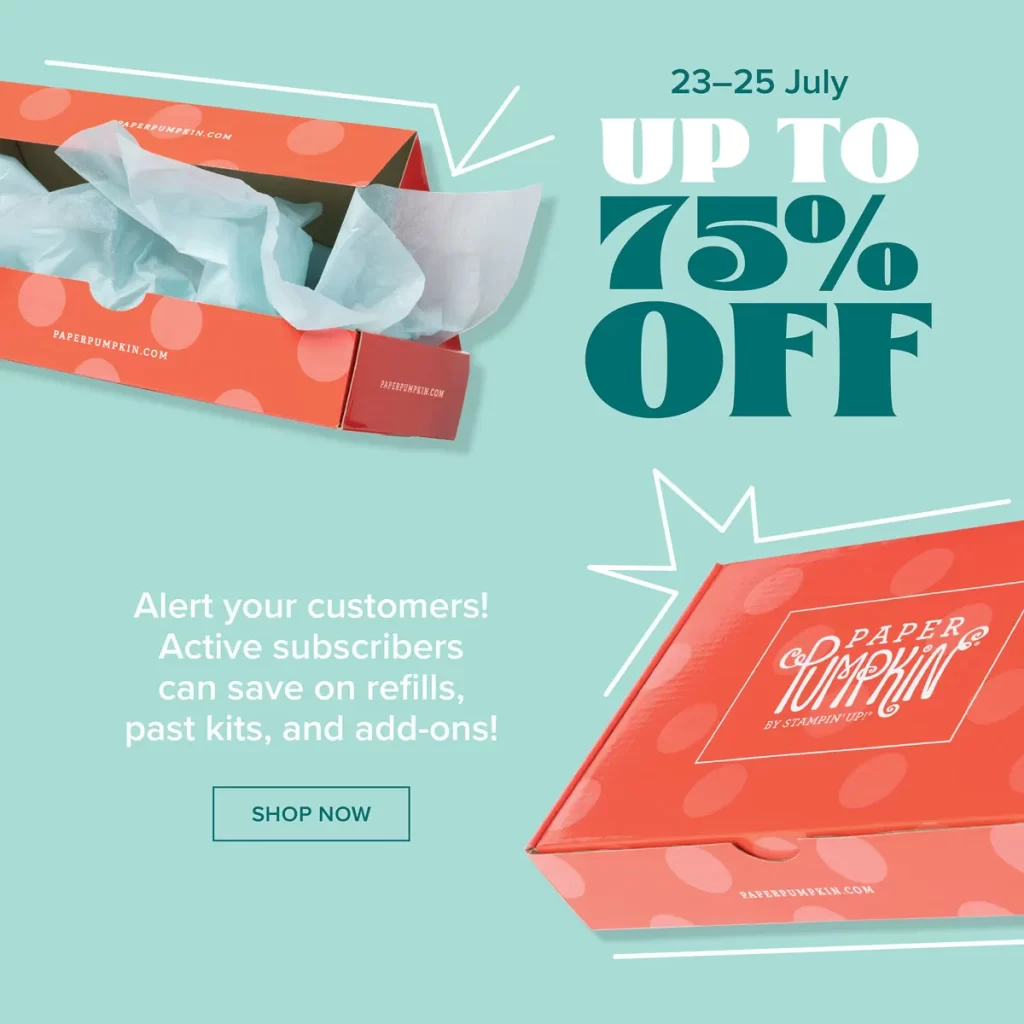
banner showing an up to 75% off on retired and refill Paper Pumpkin kits. Such an awesome offer!

A second awesome offer at Stampin’ Up! this week is this sale on refills, past kits, and add-ons of the Paper Pumpkin. You have to be an active subscriber to take advantage of this sale. Not a current subscriber? Subscribe now and start shopping. What you buy on this sale qualifies you for free $5 coupons.

photo shares information about the July Bonus Days awesome offer at Stampin' Up!

The third awesome offer at Stampin’ Up! this month is the Bonus Days offer. For every $50 you purchase in product during July, you get a $5 coupon to be redeemed on purchases in August. This is the last week of this promotion. This is a 10% discount on your purchases to be applied to purchases in August. Shop now and start earning those coupons.

So there you have it. Three reasons to order those stamps, bundles, papers, etc. that have been on your list and order today.

So Simple Back Fold Card

So Simple Back Fold Card using Full of Life Designer Series Paper and Hey Chuck stamp set

This so simple back fold card makes me smile and it was so easy to make. I used the Full of Life Designer Series Paper and the retired Hey Chuck stamp set to create a graduation card for the son of very special friends. On the inside I will hand write our sentiments. I demonstrated this card tonight on my Facebook Live on my Soggy Stamper Facebook page. The replay of the video is further down in this post. I promised I would post the measurements and scoring dimensions for the card so here goes.

Cutting and Scoring Measurements

  • Hey Chuck stamp set – retired
  • Summer Splash Cardstock (163797)- 7 1/2″ x 5 1/2″ scored at 3 1/4″ and 6 1/2″
  • Basic White Cardstock (159276) 5 1/4″ x 3″ for inside, 3″ x 2 1/4″ for label
  • Full of Life 6″ x 6″ Designer Series Paper (163357) 5 1/4″ x 3″, 5 1/4″ x 3/4″
  • Click here for a shopping cart with all the needed supplies. You can remove any you already have.

Alternative Card for So Simple Fold Back Card

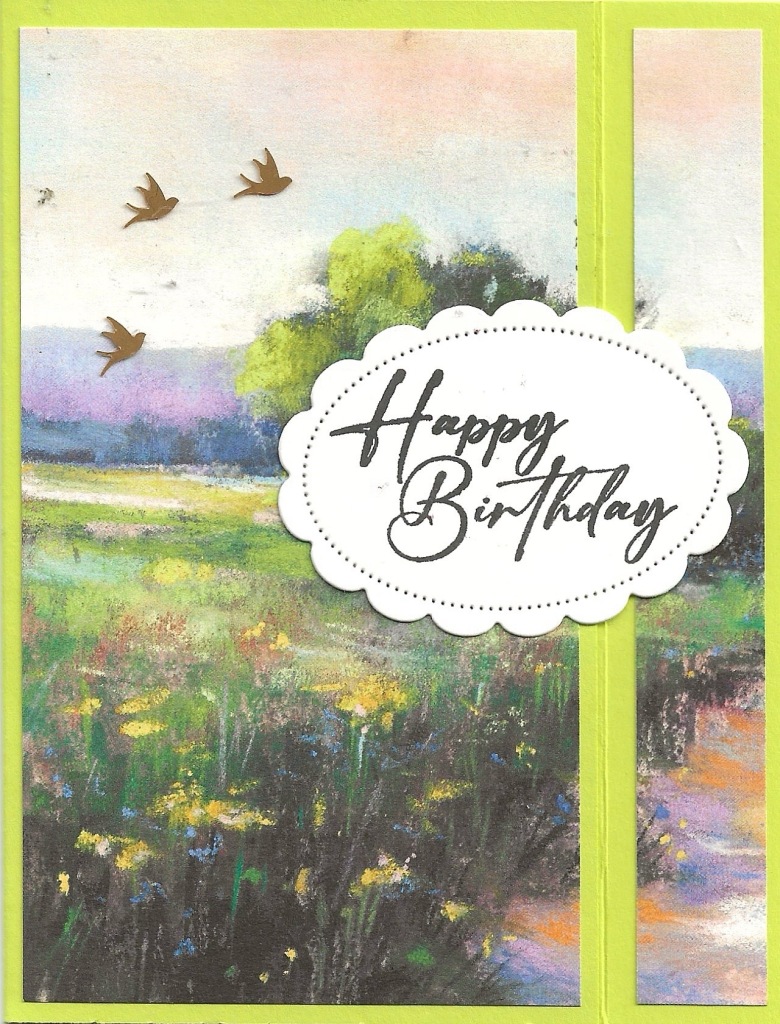
So Simple Back Fold card using Meandering Meadow dsp

For this card I used Meandering Meadow Designer Series Paper (162735), Lemon Lime Twist Cardstock (144245) and Basic White Cardstock. I used the Unbounded Love Bundle (163384) for the greeting. The cutting measurements and scoring dimensions are the same. I added three brushed Brass birds (162743) for some bling. To order these supplies click here.

When you have gathered up your supplies to make this so simple fold back card, stamp along with my video.

I Sure Will Miss The…

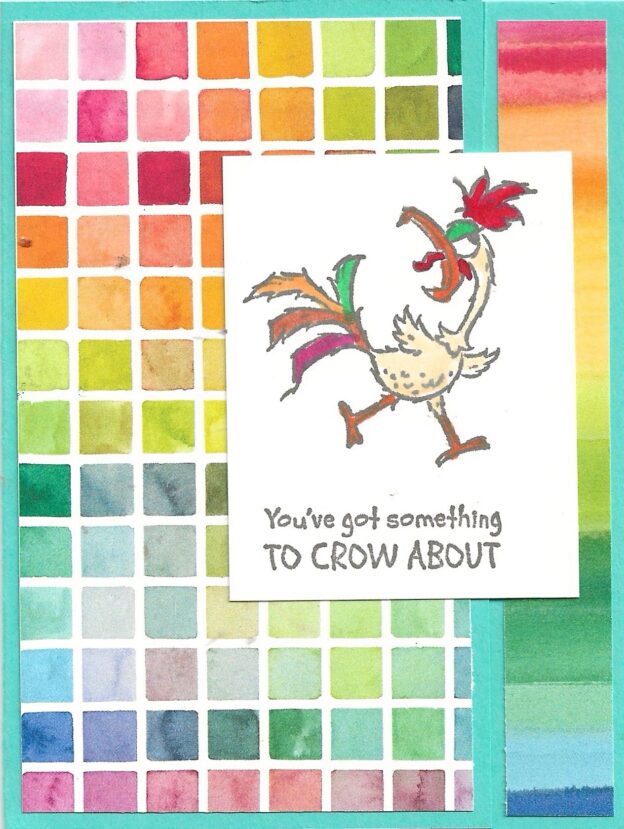
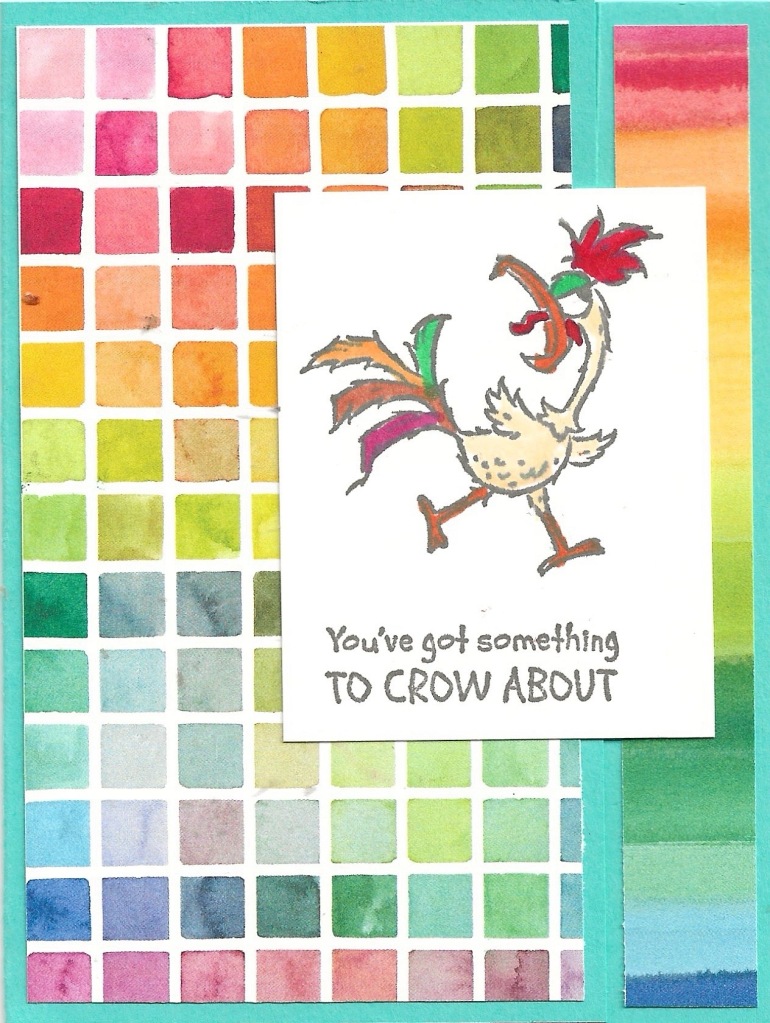
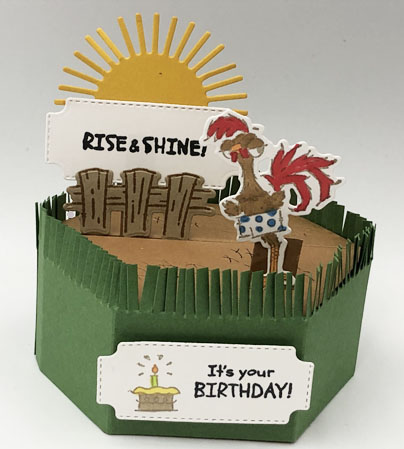
I sure will miss the funny Hey Chuck bundle. The Hey Chuck bundle works so well with the Hey Birthday Chick Bundle and the Hey Chick bundle that are already retired. The Hey Chuck stamp set has already sold out but the dies, Hey Chuck Dies (161552) are still available. If you have the stamp set but not the dies, snap them up now! They are on sale. These are my favorite cards using Hey Chuck.

Birthday card created with the Hey Chuck bundle which I sure will miss
Another sample created with the Hey Chuck bundle which I sure will miss.

I just checked my online store and only the dies of this bundle are still available. If you have the stamp set and did not get the dies, you NEED to get the dies right away! In three days they will be retired. On May 1, the only way you will be able to get them is on the secondary market. Click here to order them.

It’s Your Turn. Complete this Sentence. I Sure Will Miss The…

Complete this sentence in a comment. Thanks!

Making Space for the New

Banner that announces the Last Chance Products Sale April 9-30

Stam[in’ Up! is making space for the new products that are in the new 2024-2025 Annual Catalog. Some of the items are on sale at a good discount but most are at regular price. The important thing is that for even products that are being carried over into the new catalog, the bundle prices will be discontinued. You can see the Last Chance products for the 2023-2024 Annual Catalog here and for the Jan – April mini catalog here. Check them out and make a list of what you still want to buy. I really recommend you get the refill inks for the 2022-2024 In Color ink pads because they will sell out very quickly. After April 9 I recommend you check the availability of any item by going to my online store and placing your order there.

Price Increases

Like so many companies these days, Stampin’ Up! is having to raise the price of the cardstock, ink refills, Stampin’ Blends,and other staples. Now is the time to stock up on your favorites!

Making Space for the New Catalog

Yes, Stampin’ Up! is making space for the new, and the new is very exciting! I love the organization of the new catalog. Stampin’ Up! has identified three types of stampers. There are those who just want to ‘get it done’ step by step. The kits are especially great for them because everything except for a minimum of stamping is done in advance. There are even some kits where all you have to do is punch out embellishments and glue them down. And the art work of these kits is wonderful. The recipient of one of these cards would never guess that the card was that simple to make.

The second type of stamper is one who wants to make a card quick and easy. They need a card and they need it quickly without a lot of supplies or fussing. There is a section in the catalog with this type stamper in mind and all the supplies for quick and easy card making.

Stampin’ Up! is also making space fo the new products a stamper who wants creativity their way. These stampers want to have everything and try new techniques. They want to have endless options.

Which type stamper are you? I can help you with your stamping needs no matter how you like to stamp. Just contact me!

How to Best Show Off DSP

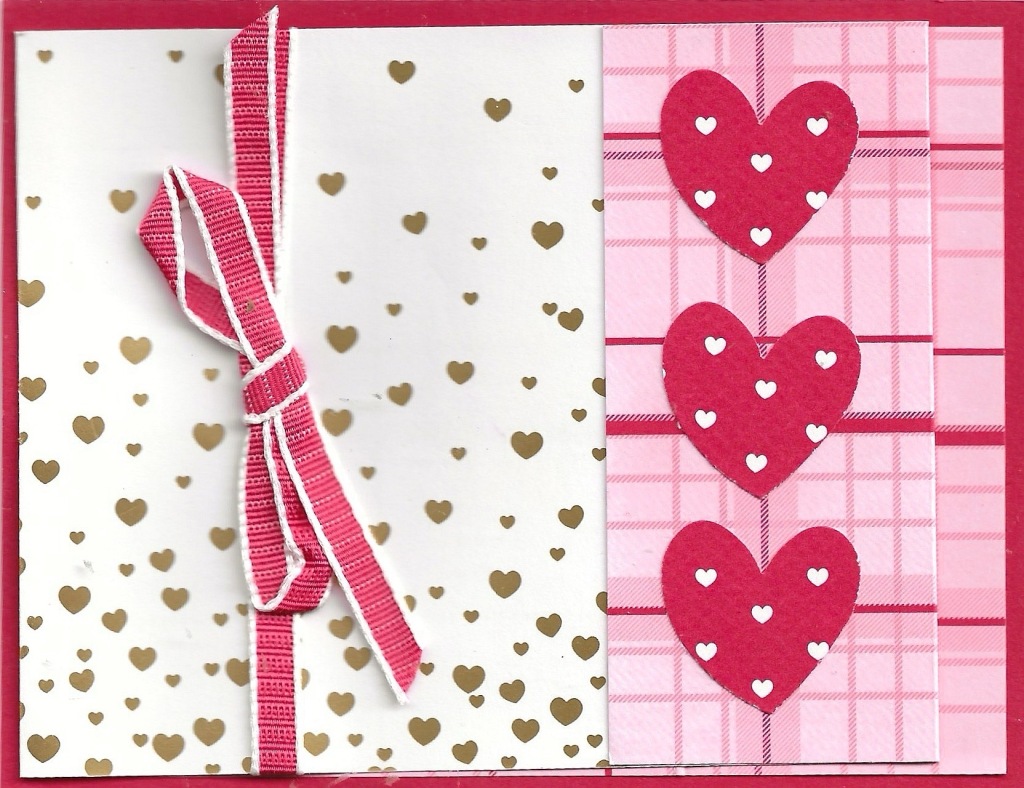
The 2024 Sale-a-bration brochure has five different beautiful designer series papers for free and the question is how to best show off dsp. Both sides are so beautiful and it is a challenge sometines to choose which one to use. This easy fun fold card shows off both sides of any designer series paper.

Valentine cardanswering the question of how to best show off dsp using Most Adored dsp

SUPPLIES for How to Best Show Off DSP

  • Bee My Valentine Bundle
  • Memento Ink
  • Real Red cardstock 5 1/12″ x 4 1/4″ – card base
  • Basic White Cardstock 4″ x 3 3/4″
  • Most Adored Specialty Designer Series Paper 12″ x 4″
  • Sweet Sorbet 1/4″ Bordered Ribbon
  • Stampin’ Seal
  • Paper Trimmer
  • For your convenience, click here to go to a shopping cart in my online store filled with the above items. Any items you already have can be deleted.

Instructions for How to Best Show Off DSP

  • Score the Most Adored Specialty Designer Series Paper at 5 1/4″ and 10″. Make Valley folds at both score lines.
  • Adhere the 5 1/4 x 4″ section to the card base with Seal.
  • Secure the folded back flap to card front with Seal.
  • Tie a length of ribbon around the card front.
  • Punch out three hearts using the Bee Builder Punch and add to the folded back flap.
  • Stamp Happy Valentine’s Day on the Basic White cardstock and adhere to inside of card.

Now that you have created this card using your choice of dsp, share it with me. I’d love to see what you have made!

Valentine with Surprise Inside

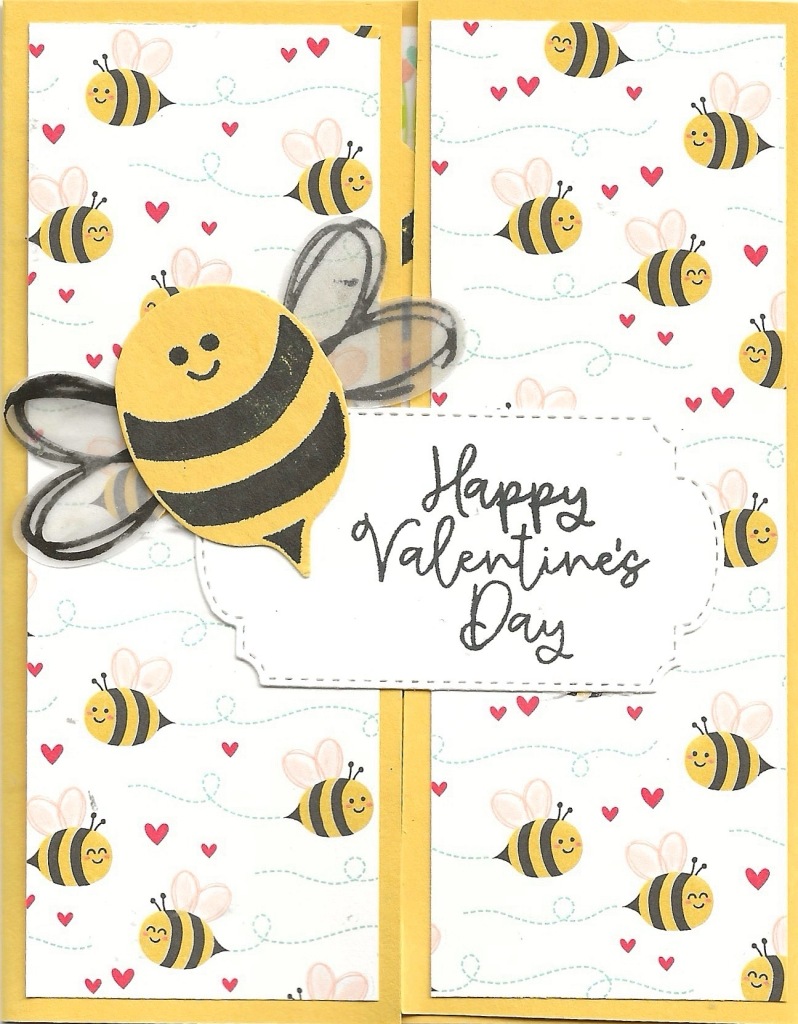
photo is of a Valentine with a surprise inside created with Bee My Valentine bundle

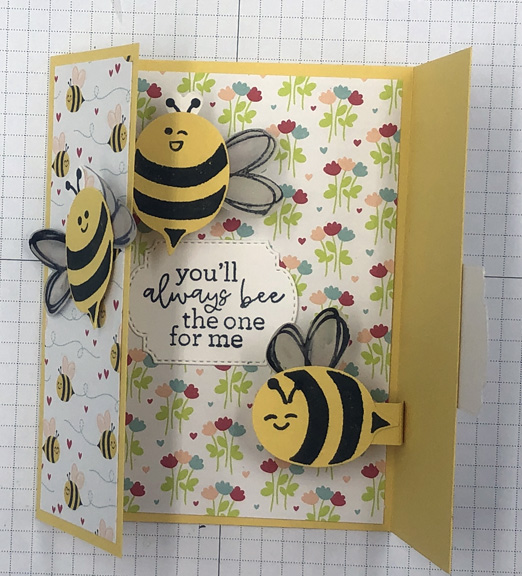
Check out this cute valentine with surprise inside. I used the Bee My Valentine Bundle and the Bee Mine designer series paper to make this card. The card front is so cute, especially that chubby, smiling bee but check out the surprise when you open the card!

image is of the Valentine with a Surprise Inside opened

Isn’t this card so cute inside. I love the way the bees popup when you open the card. It really isn’t that difficult to make.

Supplies for Valentine with Surprise Inside

Once you have gathered the supplies to make this Valentine with Surprise, stamp along with this Facebook Live I did.

Thanks for coming to visit my blog. Stay a while and explore other things I have made.

Today’s an Exciting Day

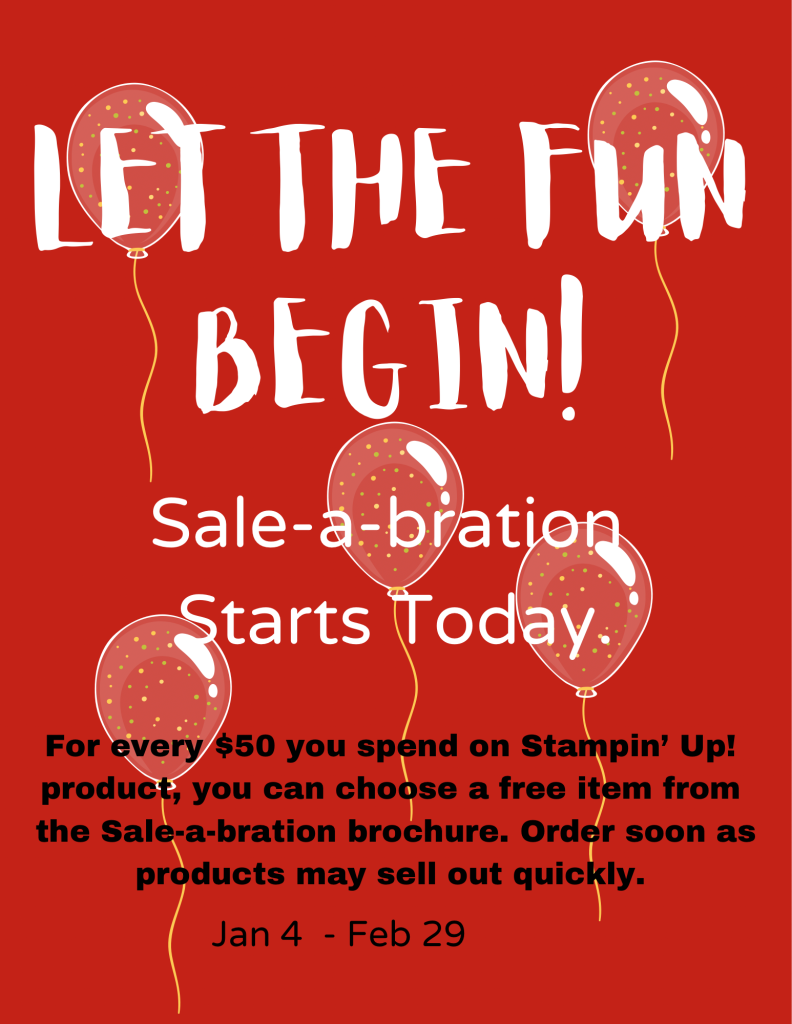
Like I said, today’s an exciting day because not only does the new Jan – April mini catalog go live, but it is also the start of Sale-a-bration! There are so many wonderful products to choose from as a free gift when you purchase $50 or more during Sale-a-bration. My favorite is the Flight & Airy designer series paper (162977). This paper will definitely sell out quickly! Order it as soon as you can.

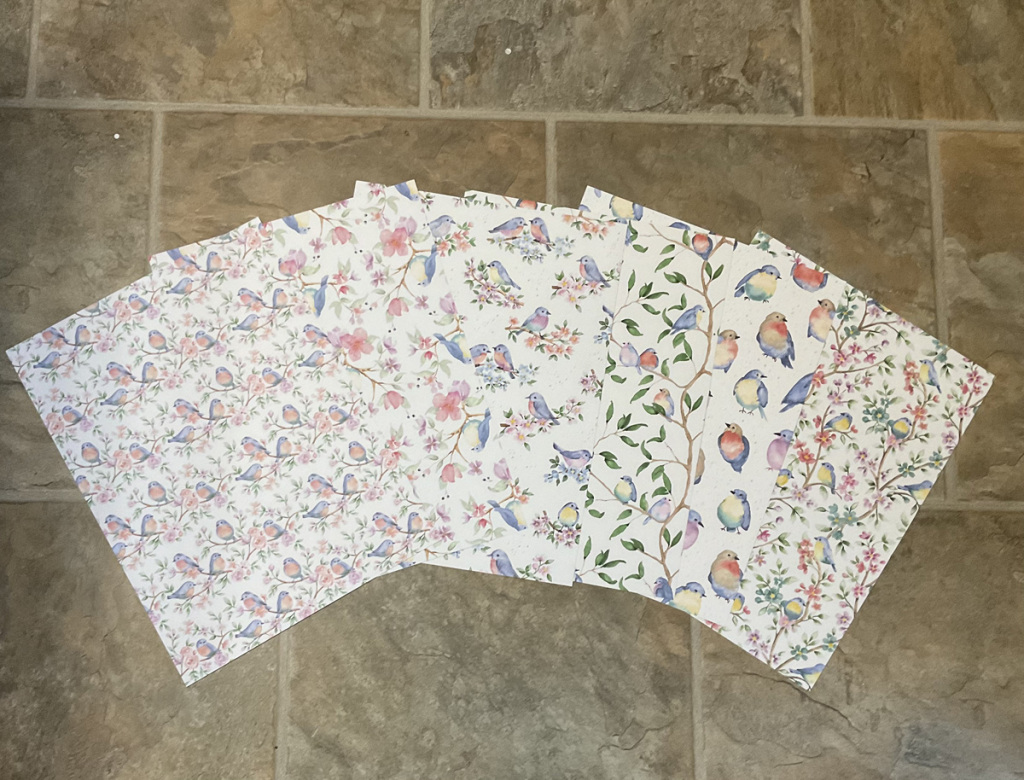
image is of the front sides of the Flight & Airy Designer Series Papers. This is another reason why today's an exciting day.
Front Side
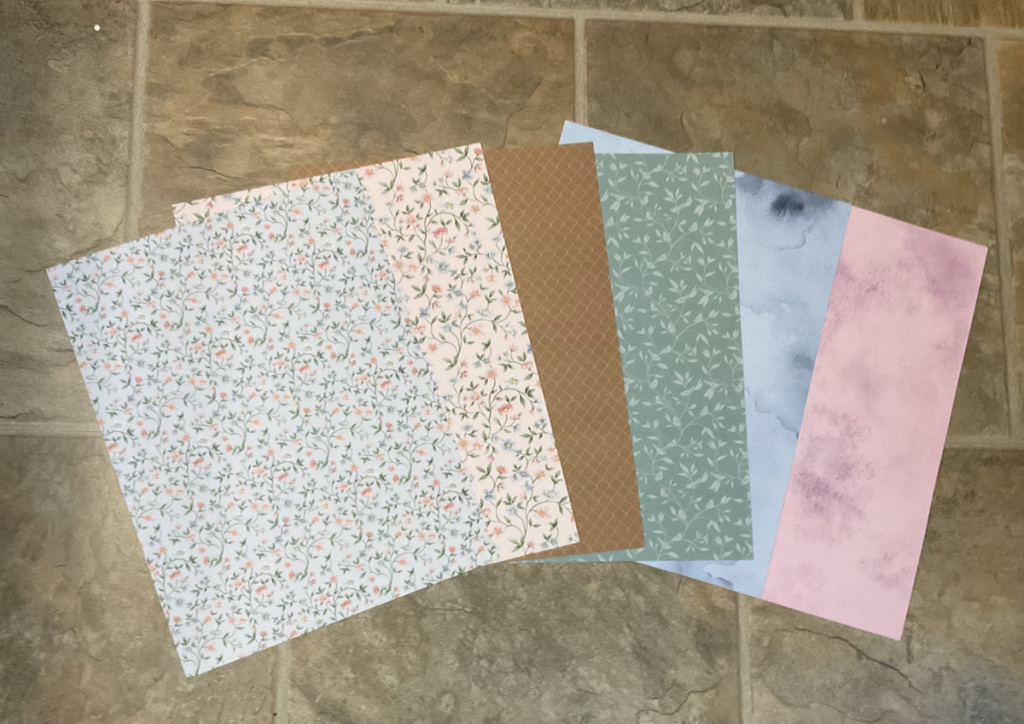
photo shows the reverse side of the Flight & Airy Designer Series Papers.
Reverse side

Today’s an Exciting Day Because You Can Earn More Free Product

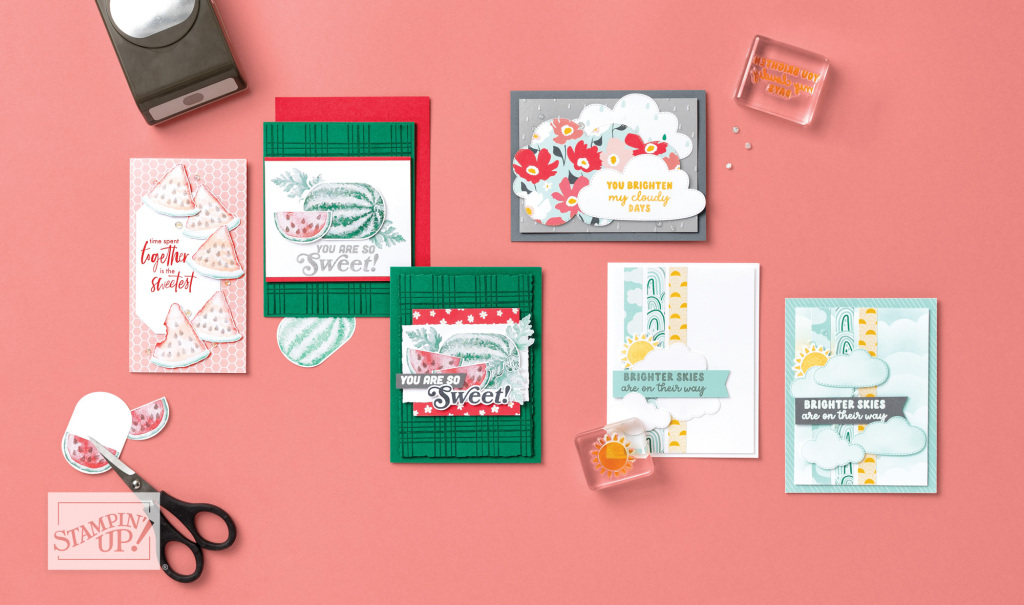
Here are images of some cards you will be able to make with items from the Sale-a-bration catalog. First up is the Watercolor Melon stamp set (162962) and Sunny Days Designer Series Paper (162974). This designer series paper coordinates with the Bright Skies Bundle (162794) which you can find in the new mini catalog.

photo shows projects made with some of the items in the Sale-a-bration brochure. It's one reason I say today'san exciting day.

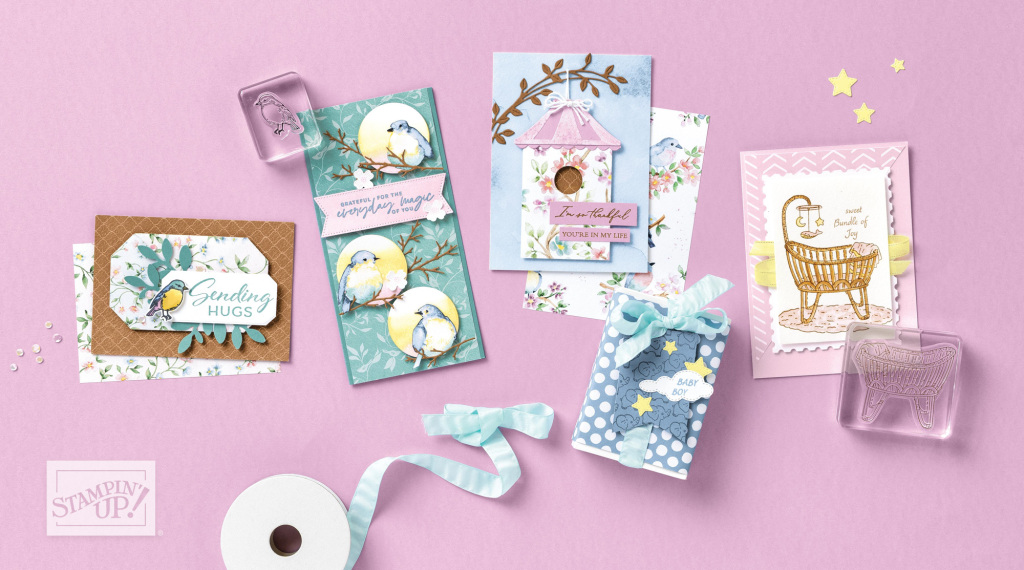
Design artists designed these samples with the Flight & Airy Designer Series Paper I mentioned above and the sweet Cradled in Love stamp set (162956).

another page from the Sale-a-bration brochure

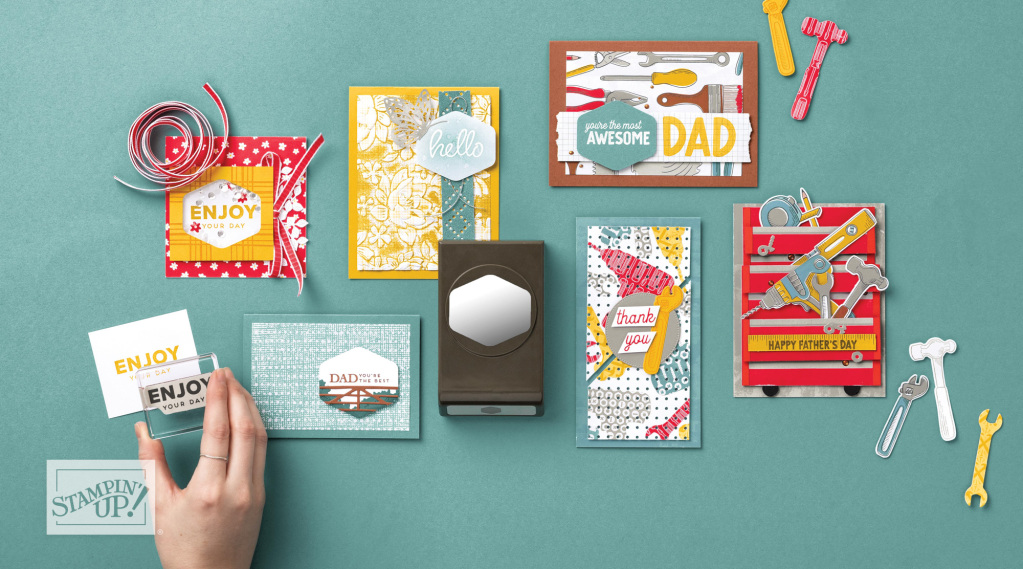
A bold font Heartfelt Hellos (162964) is another stamp set to get excited about. See it in action below. Look at what Stampin’ Up!’s design artists created with the Trusty Toolbox Designer Series Paper (162978) which coordinates with the Trusty Tools Bundle (162723) in the new mini catalog. It’s a perfect masculine combination.

a Sale-a-bration page showing projects made with the Heartfelt Hellos stamp set and Trusty Toolbox Designer Series Paper

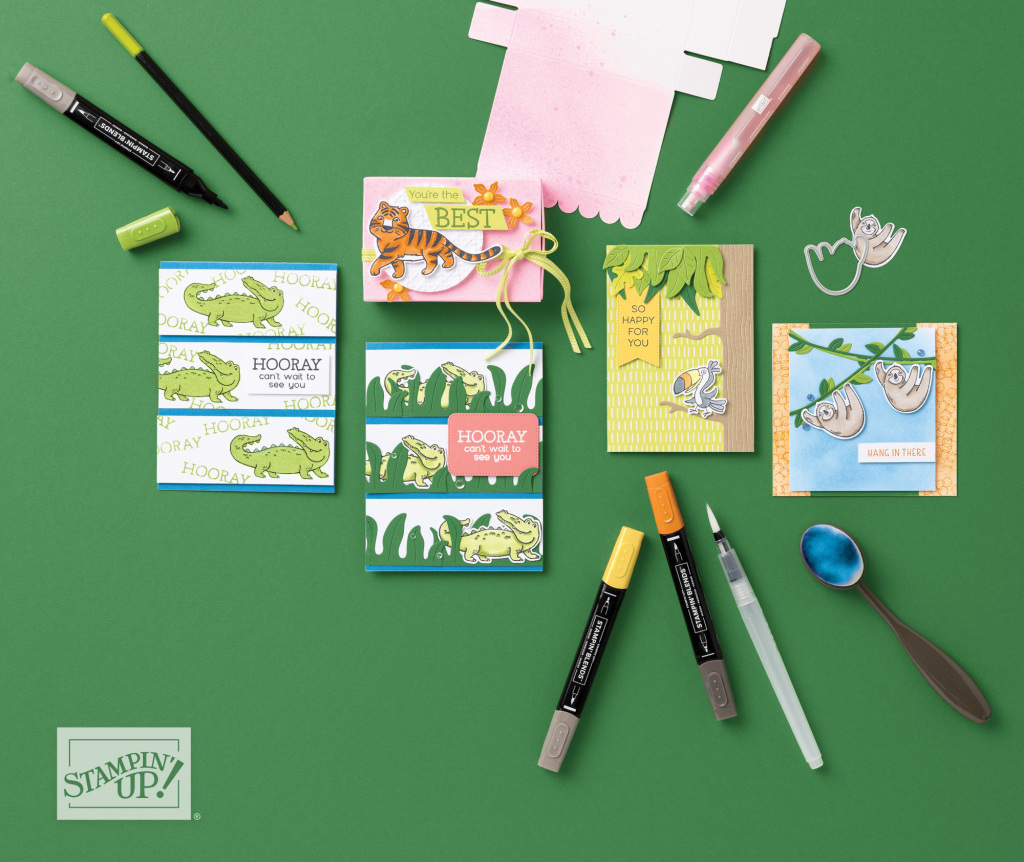
Aren’t these cute jungle animals? They are part of the Jungle Pals stamp set (162950) and a Jungle Pals die set (162973) that you can get for free with a $100 purchase.

this page from the Sale-a-bration brochure shows projects made with the Jungle Pals and Jungle Pals dies

There is even an embossing folder/stamp set bundle, Softly Sophisticated Bundle (162947) which is free with a $100 purchase. The three cards on the left were created with this bundle. On the right are three projects design artists created with the Detailed Dogwood stamp set (162953). This more detailed stamp set is also free when you purchase $100 in product.

this page shows projects made with the Softly Sophisticated and Detailed Dogwood stamp sets

Aren’t you excited about all these possibilities? See why I say today’s an exciting day? Let the fun begin! If you live in the United States and don’t already have a demonstrator, I’d love to have you as a customer. Email me, sue@soggystamper.com with your address and phone number so I can follow up with you and I’ll happily mail you a complimentary catalog.

Beautiful Flight and Airy DSP

Just look at this beautiful Flight and Airy DSP! It is gorgeous, so gorgeous! And it is free, yes, free when you purchase $50 of product during Sale-a-bration 2024! Here is the front side of the paper

photo of the front sides of the beautiful Flight and Airy dsp

and here is the reverside

photo shows the reverse side of the beautiful Flight and Airy dsp

Introducing the new Perennial Postage Bundle

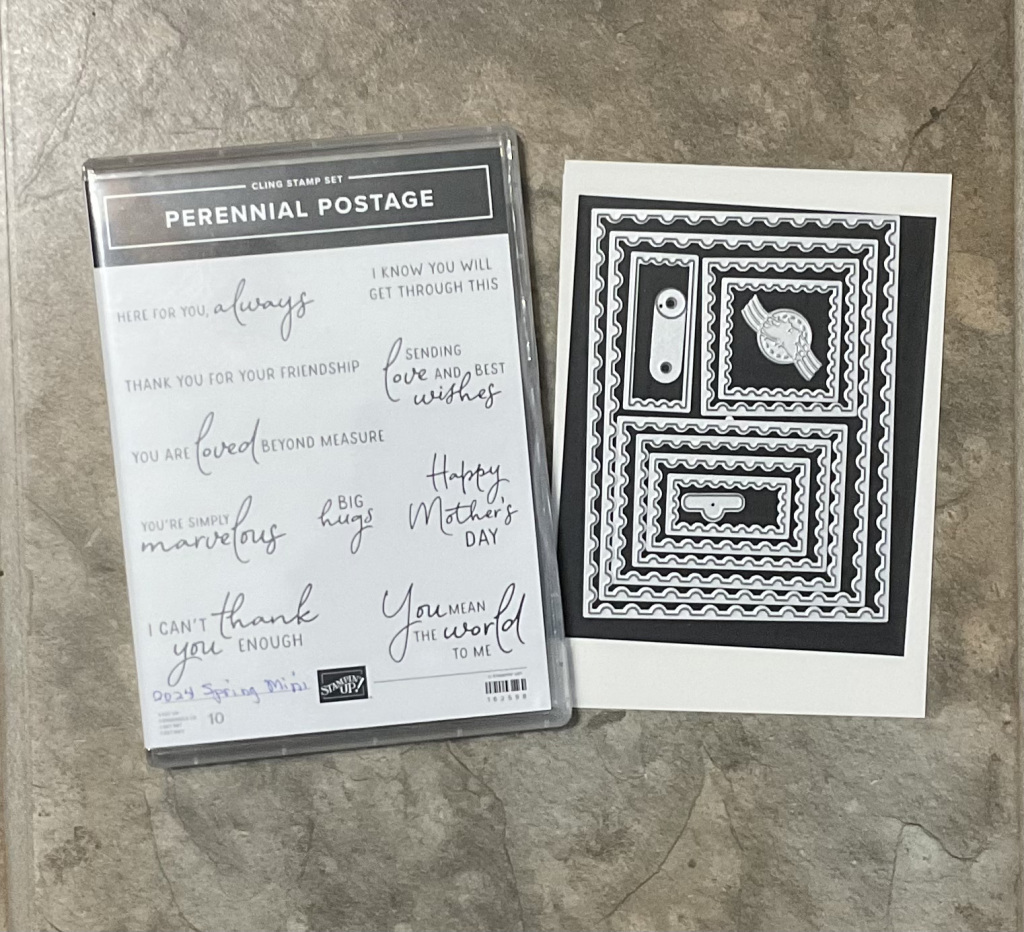
One of the bundles in the upcoming Jan – April 2024 mini catalog is the Perennial Postage bundle. I chose this to order during the Product Purchase Premiere offered to those who attended OnStage at Home earlier this month because I love the mix of fonts and the greetings are useful in so many ways. The corresponding Perennial Postage dies include a variety of sizes of rectangles with the edges cut to simulate postage stamps. They also include two hole reinforcement dies and a postmark embossing piece. This piece does not cut , just embosses. Ink it by placing it on a stamp pad and then carefully putting it on your cardstock before running it through a die-cutting machine. Combined with this beautiful Flight and Airy dsp you will have a beautiful card in no time at all.

photo is of the Perennial Postage Bundle

Cards Using the Beautiful Flight and Airy DSP

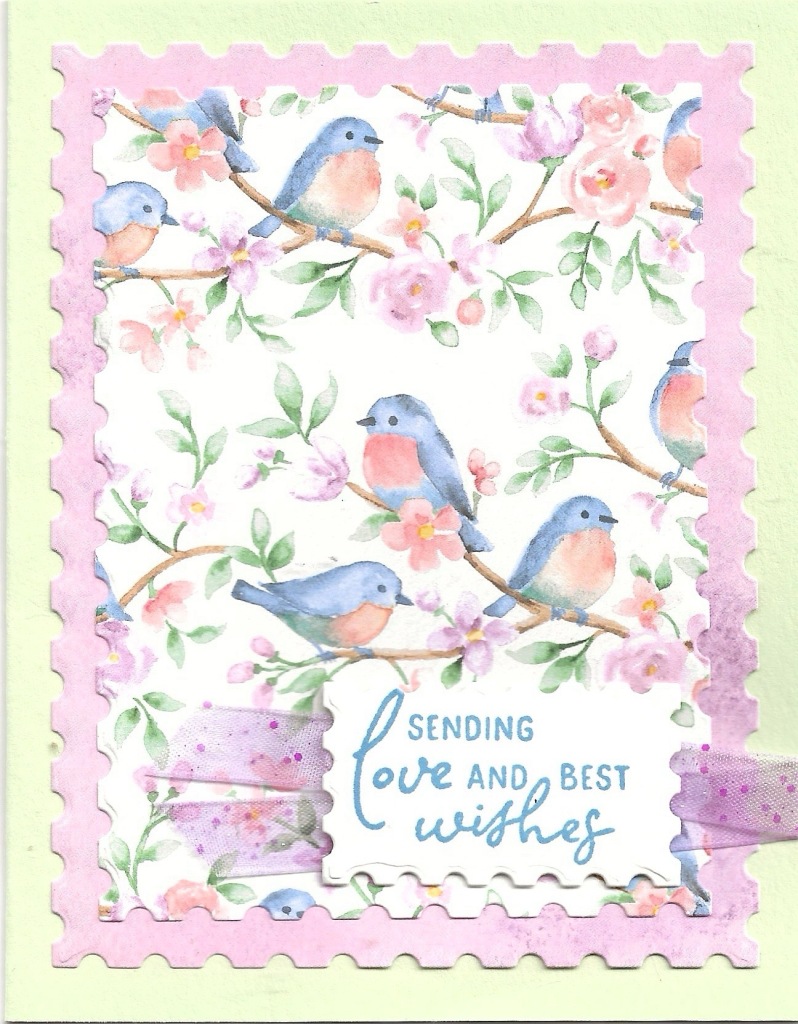
Now on to the cards I have made with this beautiful Flight and Airy DSP. Oh My! What beautiful cards you can create with it. This first card I used the largest two dies in the Perennial dies set for the backgrounds and the smallest one for the greeting. I colored the ribbon with the Dark Fresh Freesia blend. The greeting was stamped with Boho Blue ink.

Greeting card created with thebeautiful  Flight and Airy DSP

My creativity was on a roll so I created another card using Pecan Pie cardstock as the base. This time I used the reverse of one of the designs for a 5 1/2″ x 2″ strip behind the birds. I used the small square Perennial Postage die to cut them out and used a Stampin’ Dimensional to pop them up. I colored the ribbon with dark Boho Blue blend. I wish I had used the light color instead. I stamped the greeting with Pecan Pie ink.

photo shows a second greeting card created with the beautiful Flight and Airy dsp.

Which card do you like best? Leave a comment.

Have I piqued your interest in the upcoming spring mini and SAB? If you love this beautiful Flight and Airy DSP as much as I do, you will want to get your order in as soon as Sale-a-bration starts on January 4.

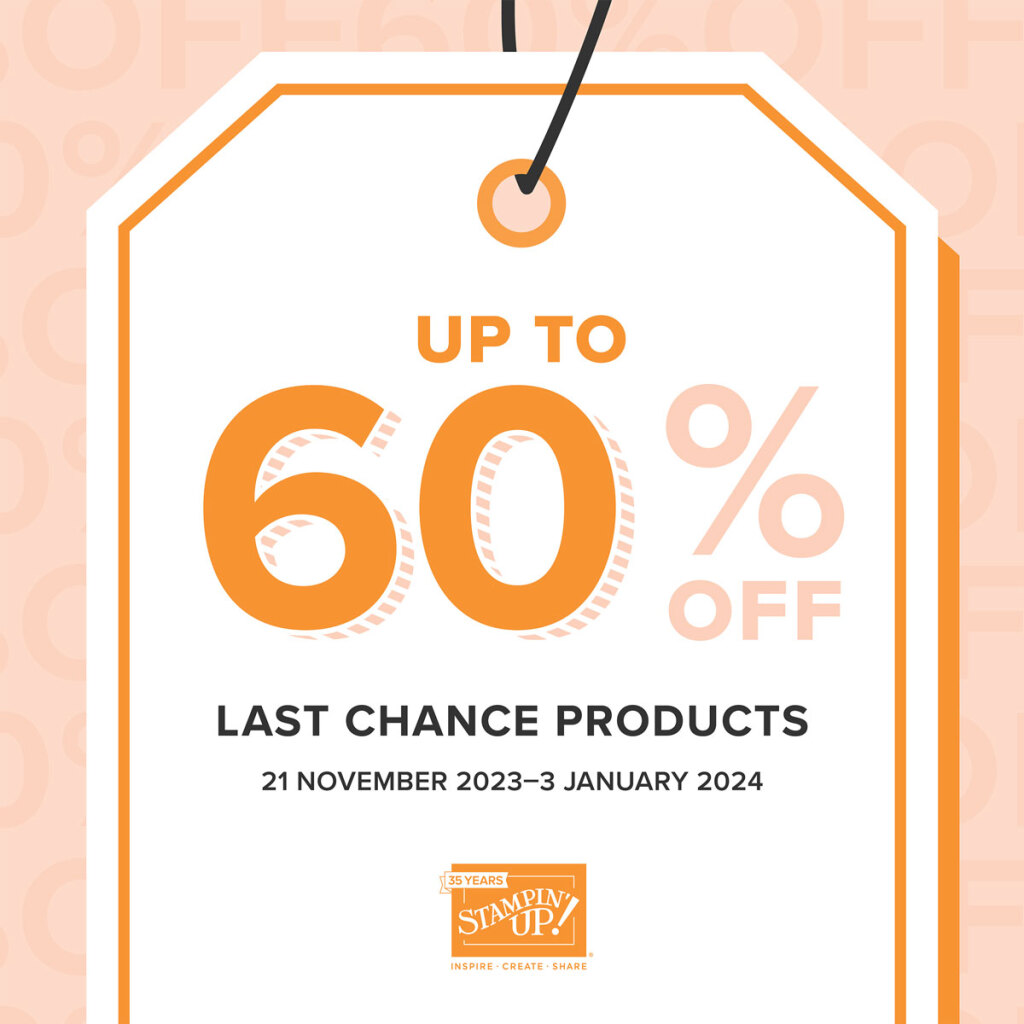
Last Chance Products Time

image is of the Last Chance Products Time

Last Chance Products Time has come. It’s necessary to move out the old to make room for the new products coming in the Jan – April 2024 Mini Catalog. Now is the time to order those stamps, bundles, papers, and accessories you have been eyeing in the fall mini catalog. A few items are carrying over to next year but most will retire. Most importantly, even those stamps and dies that carry over into the next catalog sales period will no longer be bundled together. Now is the time to order the bundles and save 10%.

Since items will sell out quickly, the best policy is to shop now while there is still inventory. You can access the Carryover list here and the Last Chance items list here. Then go over to my online store to order. That way you will know if something is still available.

My Favorite Products are Going Away During Last Chance Products Time

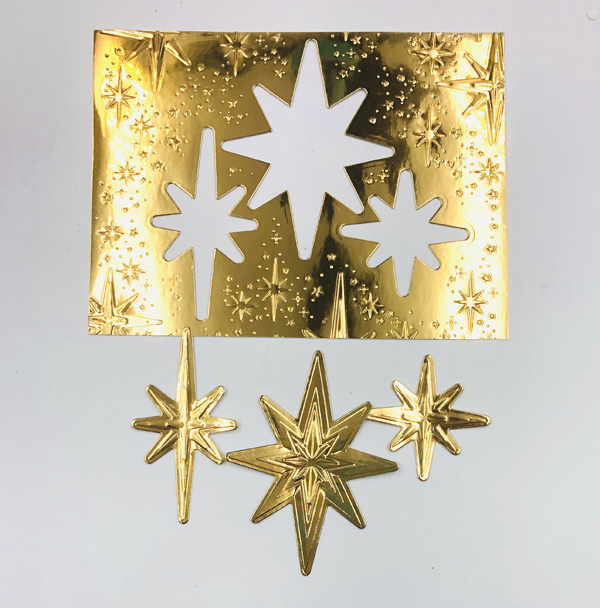
Stars at Night Hybrid Embossing Folder and Dies (162996)

image shows gold foil embossed and die-cut with Stars at Night Hybrid embossing folder

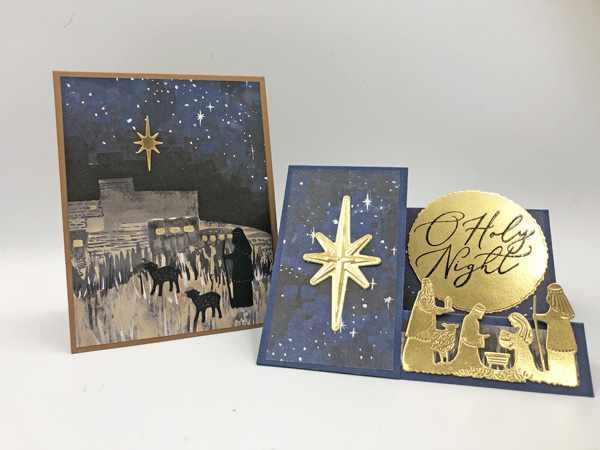
Divine Night Bundle (161997)

Two Christmas cards created with the Night Divine Bundle

and of course all the beautiful designer series papers in the catalog. The only one carrying over is the Winter Meadow Designer Series Paper (162133).

What is your favorite item from the catalog that is retiring during the Last Chance Products Time? Leave your answer in a comment below.

35% Off Starter Kit Special

35% Off Starter Kit Special banner

Stampin’ Up! is celebrating 35 years of business this month by offering a 35% Off Starter Kit Special. Yes! This is a very rare offer but it ends at midnight MDT on October 31. If you love Stampin’ Up! products like I do, you’ll want to join my team of demonstrators and start your own business.
I have been a demonstrator for 22 years and can’t imagine not being one. Here are some of my reasons:

  • Your time is flexible. You are allowed to spend as much time on your home-based business as you want as long as you meet the $300 minimum sales per quarter. There have been times when I had a lot of customers and times when I have been my best and almost only customer. Since I work part-time at another job, I don’t spend much time on my Stampin’ Up! home-based business and only make enough to cover some of my expenses. It is all up to you.
  • You get a discount. I do enjoy purchasing my products at a 25% discount and getting to purchase some of the products before the catalogs go live.
  • It’s like Christmas when a brown Stampin’ Up! box arrives. When my order of Stampin’ Up! products arrives, I feel like it is Christmas again. It is exciting to get new ‘toys’ to play with.
  • You make long-lasting friendships not only locally but even overseas. Although I don’t earn free trips and have to pay to go to On Stage Live, the three days spent with thousands of demonstrators, all excited to share with each other and to learn about new products, the event is a highlight for me. The second convention I went to was in Florida and I went by myself. While doing the Make And Takes, I met Ruthie Burkey, a demonstrator from Ft. Worth, TX. We chummed around together during the convention and in the years since have been roommates and best friends. I lived in Alaska at the time and would not have met Ruthie if it weren’t for being a demonstrator
  • It’s fun! I have fun while working and feeding my creative nature.

This 35% Off Starter Kit Special is only good for a week longer. Contact me, sue@soggystamper.com, to discuss how you can benefit from this special and from being on my team of demonstrators. You can also click this link for more information. Don’t delay. If you love card-making and/or scrapbooking this is for you!

Announcing Free Shipping Oct 9 – 11!

photo is announcing Free Shipping Oct 9 - 11! Whoohoo!

Yes! Stampin’ Up! is announcing Free shipping Oct 9 – 11! What a perfect chance to get those supplies you need to make Christmas cards and not have to pay shipping. The larger the order, the more you save on shipping. Get your order ready and then place it tomorrow on my online store. Be sure to order early. The last time we had free shipping, it took over a week for my order to be shipped due to the high volume.

Take advantage of this great offer of free shipping tomorrow!

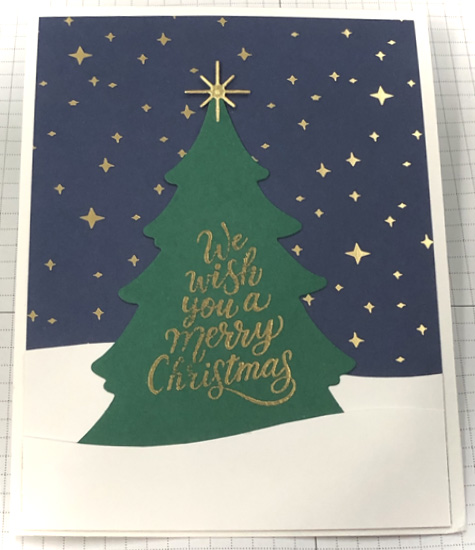
Easy Merriest Trees Christmas Card

Easy Merriest Trees Christmas Card

It’s a snap to make this easy Merriest Trees Christmas card! A total beginner stamper had no trouble making this card in class last week. We used the Merriest Trees bundle (162048) and a piece of beautiful Shining Brightly Specialty Designer Series Paper (162378). The greeting was heat embossed with gold embossing powder. Heat embossing is such a magical technique that still enchants me after at least 45 years.

Supplies Used for Easy Merriest Trees Christmas Card

  • Stamp Set – Merriest Trees
  • Paper including cutting measurements – Basic White Cardstock 11″ x 4 1/4″ scored and folded at 5 1/2″, 4″ x 2 1/2″; Shaded Spruce Cardstock 5″ x 3 3/4″; Shining Brightly Specialty Designer Series Paper – Night of Navy with stars 5 1/4″ x 4″; Gold Foil Sheet scrap
  • Ink – Versamark
  • Accessories – Merriest Trees Dies, Adhesive Sheets, Paper Trimmer, Paper Snips, Stampin’ Seal, Stampin’ Cut & Emboss Machine
  • Click here to be taken to a shopping cart in my online store with all these supplies already pulled for you. You can delete any you might already have.

Directions

  1. Use Stampin’ Seal to apply the designer series paper to the folded Basic White card base.
  2. Rub the Shaded Spruce cardstock with the embossing buddy and stamp the greeting with versamark. Apply gold embossing powder, tap off excess and heat emboss.
  3. Cut the greeting out with the largest tree die.
  4. Use the paper snips to cut the 2 1/2″ x 4″ Basic White cardstock approximately in half with a snowdrift type curve. Turn one piece around so they overlap.
  5. Use seal to stick the back layer to the card front.
  6. Adhere the front layer with seal only on the sides and bottom of the piece. The top should be not sticky.
  7. Apply a little seal on the back of the tree and then slip it between the Basic White layers.
  8. Cover the back of the gold foil sheet scrap with adhesive sheet and cut one of the stars from it. Put it on the top of the tree.

Watch my Facebook Live video here

.

Beautiful Quilted Card

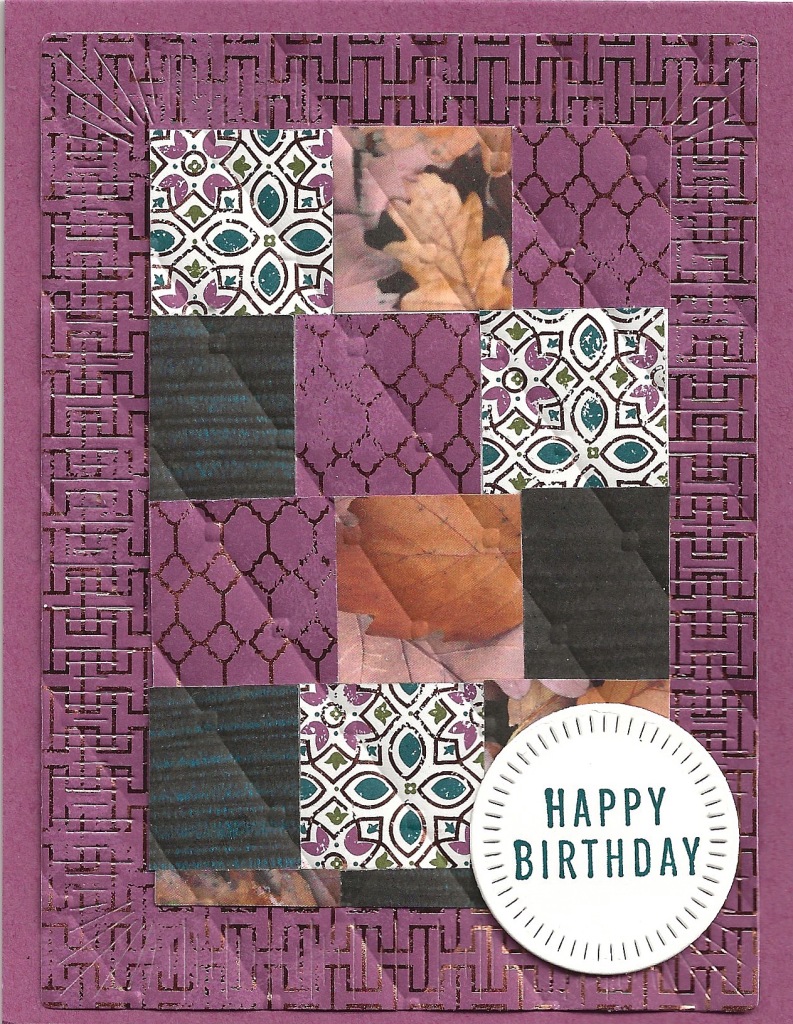
photo is of a beautiful quilted card using the gorgeous ll About Autumn Specialty Designer Series Paper

This beautiful quilted card is so easy to make! I love the new All About Autumn Specialty Designer Series Paper (162178) with it’s so many beautiful designs. One side of the paper is a print and the reverse side is copper embossed patterns. I cut 1″ x 6″ strips of a couple designs into 1″ squares. You could do this with a 1″ square punch if you have one but it might take more time. Then I glued them down alternating sides and patterns on a piece of Basic White cardstock and trimmed the cardstock to 2 3/4″ x 4 1/4″.

The next step was to adhere this layer to a piece of 5 1/4″ x 4″ designer series paper that had been die-cut with the large rectangle Radiating Stitches Dies. Embossing the piece with an embossing folder and the Stampin’ Cut & Emboss Machine simulates the quilting stitches. I used the retired Tufted embossing folder but other ones that don’t have a high degree of detail would work.

The final step was to adhere this focal piece to the Moody Mauve cardstock base. I stamped a greeting from Translucent Florals stamp set on Basic White cardstock with Pretty Peacock ink and die-cut it with the circle from Radiating Stitches Dies. This was adhered to the card front with a Stampin’ Dimensional.

Supplies Used for the Beautiful Quilted Card

  • Stamp set – Translucent Florals
  • Ink – Pretty Peacock Classic Stampin’ Pad
  • Paper – Moody Mauve Cardstock 8 1/2″ x 5 1/2″
    Basic White Cardstock scrap and 5″ x 3″
    All About Autumn Specialty Designer Series Paper 1 piece 5 1/4″ x 4″, strip of two or three different patterns 6″ x 1″
  • Embossing folder of choice – I used the retired Tufted embossing folder
  • Adhesives of choice – I used Multipurpose Liquid Glue and Stampin’ Seal
  • Stampin’ Cut & Emboss Machine
  • For your convenience, I have these items in a shopping cart in my online store. You can delete any item you already have.

September Gift with Purchase

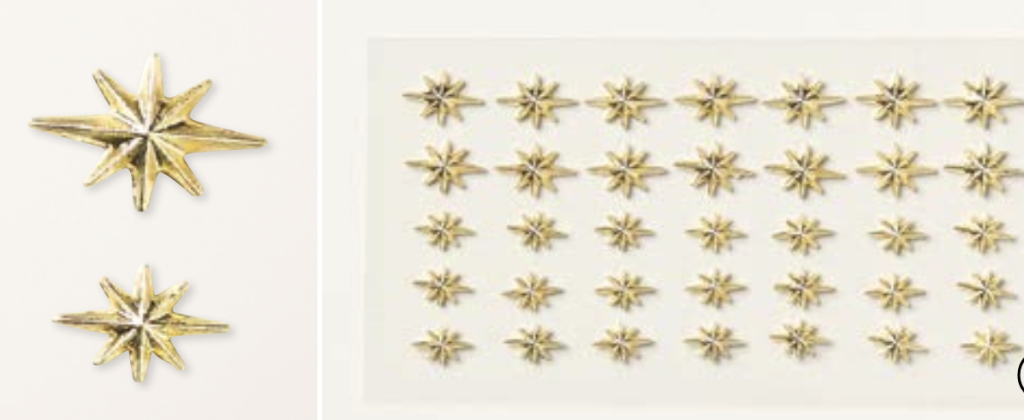
I truly appreciate my customers and thank them when they purchase $75 or more with a free gift. This month is the great Adhesive- backed star trinkets found in the new Sept-Dec mini catalog which goes active on Wednesday. If you live in the United States and don’t already have a demonstrator, I’d love to be yours. Email me with your name, mailing address and phone number and I’ll send you a free catalog.