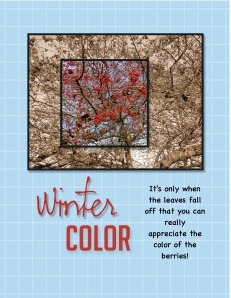
 Yesterday I shared this digital scrapbook page with you and promised to share the technique with you today. As I said yesterday, I started out playing with the photo spread across 5 smaller squares. The photo was all in color. Then I decided to see what it would look like if I ungrouped the squares and made all but one of them sepia toned. That was sort of cool and that brought to mind the spotlight technique in traditional stamping. So I started over with a blank page.
I added the large photo box and then added the smaller one. I added a drop shadow and black mat to both photo boxes. I positioned the smaller box over the larger one and then grouped them. You have to have the positioning the way you want it because once you add the photo, the content of each box stays the same no matter where you move the photo box.
Next I dragged the photo onto the grouped photo boxes. Then I ungrouped them, selected the larger box and clicked on the photo effect button in the DESIGN CENTER under photos. This opens a variety of things you can do with your photo. I chose ‘sepia’.
And there you have it…a perfect spotlight done digitally!
I didn’t have the word ‘color’ by itself in my MDS library so I used the ‘color me creative’ stamp from the Color Me Creative Kit we received at convention the year MDS 2 was released. I used the crop tool to crop out all but the word ‘color’. I used the color picker feature to color both words of the title with one of the colors in the berries in the photo.
So my challenge to you now is…go forth and try creating a spotlight on your card or scrapbook page. Again…send me a photo of your creation. I just might share it on my blog!
Supplies:
MDS software digital download (130646), MDS software disc (130647), or 30-day Free Trial of MDS (130910)
Stamps
Color Me Creative Designer Kit– color me creative (cropped)
Punches
Holiday Celebration Punches (131309) – winter
Photos
Designer Series Paper/Grid/Bashful Blue Grid (118858) also comes with MDS software
