Category Archives: 3-D projects

Nests of Winter Diamond Box

Nests of Winter Diamond Box

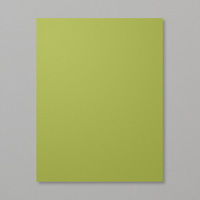
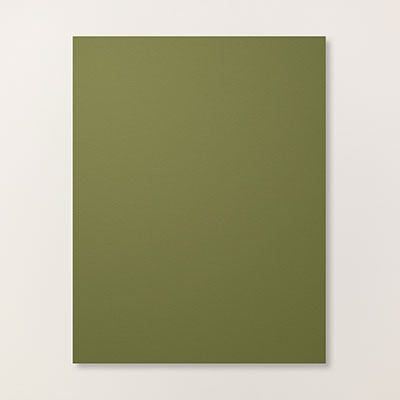
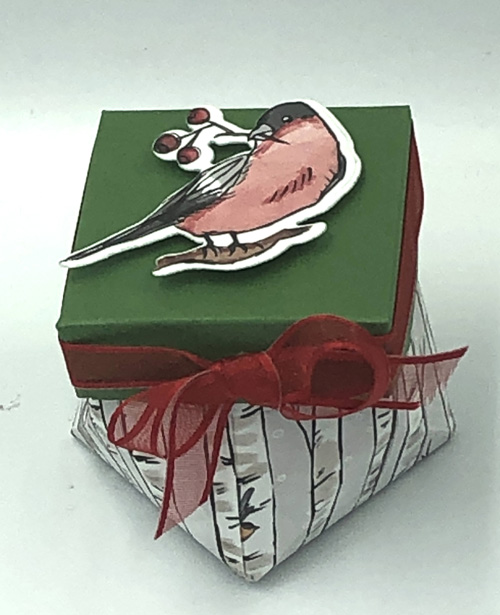
I love making little boxes and this Nests of Winter Diamond Box is one of the cutest boxes I have made. It measures about 2 3/4″ square by 2″ high and is the perfect size to hold a lovely big piece of chocolate. I made it using the beautiful Nests of Winter Designer Series Paper which is in the September – December mini catalog available September 3. i made the lid from Garden Green Cardstock. Unfortunatel, I can’t show you a picture of this dsp yet because I have cut up several of the pieces already.

Also included in the Nests of Winter Suite is the Winterly Tree Tops bundle. I love how the dies have a die for cutting out two different birds that are part of the stamp set but also cut out the birds of one of the designs in the dsp. Stampin’ Up! is offering more and more of this coordination so that if you are in a hurry or don’t like coloring, you can still use the images inyour creations. That is how I got the bird on the lid of the box.

Supplies

  • Nests of Winter Designer Series Paper – 8 1/2″ x 3 3/4″ plus scrap that has the large bird – available Sept 3. To make this box now use any other designer series paper or cardstock.
  • Garden Green Cardstock – 3 1/2″ x 3 1/2″
  • Basic White Cardstock – scrap to reinforce the die-cut bird
  • Multipurpose Liquid Glue
  • Tear & Tape
  • Mini Glue Dots
  • Stampin’ Dimensionals
  • Paper Snips
  • Paper Trimmer
  • Winterly Tree Tops Dies
  • Stampin’ Cut & Emboss Machine or the mini one

Template for Nests of Winter Diamond Box
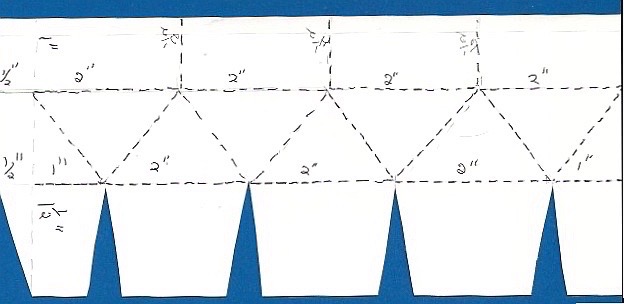
Template for Diamond Box

Once you have all the materials ready, craft along with me. You can pause the video when you need to catch up.

Here is another example of the diamond box created with Country Woods Designer Series Paper and Country Birdhouse Bundle. Enjoy!
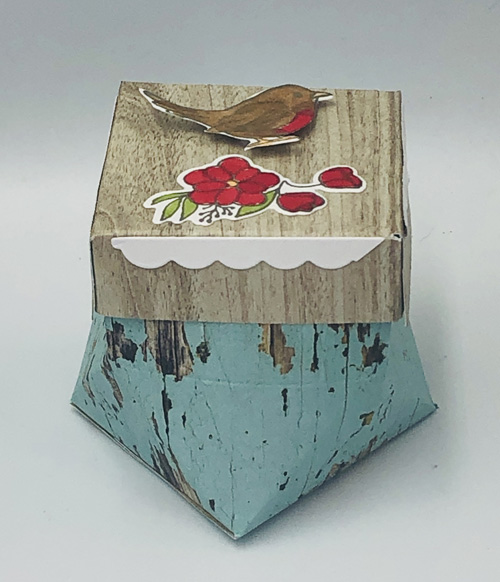
Diamond box created with Country Woods Designer Series Paper.

Since you have only today and tomorrow to earn $5 coupons to be used in August, why don’t you order this Country Woods Designer Series Paper (163393) and the Country Birdhouse Bundle (163401) right now to make this cute diamond box.

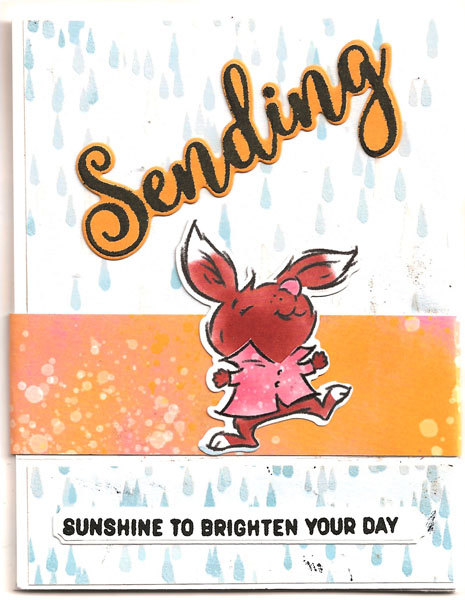
Playing in the Rain Box Frame Card

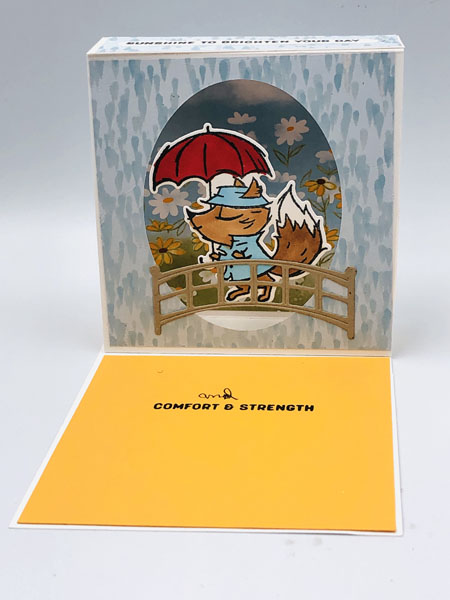
This Playing in the Rain Box Frame card is sure to cheer up anyone who sees it. I love it! As you might know, I love fancy folds and this card is an easy one to make. I got the dimensions for this box frame card from another demonstrator’s video. Thanks to whomever that was. I forget.

The outside of this card is cute enough but just look at the magic inside!

Open view of Playing in the Rain Box Frame Card

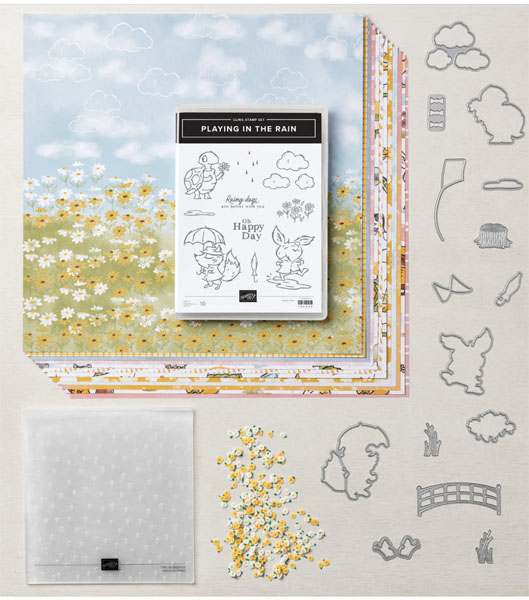
I created this Playing in the Rain box frame card for a friend’s brother who is battling stage 4 melanoma cancer. I hope it cheers him up and encourages him. The images for this card come from the Playing in the Rain Suite of products. They are so cute and uplifting!

photo shows the elements in the Playing in the Rain Suite used for the Playing in the Rain box frame card

Supplies Used for Playing in the Rain Box Frame Card

  • Playing in the Rain Bundle (160551)
  • Sending Smiles Bundle (158707)
  • Memento Ink Pad
  • Basic White Cardstock (159275) 11″ x 4 1/4″ scored at 1 1/4″ and 5 1/2″, 6 1/8″ x 4 1/4″ scored at 1 1/8″ on each end, scraps for stamping fox with umbrella and greeting
  • Mango Melody Cardstock (146989) 4 1/8″ x 4 1/8″, scrap for sunshine word
  • Soft Suede Cardstock (115318) scrap for bridge
  • Rain or Shine Specialty Paper (160540) Card front – Light raindrop pattern 4 1/8″ x 4 1/8″, inside back behind frame – grass with daisies pattern x4 1/8″ x 4 1/8″, inside front of frame – light raindrops pattern 4 1/8″ x 4 1/8″, splashed pink/yellow design 12″ x 1 1/2″ for belly band
  • Stampin’ Seal (152813) or Multipurpose Liquid Glue (110755)
  • Paper Trimmer (152392)
  • Stampin’ Cut & Emboss Machine (149653) or Mini Stampin’ Cut & Emboss Machine )(150673
  • Click here to be taken to a shopping cart in my online store where these supplies are all ready for you to purchase. You can delete any you already have.

Once you have collected your supplies, watch this video and stamp along with me. If you like this project, please leave a message in the comments. The Mango Melody and Soft Suede cardstock is retiring as well as the Rain or Shine Specialty Paper. They are on the Last Chance List so order them now before they sell out. The Playing in the Rain stamp set and dies are in the new 2023-2024 Annual Catalog but not as a bundle. Purchase them now as a bundle and save 10%

Beautiful Fancy Flora Fancy Fold Card

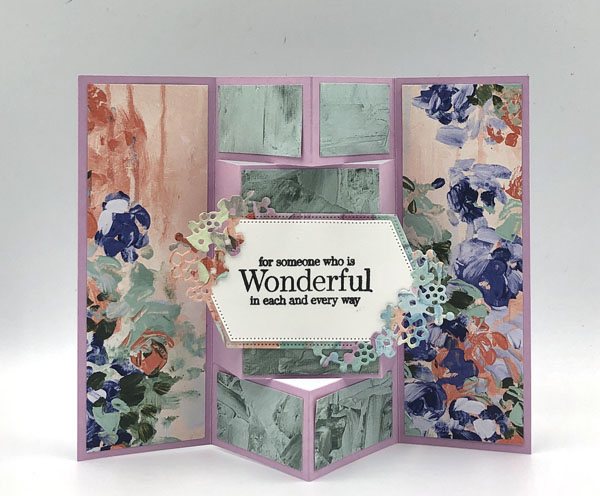
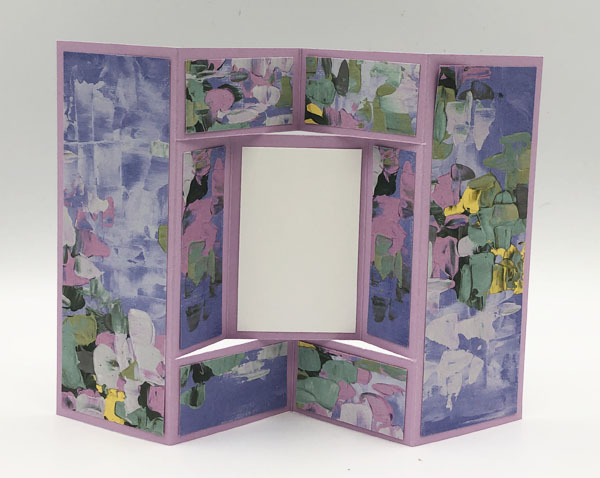
photo is of the beautiful Fancy Flora Fancy Fold card

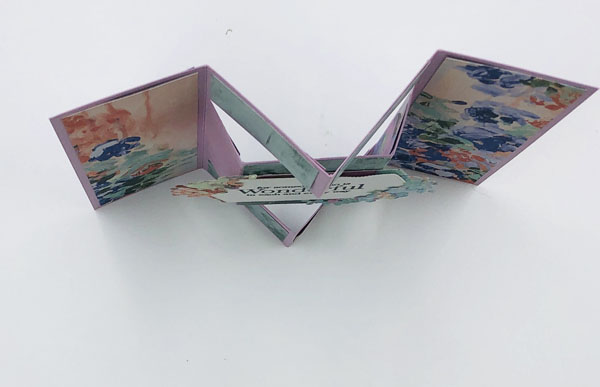
This beautiful Fancy Flora fancy fold card was a cinch to make and turned out so wonderfully! Three scored lines and two cutting lines are all it takes for create the card base. Then adding pieces of the Fancy Flora designer series paper (160413) to decorate it creates the beauty. The focal point is a beautiful die-cut label using the Sentimental Park dies (160566). Unfortunately, the greeting is unavailable as it is from the retired 2022 SAB set Special Moments. You can easily substitute a greeting from the Sentimental; Park stamp set (160561) or any other greeting set that fits on the label. Here is a vertical view of the card and the back side. The white area is for handwriting a message and signing the card.

This is the top view of the Beautiful Fancy Flora Fancy Fold card
Back view of the beautiful Fancy Flora Fancy Fold card

Supplies Used for Beautiful Fancy Flora Fancy Fold Card

  • Sentimental Park Dies (160566) or Sentimental Park Bundle (160567)
  • Fancy Flora 6″ x 6″ designer series paper (160413) 4 at 5 3/8″ x 1 7/8″, 8 at 1 1 7/8″ x 1 1/8″, 2 at 2 7/8″ x 7/8″, 1 at 2 7/8″ x 1 7/8″, 4 1/4″ x 2 3/4″ for die-cutting fancy label
  • Basic White Cardstock (159276) 2 7/8″ x 1 7/8″, 3 1/4″ x 2″ for label
  • Fresh Freesia Cardstock (155613) 8″ x 5 1/2″
  • Tuxedo Black Memento Ink
  • Paper Trimmer
  • mini Stampin’ Cut & Emboss Machine
  • A shopping cart in my online store with these products is here for your convenience. You can remove anything you already have from the cart before placing your order.

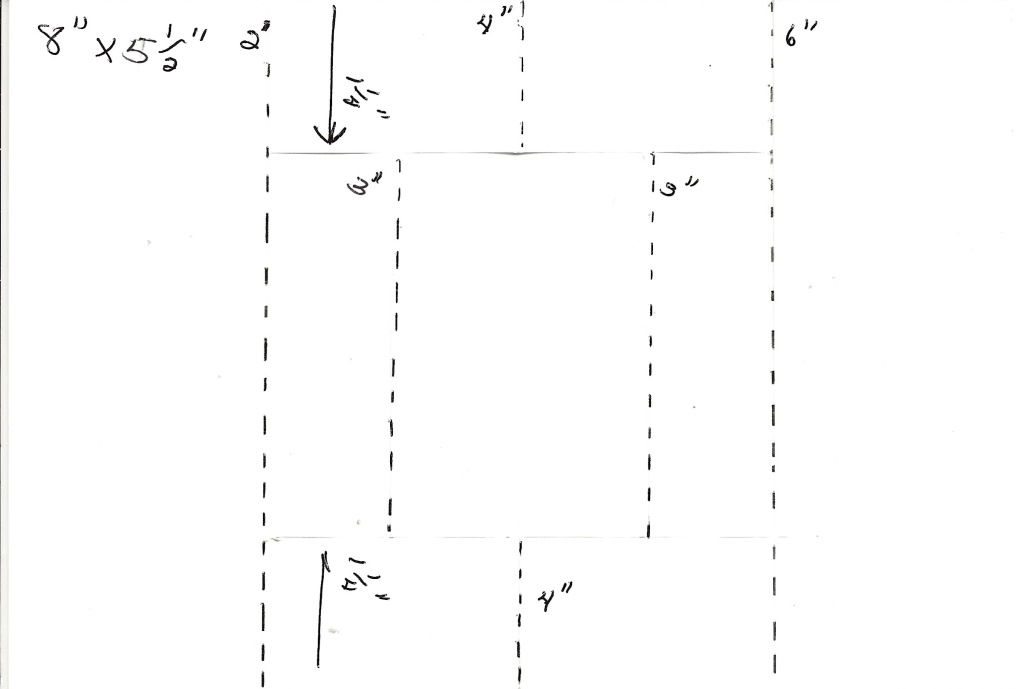
Template

Template for the beautiful Fancy Flora Fancy Fold card

Once you have the needed supplies, you can follow along with me in this video of my Friday Facebook Live as I show how to put this beautiful Fancy Flora Fancy Fold card together.

Poinsettia Bay Window Fancy Fold

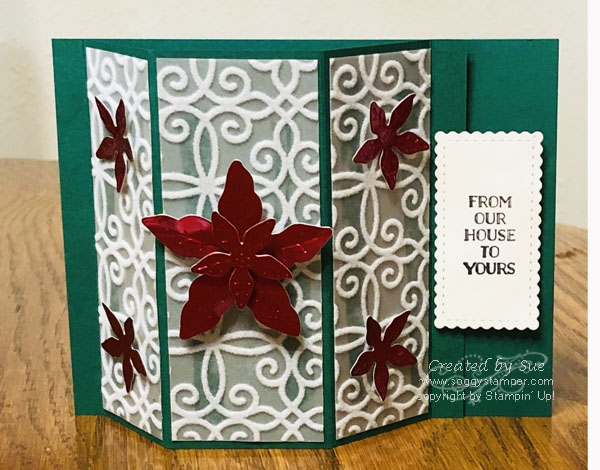
photo is of Poinsettia Bay Window Fancy Fold card created with the Bay Window Fancy Fold technique and Plush Poinsettia specialty paper

I love this beautiful Poinsettia Bay Window Fancy Fold! If you have been reading my blogs, you have discovered that I love fancy folds. This fold is a really easy one that you will like to make.

I used the Plush Poinsettia Specialty Paper (153486) on the bay window part as it looks like lace curtains to me. It is one of the products in the Poinsettia Place Suite (155109). Another product is the Poinsettia dies (153522) which I used to cut out and emboss the flowers from Red Foils Sheets (153510). The greeting is from the Peaceful Boughs stamp set (150541) found in the 2020-2021 Annual catalog.

Supplies Used for Poinsettia Bay Window Fancy Fold:

  • Shaded Spruce cardstock – 4 1/4″ x 11″ scored parallel to the short side at 3/8″, 1-7/8″, 3-5/8″, 5-1/8″, and 5-1/2″
  • Whisper White cardstock – scrap for greeting, 4″ X 3-3/8″ for inside
  • Plush Poinsettia Specialty Paper – 2 pieces 4-1/8″ x 1-3/8″, 4-1/8″ x 1-5/8″
  • Red Foil Sheet – scraps for poinsettias
  • Poinsettia Dies – smallest and next smallest flowers
  • Tear & Tape, Stampin’ Seal

Learn how to make this card by joining me on my Facebook Live tomorrow at 3 pm Pacific time. You’ll find me on the Soggy Stamper Facebook page. I’ll be demonstrating this technique and a second sample using other supplies. After I’m through with the live presentation, you can watch the video on the Soggy Stamper YouTube channel. While you are at my channel, click the subscribe button to receive notification when a new video is uploaded. I’d love to have you leave a comment here on this post and on the video when you watch it so I know you have been visiting.

Grace’s Garden Handmade Card

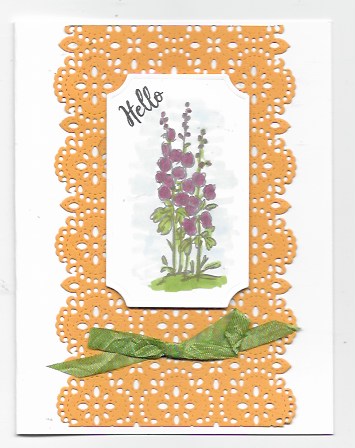
Photo shares Grace's Garden Handmade card created with Grace's Garden stamp set and Stitched Lace die

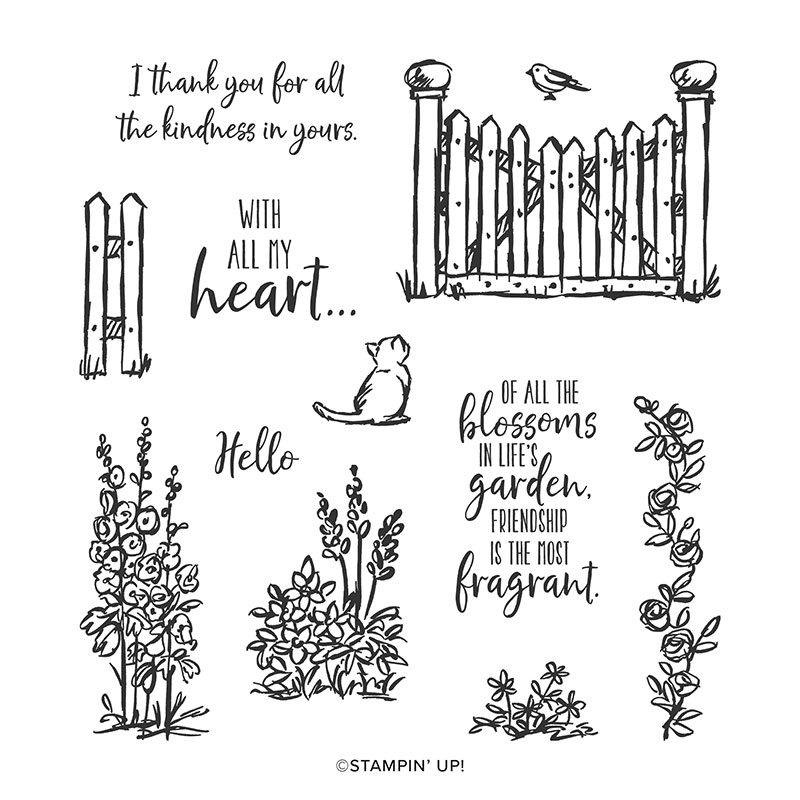
I love this Grace’s Garden Handmade card! Grace’s Garden stamp set (151513) is the first set to catch my eye in the new spring mini catalog. I love flowers in my garden and this set has flowers galore and a lovely garden gate. Check out the stamp set.

photo shows index of Grace's Garden stamp set

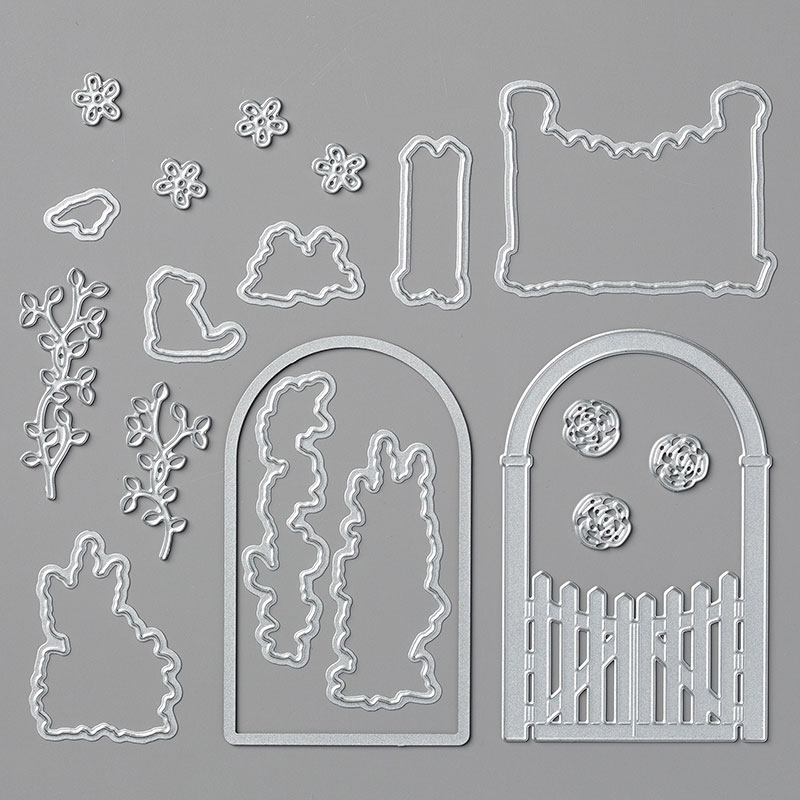
What is even better is that it comes bundled with Garden Gateway Dies (151512), Grace’s Garden Bundle (153789) for a 10% discount! Having the coordinating dies eliminates fussy cutting the flowers and gate. Note: the arched gate die is larger than the stamped gate. I have made it work by die-cutting the gate and the arch separately, cutting the gate in half and cutting the gate off the arch as shown in my second card.

photo shows picture of the Garden Gateway dies

To make Grace’s Garden Card I first folded a 8 1/2″ x 5 1/2″ piece of Whisper White cardstock to make the card base. Then I cut a 5 1/2″ x 4 1/4″ piece of Crushed Curry cardstock with the Stitched Lace dies (149625) and a die-cutting machine. I used the single edge die to make the scallops along the sides. I stamped the image with Gray Granite ink on Whisper White cardstock and colored the flowers with Light Lovely Lipstick and Light Granny Apple blends. I shaded the background with the Light Sea Side Spray blend. Then I cut the image out with one of the Painted Labels dies and mounted all this on the card front.

Now the ribbon I used on this Grace’s Garden Handmade card is tricky. I wanted a Granny Apple Green ribbon but the one in the catalog was wider than I wanted. So I took the Dark Granny Apple Green Stampin’ Blend and colored the Whisper White 1/4″ Crinkled Seam Binding Ribbon (151326). I love the softness and width of this ribbon and the fact that you can color it any color you wish with our Stampin’ Blends. You’d better stock up on this ribbon that will only be available in the spring mini catalog!

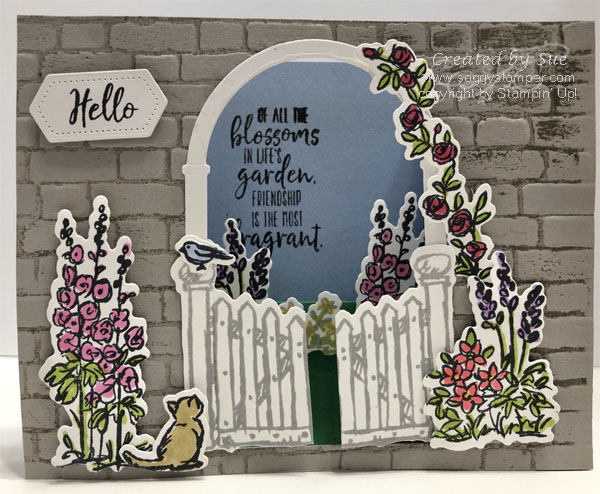
Diorama card created with Grace's Garden Bundle

I also created this beautiful diorama card using the Grace’s Garden Bundle. If you would like a picture tutorial of this card, contact me and I’ll be happy to send you one. The cost of the tutorial is $5.

Hand-stamped Wedding Candle

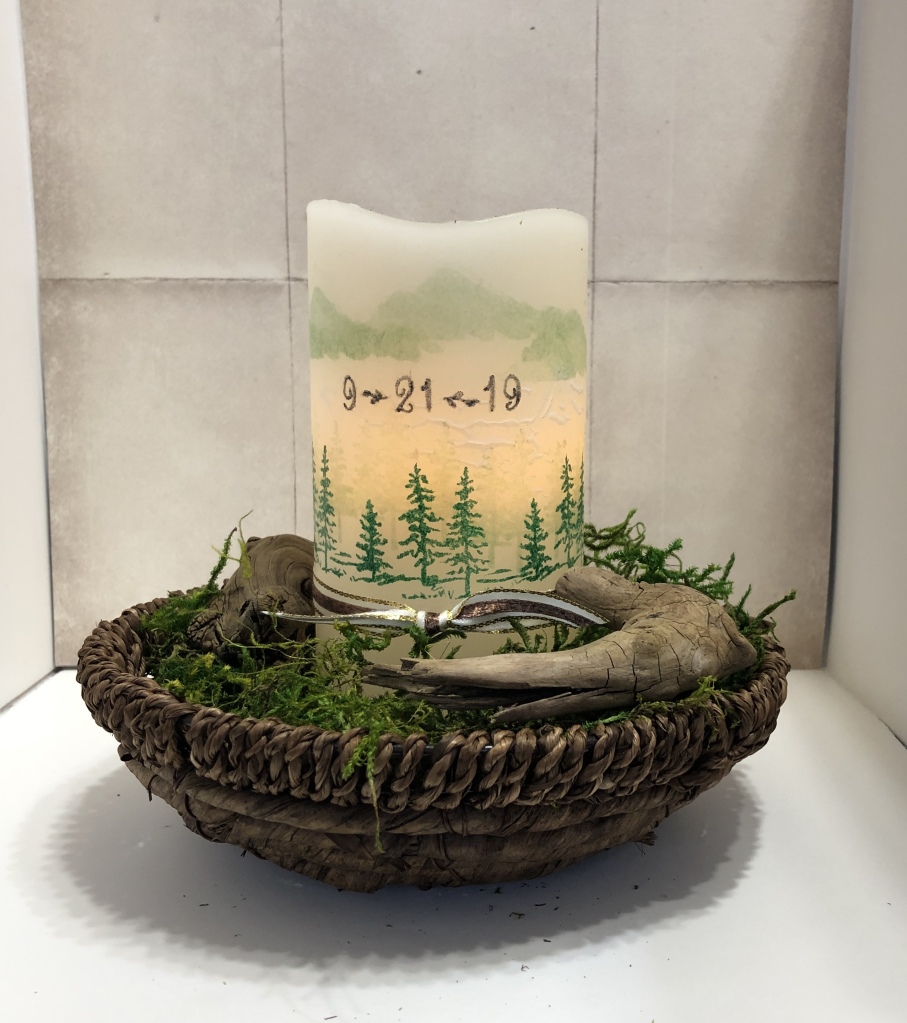
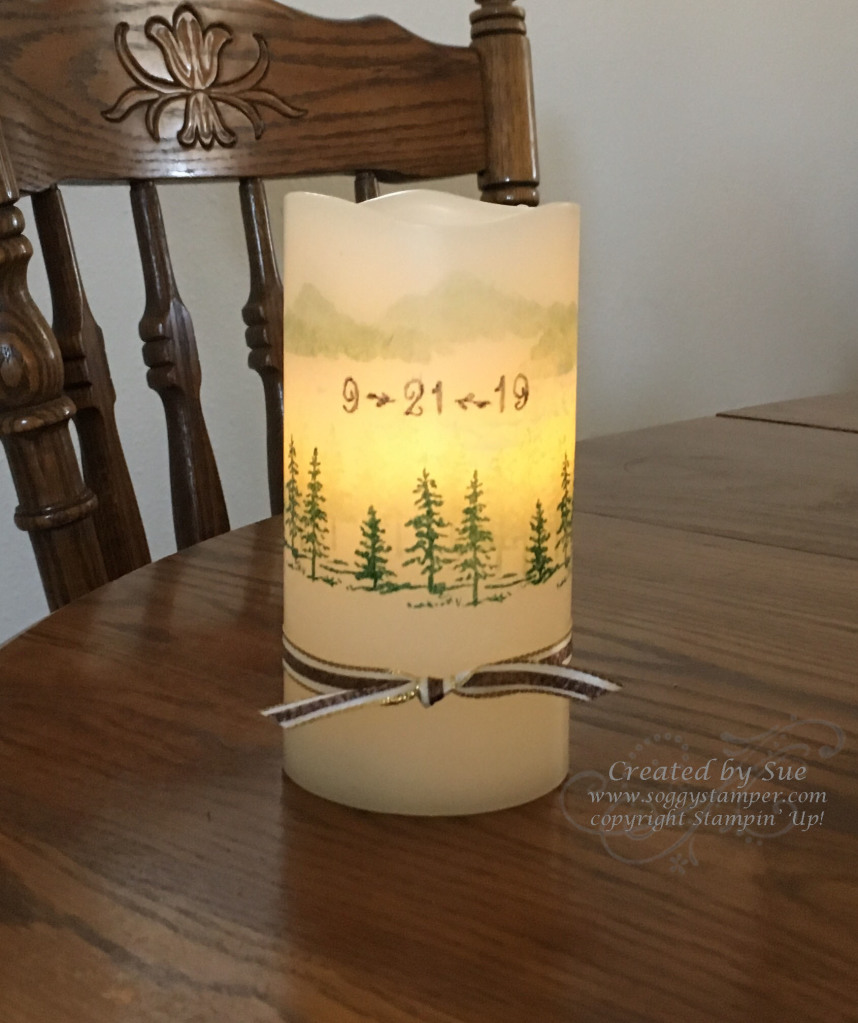
The  finished hand-stamped Wedding Candle

Check out this Hand-stamped Wedding Candle! I posted about this wedding candle, complete with direction for stamping on candles, the end of July in this post. At that time I had not embellished it with a tray and other accessories. Now I have finished it and am sharing the finished product with you.

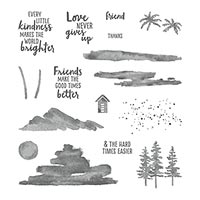
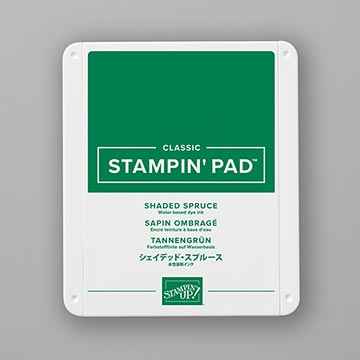
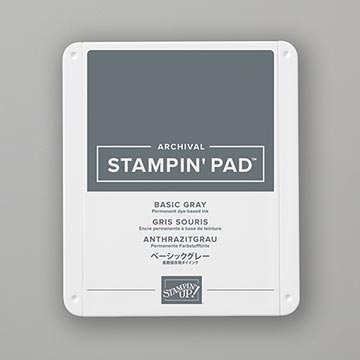
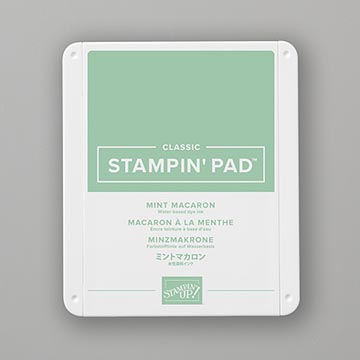
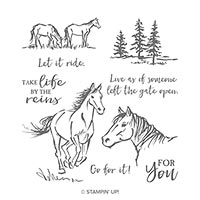
The Waterfront (146386) and Let It Ride (148765) stamp sets were used to create the scene on this hand-stamped wedding candle. I stamped the images on tissue paper using Shaded Spruce (147088) and Mint Macaron (147106) inks. By stamping the mountains and some of the trees in the lighter green ink, they seem to recede into a mist. I stamped the wedding date with numbers from the Make a Difference stamp set (146676) using Basic Gray ink (149165). Once I sealed the tissue paper into the candle wax, the date was barely visible. To fix this, I enhanced the numbers with the Dark Basic Black Stampin’ Blend marker (147941). I highly recommend using Jet Black Stazon (101406) or Tuxedo Black Memento (132708) ink to do the stamping in the first place!

Since the wedding couple are foresters on Prince of Wales Island in SE Alaska, I set the candle in a woven basket with preserved moss and a few pieces of driftwood from that island. I’m so happy with the way the whole thing came out!

If you haven’t tried stamping on candles yet, refer back to my previous post and give it a try. You will find it is so easy to create beautiful candles with the technique. Be sure to use real wax candles. Then send me a picture of your creation. I’ll be happy to share it in a blog post. To recreate this exact hand-stamped wedding candle, click on the links above to find the items in my online store.

Candle Stamping – My Favorite Technique

Photo of a handstamped candle

Candle Stamping is my favorite technique! I get such satisfaction from making gifts like this. This particular one is a wedding candle for the daughter of our good friends in Alaska. The bride and groom work for the Forest Service so this candle with the mountains and pine trees is most appropriate. I even stamped their wedding date on the candle.

Here are the directions for the candle stamping technique.

SUPPLIES:

White tissue paper or tissue paper the color of your candle
Wax candle -Be sure they are wax candles. They can be ones you light or flameless. I got this flameless vanilla scented real wax candle at Walmart in a package of four for $19.99.
Strip of wax paper long enough to wrap around the candle plus extra for you to hang on to
stamps and ink as desired – I used the Let It Ride and Waterfront stamp sets with Basic Gray, Shaded Spruce, and Mint Macaron inks. I applied SNAIL adhesive to one side of Copper Trim, then stuck it to the Gold Metallic-edge Ribbon.
heat tool

INSTRUCTIONS:

1. Stamp desired images on tissue paper. I have found that line drawings work better than solid ones. The solid ones have so much ink that it wrinkles the tissue paper.
2. Carefully tear around the images leaving as little border around them as possible.
3. Position the images on the side of the candle and then wrap the wax paper around the candle covering the tissue paper. Pull the wax paper tight.
4. Use the heat tool to melt the wax on the paper and on the candle just until the tissue paper is soaked with wax. Melting the wax too much will make an uneven surface to the candle.
5. Remove the wax paper and finish the candle as desired

So that is how easy it is to do my favorite technique – stamping on candles. Click on the images below to find them in my online store.

Jar of Love Shaker Card

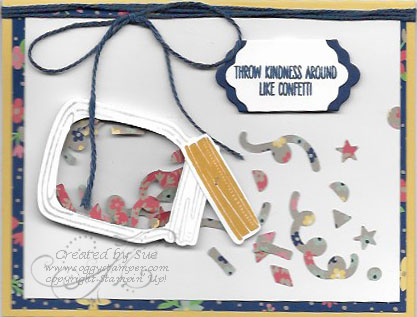
Jar of Love Shaker Card

When the new 2016-2017 Annual Catalog first arrived, I did not think I would buy the Jar of Love/Everyday Jars Thinlits bundle. But my downline, Dina Merchant, helped me see the possibilities of this bundle. Thanks, Dina!

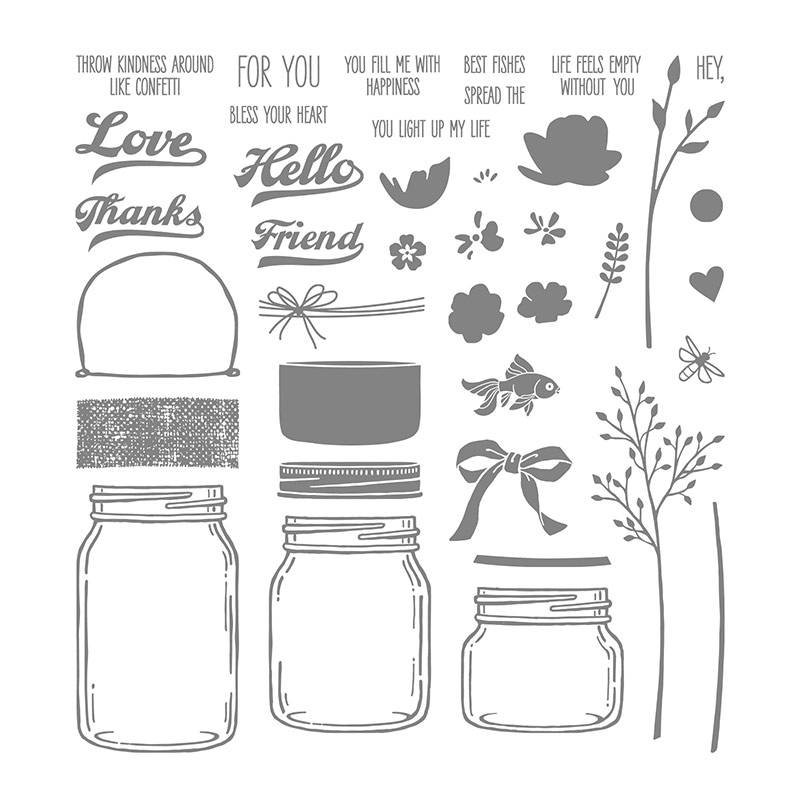
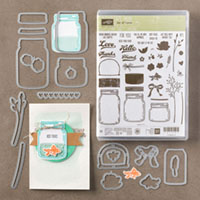
This bundle is perfect for shaker cards and the saying “Throw Kindness Around Like Confetti” inspired me to make this card. I had also purchased the Sprinkles punch at OnStage Live and was happy to use it finally. The Foam Adhesive Strips make shaker cardmaking a snap. Check out all the stamps you get with this Jar of Love stamp set:

Jar of Love stamp set

You can order the supplies I used to make this card by clicking on the images below. They are linked to the item number in my online store.

Have you received your copy of the new 2016-2017 Annual Catalog? If not, contact me! I’d love to have a conversation on how I can give you one totally free.

Easter Berry Basket

I finally ordered the Berry Basket Bigz L die (137366) because I had this great idea for an Easter decoration. The basket is small, 3 7/8″ square and 2 1/2″ high, but it is so stinkin’ cute. Here is my first sample.

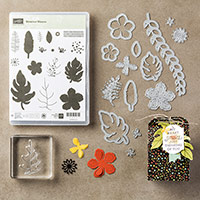
Berry Basket created with Botanical Garden Designer Series Paper and Botanical Builder Framelits Dies

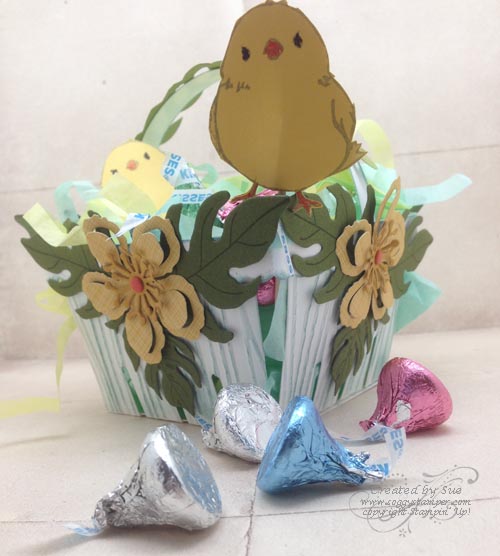
Cute? Yes! But I got another idea of using Thick Whisper White cardstock and embossing it with the woodgrain embossing folder. Since I used the thick cardstock, the basket is sturdier. Take a look.

White Easter Berry Basket with sponged woodgrain embossing

Now this really looks like Easter to me! I love the touch of Lost Lagoon ink I sponged on the raised portions of the basket.The first time I put this basket together, I put the Tear & Tape Adhesive on the strips that go around the top of the basket. Getting things lined up was a little tricky so the second time I put the Tear & Tape on the top edges of the basket part which worked much better.

I filled the basket with crumpled tissue paper and topped it with crumpled thin strips of tissue that I had cut with Stampin’ Up!’s retired Tabletop Paper Cutter.

Aren’t those chicks the cutest?! They are from the Sale-A-Bration freebies stamp set Honeycomb Happiness (wood – 141288, clear – 141291). I stamped 6 images using Smoky Slate ink and fussy cut just around the legs. Then I glued two images together matching the cut out legs together and put a toothpick between the layers. Then finished cutting out the chick. I used the Smoky Slate marker to add a suggestion of the wings and tail feathers on the back of the chick as well. I poked the toothpick through the crumpled tissue paper to make the chicks stand up in the basket.

You can still get this darling stamp set for FREE through the end of March. All you have to do is order $50 in product through my online store. Click on the images below to order the supplies I used for these baskets.

Terrific Tuesday!

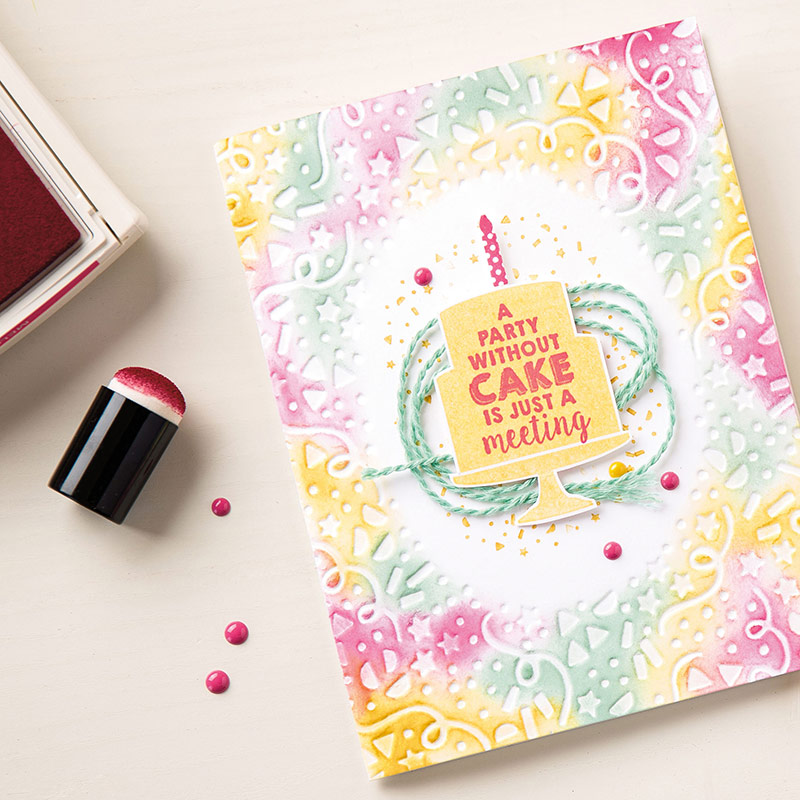
Terrific Tuesday is back! Why are Tuesdays terrific you ask? Because on Tuesdays, Stampin’ Up! releases the new Weekly Deals and this week they are really great! Check out this card created by one of the Stampin’ Up! creative artists:

Birthday card created with Party Punch Pack and Confetti Textured Impressions embossing Folder

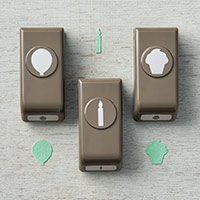
Notice the little candle on to top of the cake? It is punched out with one of the Party Punch Pack (140608) Punches. Do you love the background like I do? It is created by gently sponging ink on the raised portions of the embossing created with the Confetti Textured Impressions Embossing Folder (140592). The embossing folder has the center area smooth so you don’t have to do anything extra to have that smooth area for stamping. This card also uses the Party Wishes stamp set (wood-140651, clear-140961).

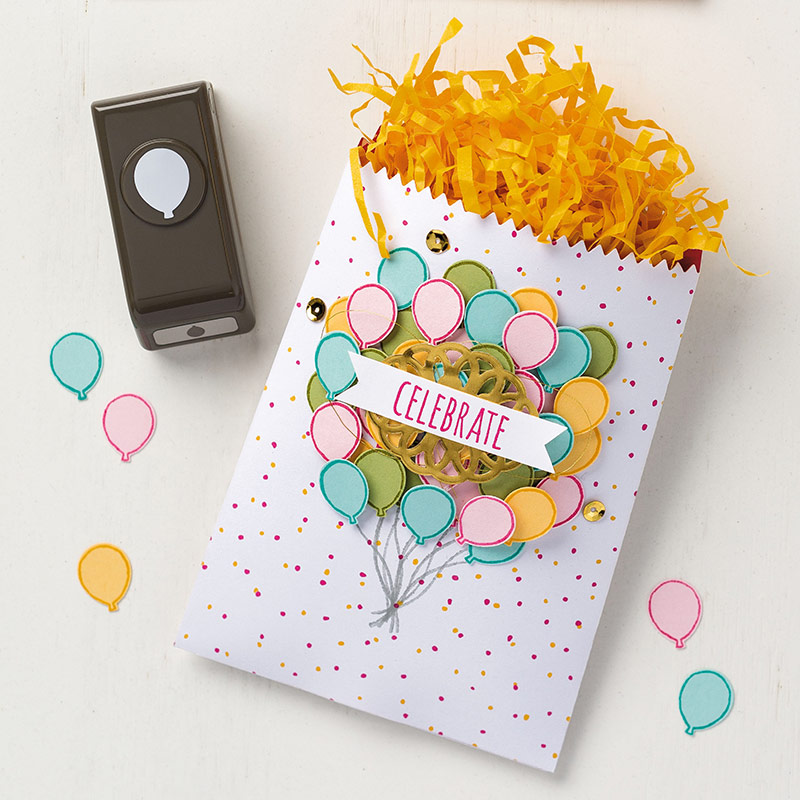
Here is another sample created by Stampin’ Up! artists using the little balloon punch:

Treat bag decorated with balloons punched by the Party Punch Pack

Now why do I bring these up when talking about savings? Well….the Party Punch Pack is one of the items that is in the Weekly Deals this week. Yes! An item that is in the new Occasions catalog on sale for 15% off! Check out all the new Weekly Deals below and click on the images to go order them in my online store.

Remember, this is Sale-A-Bration time and for each $50 you spend in product, you can choose one of the 11 FREE items in the Sale-A-Bration catalog. Also remember my Customer Appreciation Program. That same $50 will allow you to check one of the boxes on my tracking form. When you fill out all 8 boxes, you can choose $45 worth of supplies from me totally FREE. Check out the program and download your tracking form here.

Today Is Last Day for 15% Off Sale

15% off Stamps Header

Today is the last day for you to take advantage of Stampin’ Up!’s 15% Off Sale. Go straight to jail my online store do not pass Go! Remember to keep track of your purchases of $50 or more to earn $45 of product from me for FREE! Read more about this offer and download your tracking form here.


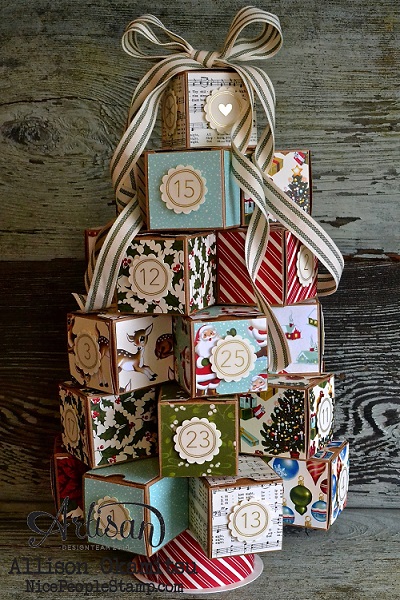
Advent tree created with tiny treat boxes

I still have a couple kits left for this darling advent tree. The price of $35 includes all you need to create the tree except for adhesive, scissors, and a paper cutter. Shipping is free. Order now and you will be all set for the beginning of December.


Advent Tree Class to Go

Advent tree created with tiny treat boxes

This adorable advent tree created from tiny treat boxes was posted on the Stampin’ Up! corporate blog yesterday. The creator is Allison Okamitzu, one of the 2014 – 2015 Artisan Design Team members.

I am offering a class by mail for this project. The kit will include one package of the tiny treat boxes, 1/2 package of the Home for Christmas Designer Series Paper, 1 Hello December 2015 Project Life Accessory Pack (for the date labels – you can use the rest of the package for cards), 2 yards of ribbon, and complete instructions. All you will need to make your tree is hot glue, adhesive, paper trimmer, and a ribbon spool for the base. The price of the kit is $35 which includes flat rate priority shipping.

The supplies will be quite popular now that the tree has been posted and has been shared on Facebook so contact me soon so I can order the supplies for your kit. After the middle of October, they may not be available. Email or call me to order a kit.

Need a longer Pillow Box?

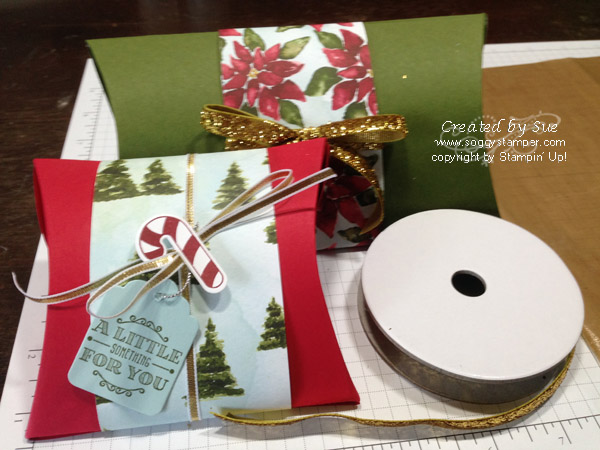
Christmas pillow bozes using Stampin' Up! Square Pillow Box Dies

My order containing the bundle of the A Little Something Stamp Set (w – 139827, c-139830) and Square Pillow Box Thinlits Dies (139657), bundle (w-140858, c-140859) arrived last night and I couldn’t wait to put my new toys…err…tools to use. I was amazed how quickly this gift wrap went together.

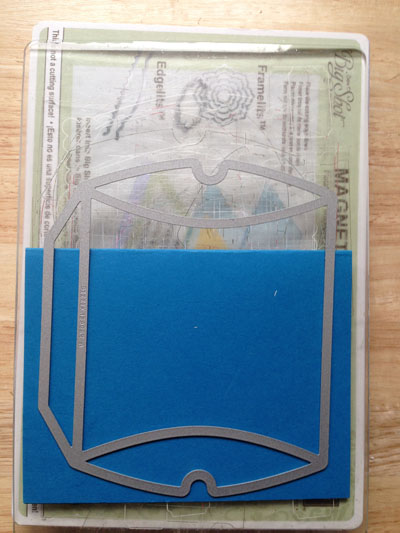
But…what if you need a longer pillow box? You can double the length of the box by folding a piece of cardstock in half (I used a 5 1/2″ x 8 1/2″ piece) and placing the die on it as shown below. Then cutting it out. You have to make two sides to the box so you repeat the process for the second side. Be careful to place the fold in the exact same place on the die so both halves are the same length. You might want to place a small piece of washi tape on the die marking where the fold should be placed. By placing the fold where I did, you double the length of the box. Placing the fold closer to the cutting end will give you a shorter box but still longer than the original one. I placed a belly band over the fold to conceal it and decorate the box.
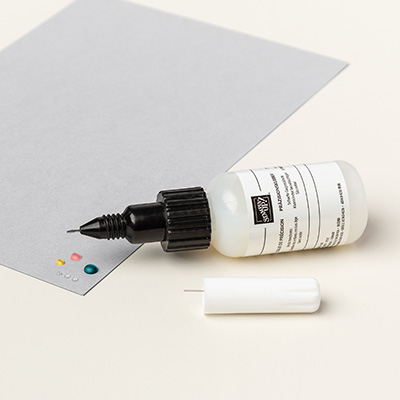
I initially put the box together using Tear & Tape Adhesive (a must when building boxes) on the side flaps of the box. However, since the flaps are tapered at the ends,  the seam does not have adhesive at the corners. Then I put the Tear & Tape on the edge of the box and found a part of the adhesive was not covered by the flap. To fix this problem, I just pounced my Embossing Buddy on the sticky part. The powder removed the stickiness and I had a nice seam even in the corners.
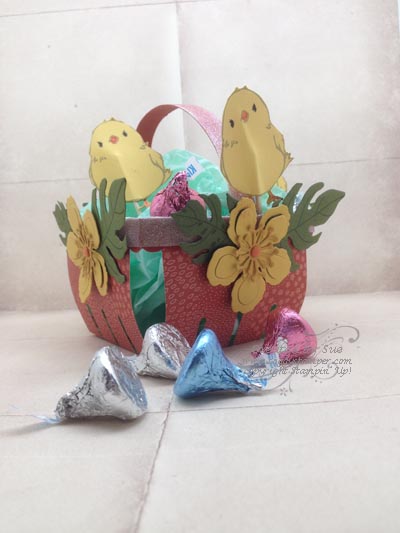
Photo showing position of folded cardstock and Square Pillow Box Thinlit Die

A tip we learned at convention is that the ends can be closed and reopened easily if you alternate which end tab is on top like in this photo.

End of Pillow Box demonstrating how to alternate the end tabs

This is definitely a go-to product when you want to quickly create a unique wrap for a small gift. Click on the image below for more details on the products I used and to order them in my online store.

Time to Get Serious

I’ll admit it…I have been really lax about posting on my blog for quite some time now but I a turning over a new page. I will spend more time sharing ideas and tips with you and less playing Secret Society on my i-pad. After all, you are much more important to me than a silly game!

When Stampin’ Up! discontinued releasing new downloads on Tuesdays, I was quite disappointed and Tuesdays became a little less terrific. However, they still give us new Weekly Deals on Tuesdays. I created this treat bag with several of this week’s deals.

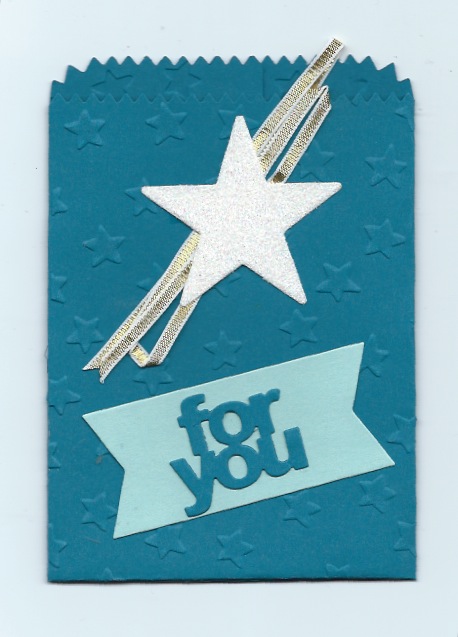
Treat Bag created with Dazzling Diamonds Glimmer paper, Island Indigo card stock and treat bag thinlits

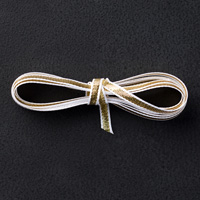
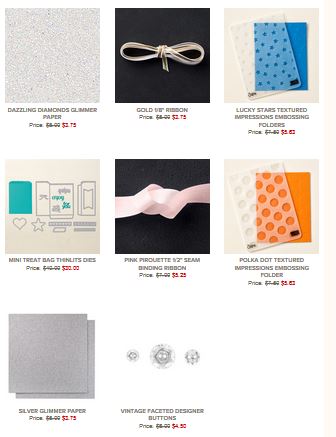
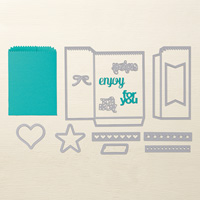
I love the Mini Treat Bag Thinlits. Not only can you use the treat bag to hold candy and cookies, it makes a really easy pocket card. You just cut a piece of cardstock to fit in the bag and stamp a greeting on it. The dies come with a variety of shapes in addition to the bag itself. The banner, ‘for you’, and the star are all part of the set. I like having texture on bigger expanses of cardstock so I used the Lucky Stars embossing folder on the front of the bag. The Dazzling Diamonds glimmer paper, the Lucky Stars embossing folder, the Mini Treat Bag Thinlits and the gold ribbon are all part of this week’s Weekly Deals. Click on the image below to go order them while they are 15% off. Next Tuesday will be too late to get in on the bargain.

Weekly Deals for week of 6-23-15

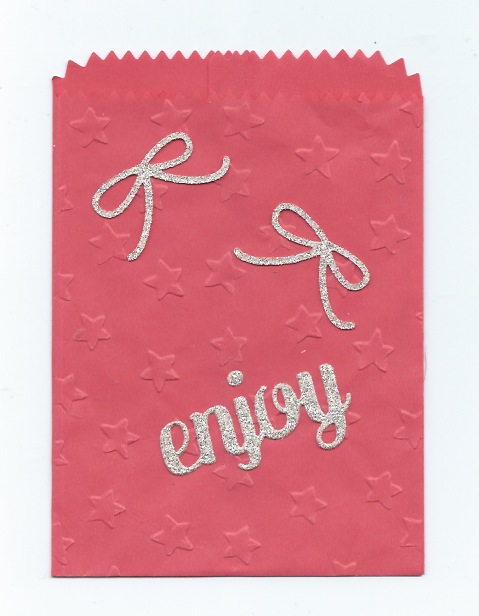
Stampin’ Up! has come out with a Cotton Paper Assortment. Cotton paper is thinner than cardstock and works beautifully when making flowers with the Bouquet Bigz L die. It also makes a great treat bag. I used the Watermelon Wonder color to make the treat bag below. It did wrinkle slightly as I used the Lucky Stars embossing folder with it but I liked the effect. It looks like it is almost quilted. I just love the little bows cut from the Dazzling Diamond glimmer paper. The bow die is also part of the treat bag thinlits set.

Treat bag made with Watermelon Wonder Cotton Paper, Lucky Stars embossing folder, Treat Bag Thinlets, and Dazzling Diamonds Thinlits

Have I convinced you yet that you ‘need’ the Mini Treat Bag Thinlits yet?

Valentine Treat Bag Redo

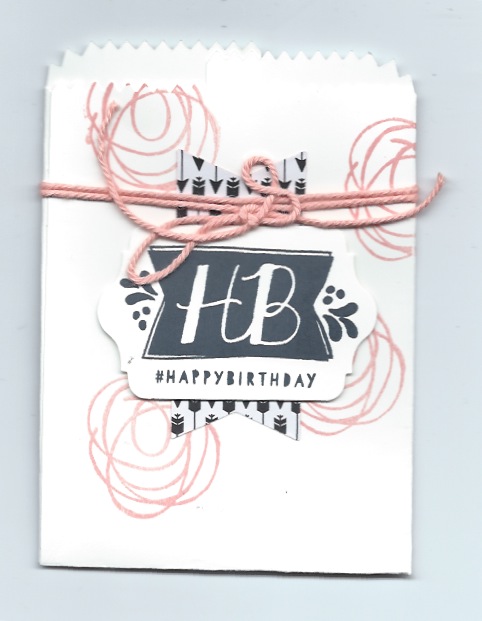
Mini Treat Bag with Balloon Bash stamp set

Sometimes we find leftover cards or 3-D items laying around on our stamping table just waiting to be repurposed. This treat bag started out as a Valentine one but didn’t send it. Tonight I sat down to make a Birthday card for a dear friend and saw this treat bag lying there.

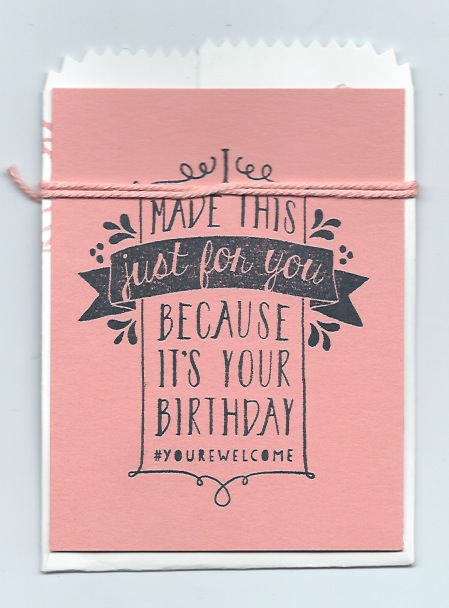
I had planned to turn it into a pocket card so I stamped the largest image from the Balloon Bash stamp set on a piece of Crisp Cantaloupe cardstock cut to fit in the treat bag. When I turned the treat bag over I discovered that I had written on the back of it. What to do? Well, I just glued the image on the back to cover the writing and will put some treats inside the bag instead of a card.

Back of Mini Treat Bag with Balloon Bash stamp set

I stamped the HB image on Whisper White cardstock and cut it out with one of the Chalk Talk Framelits. Then I put it over the black and white banner on the front with Stampin’ Dimensionals to cover some adhesive that was on the front. As usually happens, I love the redo better than the original plan!

The moral of this story is that covering up perceived flaws in our creations often leads to even better creations! If you would like to create this treat bag for yourself and need some of the supplies I used, just click on the images below to be taken to them in my online store.